Category Archive Manuals

Bycassandre

hampton bay ceiling fans manual

Welcome to the Hampton Bay Ceiling Fans Manual‚ your comprehensive guide to installing‚ operating‚ and maintaining your ceiling fan. This manual ensures safe and efficient use‚ covering installation‚ troubleshooting‚ and maintenance tips to enhance performance and longevity.

1.1 Overview of the Manual

The Hampton Bay Ceiling Fans Manual is designed to provide a detailed guide for the installation‚ operation‚ and maintenance of your ceiling fan. This manual is structured to ensure a smooth experience‚ offering step-by-step instructions and essential information to maximize the performance of your fan. It covers pre-installation checks‚ wiring‚ balancing blades‚ and troubleshooting common issues. Additionally‚ the manual includes safety guidelines to prevent accidents and tips for energy efficiency. Whether you’re installing a new fan or maintaining an existing one‚ this guide equips you with the knowledge needed to enjoy optimal functionality. Refer to the manual for specific instructions on pairing remotes‚ addressing recalls‚ and understanding warranty details. Hampton Bay is committed to quality‚ and this manual reflects that dedication‚ ensuring your ceiling fan operates safely and efficiently for years to come.

1.2 Importance of Reading the Manual

Reading the Hampton Bay Ceiling Fans Manual is crucial for ensuring the safe and efficient operation of your ceiling fan. The manual provides essential details about installation‚ wiring‚ and maintenance‚ which are vital for preventing accidents and property damage. By following the guidelines‚ you can avoid common issues such as blades falling off during operation‚ a problem noted in recent recalls. The manual also includes troubleshooting steps and energy efficiency tips‚ helping you maximize performance and longevity. Understanding the warranty information and customer support options ensures you’re prepared for any unforeseen issues. Proper installation and maintenance not only enhance safety but also contribute to energy savings. Taking the time to read and follow the manual guarantees a seamless experience with your Hampton Bay ceiling fan‚ protecting both your investment and your home.

1.3 What to Expect in the Manual

The Hampton Bay Ceiling Fans Manual is a detailed resource designed to guide you through every aspect of your ceiling fan’s setup and use. It includes step-by-step installation instructions‚ safety precautions‚ and troubleshooting tips to address common issues. The manual also provides insights into energy efficiency features and maintenance recommendations to prolong the fan’s lifespan. You’ll find specific guidance on wiring‚ balancing fan blades‚ and pairing remotes‚ as well as information on resolving problems like blades falling off during operation‚ as mentioned in recent recalls. Additionally‚ the manual outlines warranty details and customer support options‚ ensuring you have all the information needed for a seamless experience. By following the manual‚ you can ensure safe‚ efficient‚ and optimal performance of your Hampton Bay ceiling fan.

Installation Process

The installation process involves preparing tools‚ assembling parts‚ and following safety guidelines. Ensure power is off‚ then mount the fan securely‚ connect wires‚ and test operation before finalizing.

2.1 Pre-Installation Checks

Before installing your Hampton Bay ceiling fan‚ ensure the power is turned off at the circuit breaker. Verify the ceiling can support the fan’s weight and measure the space to ensure proper fit. Check all parts against the manual to confirm they are included and undamaged. Familiarize yourself with local electrical codes and regulations. Ensure the installation area is clear of furniture and obstructions. Gather necessary tools‚ such as a screwdriver‚ pliers‚ and a ladder. Double-check the manufacturer’s specifications for any additional requirements. Finally‚ review safety precautions to avoid accidents during installation. Proper preparation ensures a smooth and safe installation process.

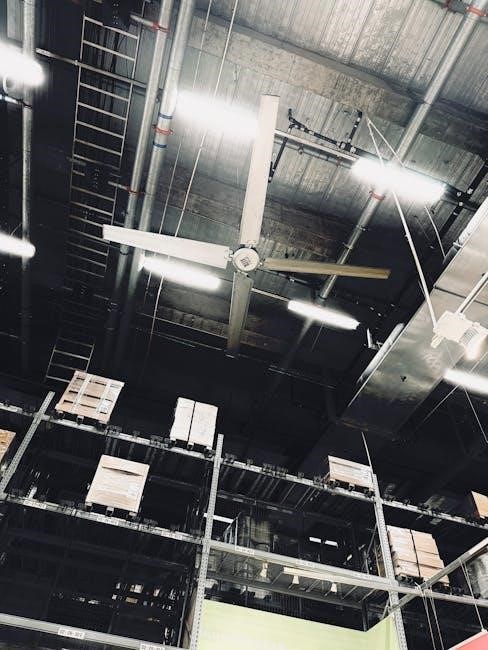
2.2 Mounting the Ceiling Fan

Mounting your Hampton Bay ceiling fan securely is essential for safe and efficient operation. Begin by installing the mounting bracket to the ceiling junction box‚ ensuring it is sturdy and can support the fan’s weight. Use the screws provided in the kit to attach the bracket firmly to the ceiling. Next‚ carefully lift the fan motor and align it with the mounting bracket‚ ensuring proper alignment. Secure the motor to the bracket using the provided screws. Tighten all connections to prevent wobbling. For blade installation‚ attach each blade to the motor housing using the screws provided‚ ensuring even spacing and alignment. Double-check that all screws are tightened properly to avoid imbalance. Refer to the manual for specific instructions tailored to your fan model‚ as some may have unique mounting features or requirements.

2.3 Wiring the Fan and Light Kit

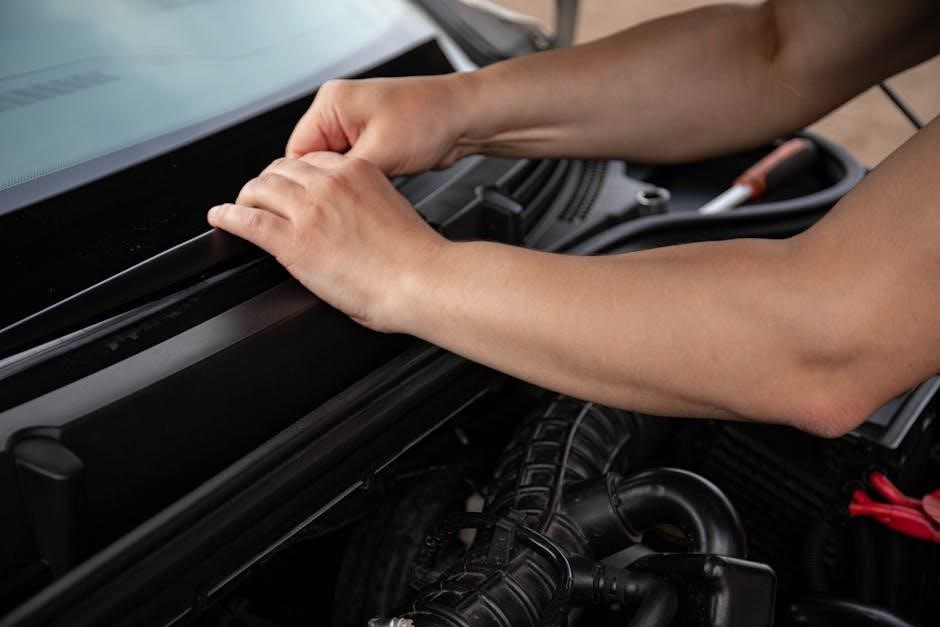
Wiring your Hampton Bay ceiling fan and light kit requires careful attention to ensure proper function and safety. Begin by turning off the power to the circuit at the breaker box. Identify the wires: the black wire is typically the live wire‚ the white is neutral‚ and the copper is the ground. Use a voltage tester to confirm there’s no electricity flowing. Connect the black wire from the fan to the black wire in the ceiling‚ and the white wire to the white wire. Secure the ground wire to the copper wire in the ceiling for proper grounding. For the light kit‚ connect the blue wire (if present) to the corresponding wire in the fan or ceiling. Ensure all connections are secure with wire nuts to prevent loose connections. After wiring‚ test the fan and light to ensure they work correctly. If issues arise‚ double-check your connections or consult the manual for guidance. Safety is paramount‚ so consider seeking help if unsure.

2.4 Balancing the Fan Blades

Balancing your Hampton Bay ceiling fan blades is essential for smooth operation and to prevent wobbling or noise. Start by ensuring the fan is turned off and the power is disconnected. Remove any light kits or glass covers for clear access. Inspect each blade for damage or debris and clean as necessary. Use the provided balancing kit‚ which typically includes weights or clips‚ to test and adjust the balance. Attach the weights to the blades and test the fan’s operation‚ moving the weights as needed until the fan runs steadily without wobbling. This may require a trial-and-error approach‚ checking each blade individually and then together. If the fan still wobbles‚ consider checking the mounting hardware‚ though that’s usually addressed elsewhere. Patience and careful adjustment are key for optimal performance and longevity. Ensure all blades are balanced collectively for the best results.

Understanding the Manual

This section provides a clear overview of the manual’s structure‚ safety guidelines‚ and troubleshooting tips to help users navigate and maintain their Hampton Bay ceiling fan effectively.

3.1 Overview of the Manual Layout

The Hampton Bay ceiling fans manual is designed to guide users through installation‚ operation‚ and maintenance. It begins with an introduction‚ followed by detailed installation steps‚ operational instructions‚ and troubleshooting tips. The manual is divided into clear sections‚ each addressing specific aspects of the ceiling fan‚ such as safety precautions‚ wiring diagrams‚ and remote control functions. Visual aids like diagrams and charts are included to simplify complex procedures. Safety guidelines are emphasized throughout‚ with warnings and cautions highlighted for user awareness. A table of contents at the beginning allows easy navigation‚ while appendices provide technical specifications and warranty details. This structured approach ensures that users can quickly find the information they need‚ making the manual both comprehensive and user-friendly. By following the layout‚ homeowners can efficiently install‚ operate‚ and maintain their ceiling fans with confidence.

3.2 Safety Guidelines and Precautions

The Hampton Bay ceiling fans manual emphasizes critical safety guidelines to ensure safe installation and operation. Always turn off the power supply at the circuit breaker before handling electrical components. Wear protective gear‚ such as gloves and safety glasses‚ when working with tools or wiring. Never touch electrical parts with wet hands or while standing on a wet surface. Ensure the fan is securely mounted to avoid accidents caused by improper installation. Regularly inspect the fan blades and mounting hardware for damage or wear. Avoid overloading the fan with excessive weight‚ as this can lead to imbalance or failure. Keep children and pets away from the fan while it is in operation. Additionally‚ never operate the fan near water or in humid environments unless it is specifically rated for such conditions. Failure to follow these precautions can result in injury‚ electrical hazards‚ or damage to the product. Always prioritize safety to ensure optimal performance and longevity.

3.3 Troubleshooting Common Issues

The Hampton Bay ceiling fans manual provides a detailed troubleshooting section to help users resolve common issues. If the fan does not turn on‚ check the power source and ensure the circuit breaker is not tripped. Verify that the remote control batteries are installed correctly and functioning. For wobbling or imbalance‚ inspect the fan blades for damage or uneven alignment. Tighten any loose screws and ensure the mounting bracket is secure. If the light kit flickers‚ check the bulb connections and ensure the correct wattage is used. For noise issues‚ lubricate moving parts or replace worn-out components. Refer to the manual for specific guidance on resetting the fan or synchronizing the remote control. Addressing these issues promptly can prevent further complications and ensure smooth operation. Always follow the troubleshooting steps carefully to avoid additional damage.

Operating Your Hampton Bay Ceiling Fan

Mastering your Hampton Bay ceiling fan’s operation involves understanding its controls‚ adjusting settings for optimal airflow‚ and maintaining its efficiency. Regular checks ensure smooth performance and extend its lifespan effectively.

4.1 Using the Remote Control

The remote control for your Hampton Bay ceiling fan offers convenient operation‚ allowing you to adjust fan speed‚ toggle the light kit‚ and switch the fan on/off effortlessly. To use it‚ ensure batteries are installed correctly in the remote. Most remotes come pre-paired with the fan‚ but if pairing is required‚ refer to the manual for synchronization steps. Press the power button to turn the fan on or off‚ and use the speed buttons to cycle through low‚ medium‚ and high settings. For fans with a light kit‚ dedicated buttons will control brightness and toggle the light on/off. Some remotes also feature a reverse function to change the fan’s rotation direction for seasonal use. Always keep the remote within reach and replace batteries when they weaken to maintain reliable operation. Regularly check for obstructions blocking the infrared signal to ensure smooth control.

4.2 Adjusting Fan Speed Settings

Adjusting the fan speed on your Hampton Bay ceiling fan is straightforward and can be done using the remote control or the pull chain. The remote typically features dedicated buttons for low‚ medium‚ and high speeds‚ allowing you to customize airflow to suit your comfort needs. For precise control‚ some models may offer incremental adjustments. Additionally‚ the pull chain provides a manual override option when the remote is unavailable.
Seasonal operation may require reversing the fan direction‚ which can be done via the remote or a switch on the fan housing. This feature helps circulate warm air in winter and cool air in summer.

For energy efficiency‚ consider running the fan at lower speeds when possible. Ensure fan blades are balanced for smooth operation‚ as imbalance can cause noise or vibrations. Regular maintenance‚ like dusting blades and checking for wobble‚ ensures optimal performance. By adjusting fan speed thoughtfully‚ you can enhance comfort and efficiency year-round.

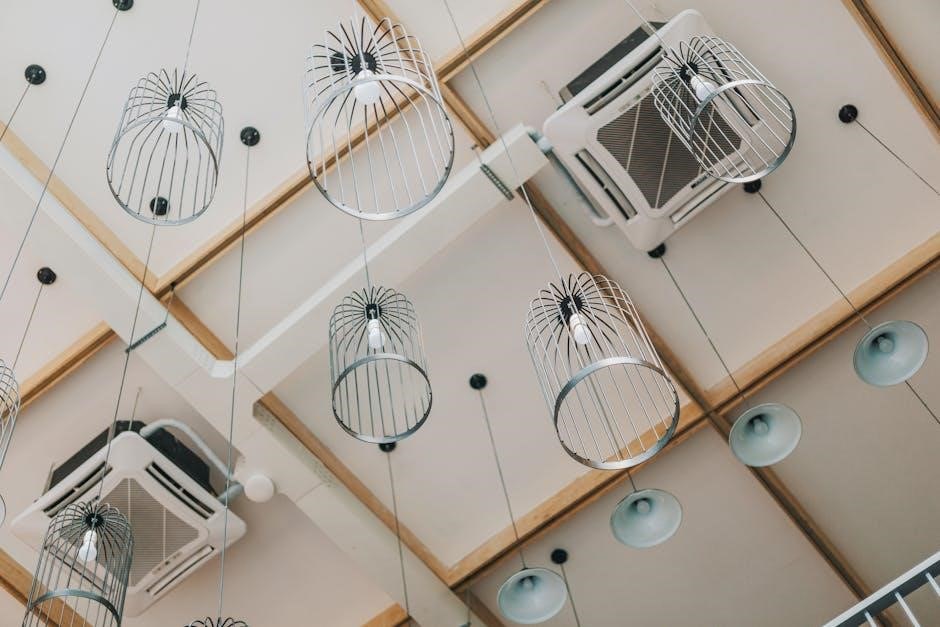
4.3 Understanding Lighting Functions

Hampton Bay ceiling fans often come with integrated lighting kits‚ offering versatile illumination options. The lighting functions can typically be controlled using the remote control or a wall switch. Most models feature multiple brightness levels‚ allowing you to adjust the light output to suit your needs. Some fans include dimming capabilities‚ enabling smooth transitions between light settings.

Additional features may include timers‚ which automatically turn the lights off after a set period‚ and memory functions that recall your last brightness setting. For energy efficiency‚ many Hampton Bay fans use LED bulbs‚ which are both long-lasting and energy-saving.

To ensure optimal performance‚ clean the light kit regularly to prevent dust buildup‚ which can reduce brightness. Always refer to the manual for specific instructions on programming or customizing lighting functions for your particular fan model. Proper use of these features enhances both functionality and energy efficiency.

4.4 Maintenance Tips

Regular maintenance ensures your Hampton Bay ceiling fan operates efficiently and lasts longer. Start by dusting the fan blades and motor housing with a soft cloth to prevent dust buildup‚ which can affect airflow. Check the fan balance periodically and tighten any loose screws or bolts to avoid wobbling. For fans with oil-based motors‚ apply the recommended lubricant to moving parts as specified in the manual.

Replace worn-out or damaged parts promptly‚ such as light bulbs or blade holders‚ to maintain performance. Clean the light kit with a damp cloth‚ avoiding harsh chemicals that could damage finishes. Inspect the wiring connections annually to ensure they are secure and free from damage.

By following these maintenance tips‚ you can keep your ceiling fan running smoothly‚ improve energy efficiency‚ and extend its lifespan. Always refer to the manual for model-specific care instructions.

4.5 Energy Efficiency Features

Hampton Bay ceiling fans are designed with energy efficiency in mind‚ offering features that reduce energy consumption while maintaining performance. Many models are Energy Star certified‚ meeting U.S. EPA guidelines for energy efficiency. These fans often use advanced DC motors‚ which are more energy-efficient than traditional AC motors‚ converting more energy into usable power.

Variable speed settings allow you to adjust the fan’s energy use based on your needs. The reverse function helps circulate warm air in winter and cool air in summer‚ reducing reliance on heating and cooling systems. Some models include LED light kits‚ which are highly energy-efficient and last longer than traditional bulbs.

By incorporating these features‚ Hampton Bay ceiling fans help lower energy bills and promote eco-friendly operation without sacrificing comfort or style. Regular maintenance‚ as outlined in the manual‚ further enhances their energy-saving capabilities.

Troubleshooting

Troubleshooting helps identify and resolve common issues with your Hampton Bay ceiling fan. Always refer to the manual for guidance on diagnosing and fixing problems efficiently.

5.1 Common Issues and Solutions

Common issues with Hampton Bay ceiling fans often relate to installation‚ wiring‚ or maintenance. One frequent problem is the fan not turning on‚ which may be due to a power outage or incorrect wiring connections. Another issue is uneven blade balance‚ causing vibrations. To fix this‚ ensure all blades are securely attached and evenly aligned. If the remote control isn’t functioning‚ check the batteries or ensure the receiver is properly wired. For flickering lights‚ replace the bulbs or check for loose connections. If the fan hums or makes noise‚ tighten all screws and ensure proper mounting. Always refer to the manual for specific troubleshooting steps. If issues persist‚ contact Hampton Bay customer support for assistance. Regular maintenance‚ such as dusting blades and inspecting wires‚ can prevent many of these problems. Addressing issues early ensures optimal performance and longevity of your ceiling fan.

5.2 Repairing or Replacing Parts

Repairing or replacing parts of your Hampton Bay ceiling fan may be necessary over time. Common parts that may need attention include fan blades‚ light kits‚ or remote control receivers. For blade replacements‚ ensure you purchase the correct size and style to maintain balance. Light kits may require new bulbs or entire fixture replacements if damaged. If the remote control stops working‚ check for faulty batteries or wiring issues before replacing the receiver. Always refer to the manual for specific part numbers and compatibility. Use a screwdriver or wrench for disassembly‚ and ensure the fan is turned off at the power source before starting repairs. For complex issues‚ consider consulting a licensed electrician. Genuine Hampton Bay replacement parts can be found on their official website or authorized retailers. Regular inspection of parts can help prevent major repairs and extend the fan’s lifespan.

5.3 When to Contact Customer Support

Contacting Hampton Bay customer support is essential when you encounter issues beyond your troubleshooting capabilities. If your ceiling fan malfunctions despite following the manual’s instructions‚ or if repairs require specialized tools or expertise‚ reach out for assistance. Additionally‚ if you have questions about warranty claims‚ missing parts‚ or compatibility issues with accessories‚ customer support can provide clarity. For complex problems like persistent noise‚ unstable operation‚ or failed remote control functions‚ professional guidance is recommended. Hampton Bay support can be contacted via phone‚ email‚ or live chat through their official website. Ensure you have your fan’s model number and purchase details ready for faster assistance; Their team can offer tailored solutions‚ recommend authorized service centers‚ or facilitate warranty claims. Reaching out sooner rather than later can prevent minor issues from escalating into major repairs.

Customer Support and Additional Resources

Hampton Bay provides dedicated customer support through phone‚ email‚ and live chat. Additional resources include warranty information‚ online FAQs‚ and troubleshooting guides to assist with any ceiling fan inquiries.

6.1 Contact Information for Hampton Bay Support

For assistance with your Hampton Bay ceiling fan‚ contact customer support at 1-855-434-2678‚ available Monday through Friday‚ 9 AM to 5 PM EST. You can also reach them via email at customerservice@hamptonbay.com or through the live chat feature on their official website. Visit hamptonbay.com/support for more details. Be prepared to provide your product model number and a detailed description of your inquiry for efficient support. Note that support hours may vary on holidays.

6.2 Warranty Information

Hampton Bay ceiling fans are backed by a comprehensive warranty program designed to protect your investment. The standard warranty typically covers defects in materials and workmanship for a period of 10 years for motor parts and 2 years for lighting kits and remote controls. This warranty applies to the original purchaser and is non-transferable. For full details‚ refer to the warranty certificate included in your manual or visit the Hampton Bay website.

Exclusions include damage caused by improper installation‚ misuse‚ or failure to maintain the product. To ensure warranty validity‚ register your product online or via mail within 30 days of purchase. For warranty claims or questions‚ contact Hampton Bay customer support at hamptonbay.com/warranty.

6.3 Online Resources and FAQs

Hampton Bay provides a variety of online resources to assist with your ceiling fan needs. The official Hampton Bay website offers detailed product guides‚ troubleshooting tips‚ and instructional videos to help you navigate installation‚ operation‚ and maintenance. Additionally‚ the site features a dedicated FAQs section that addresses common questions about ceiling fan functionality‚ remote control usage‚ and light kit installation.

For quick solutions‚ the FAQs are organized by topic‚ such as installation‚ operation‚ and maintenance. Users can also search for specific queries using keywords or browse through categorized sections. For further assistance‚ Hampton Bay offers downloadable resources‚ including PDF versions of manuals and warranty information. Visit hamptonbay.com/support to explore these resources and find answers to your questions.

The Hampton Bay Ceiling Fans Manual serves as a comprehensive guide to installation‚ operation‚ and maintenance‚ ensuring optimal performance and longevity of your ceiling fan.

7.1 Summary of Key Points

The Hampton Bay Ceiling Fans Manual provides a detailed guide for installing‚ operating‚ and maintaining your ceiling fan. Key points include pre-installation checks‚ proper mounting techniques‚ and safe wiring practices. Understanding the remote control‚ speed settings‚ and lighting functions ensures smooth operation. Regular maintenance‚ such as cleaning and balancing blades‚ prolongs the fan’s lifespan. Troubleshooting sections address common issues‚ while repair or replacement guidelines help resolve more serious problems. The manual also emphasizes safety precautions and energy efficiency features. By following the manual‚ you can enjoy optimal performance‚ reduced energy consumption‚ and extended durability of your Hampton Bay ceiling fan. Referencing customer support and warranty information ensures additional assistance when needed.

7.2 Final Tips for Optimal Performance

To ensure your Hampton Bay ceiling fan operates at its best‚ regular maintenance is essential. Clean the blades and housing with a soft cloth to prevent dust buildup‚ which can reduce airflow. Check for loose screws or bolts and tighten them as needed to maintain stability. Use the remote control to adjust speed settings and lighting functions efficiently. For energy savings‚ switch the fan direction seasonally to optimize air circulation. Avoid exposing the fan to extreme temperatures or moisture‚ as this can damage the motor or electrical components. Replace worn or damaged parts promptly to prevent further issues. By following these tips‚ you can enjoy a quieter‚ more efficient‚ and longer-lasting ceiling fan experience. Always refer to the manual for specific care instructions tailored to your model.

Bycassandre

vevor t38-1315.v1s manual

This manual provides essential guidance for the VEVOR T38-1315.V1S ice maker, covering assembly, operation, maintenance, and troubleshooting to ensure optimal performance and safety.

1.1 Overview of the VEVOR T38-1315.V1S Ice Maker

The VEVOR T38-1315.V1S is a high-performance commercial ice maker designed for efficient ice production. Constructed with durable materials such as stainless steel, PP, and ABS, it ensures long-lasting reliability. This model is capable of producing up to 360 lbs (163.3 kg) of ice in 24 hours and can store up to 250 lbs (113.4 kg) of ice, making it ideal for businesses or large households. The ice maker features a user-friendly design and advanced functionality, ensuring consistent ice production. Its robust build and high-capacity output make it a versatile solution for various settings, from restaurants to home use. Proper assembly, operation, and maintenance, as outlined in the manual, are essential to maximize its performance and lifespan.

1.2 Importance of Reading the Manual

Reading the VEVOR T38-1315.V1S manual is crucial for understanding proper assembly, operation, and maintenance procedures. It provides essential safety precautions, ensuring safe handling and usage. The manual outlines troubleshooting steps, helping users address common issues promptly. By following the guidelines, users can optimize performance, extend the machine’s lifespan, and prevent unnecessary repairs. Additionally, the manual includes warranty details and customer support information, serving as a comprehensive resource for all aspects of the ice maker. Adhering to the instructions ensures compliance with manufacturer recommendations, minimizing risks and enhancing overall efficiency. This manual is indispensable for both initial setup and long-term maintenance, guaranteeing the best experience with the VEVOR T38-1315.V1S ice maker.

1.3 Safety Precautions and Warnings

For safe operation of the VEVOR T38-1315.V1S ice maker, carefully read and follow all safety precautions in the manual. Ensure proper installation and electrical connections to avoid hazards. Keep children away from the machine while it is in operation. Avoid touching hot surfaces or moving parts during operation. Do not modify the machine or use unauthorized parts, as this may lead to malfunctions or injuries. Regularly inspect the machine for damage or wear and tear. Follow all warnings and guidelines to prevent accidents and ensure optimal performance. Adhering to these precautions will help maintain safety, extend the machine’s lifespan, and prevent potential risks associated with improper usage.

Product Specifications and Features

The VEVOR T38-1315.V1S ice maker is built with durable materials, offering high-efficiency ice production, a user-friendly control panel, and energy-saving technology, making it ideal for commercial and heavy-duty use.

2.1 Model Details: T38-1315.V1S

The VEVOR T38-1315.V1S is a high-efficiency ice maker designed for commercial and heavy-duty use. This model features a sturdy construction with stainless steel and food-grade materials, ensuring durability and safety. It is engineered to produce high-quality ice cubes efficiently, making it ideal for restaurants, bars, and large households. The T38-1315.V1S is equipped with advanced cooling technology and an intelligent control system for consistent performance. Its compact design allows for easy installation in various settings. The model is also known for its energy efficiency, reducing operational costs while maintaining high ice production capacity. This ice maker is a reliable choice for businesses and homes requiring a steady ice supply.

2.2 Material Composition: Stainless Steel, PP, ABS

The VEVOR T38-1315.V1S ice maker is constructed from high-quality materials, including stainless steel, polypropylene (PP), and acrylonitrile butadiene styrene (ABS). Stainless steel is used for its durability, corrosion resistance, and ability to withstand heavy-duty use. PP is utilized for its lightweight and moisture-resistant properties, making it ideal for internal components. ABS, known for its impact resistance and strength, is used in external parts to ensure longevity. These materials combine to create a robust and reliable ice maker, designed to handle commercial-grade demands while maintaining safety and performance. The use of food-grade materials ensures the ice produced is safe for consumption, aligning with health and safety standards.

2.3 Ice Production Capacity: 360 lbs (163.3 kg) in 24 Hours

The VEVOR T38-1315.V1S ice maker boasts an impressive production capacity of 360 pounds (163.3 kilograms) of ice in a 24-hour period. This high-output capability makes it ideal for commercial settings, such as restaurants, bars, and cafes, where consistent ice supply is crucial. The machine is designed to meet demanding ice needs efficiently, ensuring optimal performance even during peak hours. Its robust construction and advanced cooling system enable rapid ice formation, maintaining a steady supply to keep up with high demand. This feature ensures businesses can rely on a consistent ice supply without interruptions, making it a valuable asset for any establishment requiring large quantities of ice daily.

2.4 Ice Storage Capacity: 250 lbs (113.4 kg)

The VEVOR T38-1315.V1S ice maker features a spacious storage capacity of 250 pounds (113.4 kilograms), allowing it to hold a substantial amount of ice for extended periods. This large storage capacity ensures a steady supply of ice, even during high-demand scenarios, making it suitable for commercial environments. The ice bin is designed with insulation to maintain ice quality and prevent rapid melting. This capacity complements the machine’s high production rate, ensuring that freshly made ice can be stored efficiently. Regular cleaning and refilling of water are recommended to maintain optimal performance and ice quality. This feature makes the machine a reliable choice for businesses requiring consistent ice availability. Proper maintenance ensures longevity and efficiency of the storage system. Always ensure the ice bin is not overfilled to avoid operational issues. This storage capacity is a key factor in the machine’s overall functionality and practicality for heavy-duty applications. By adhering to maintenance guidelines, users can maximize the storage capacity and enjoy uninterrupted ice supply. Regularly checking the ice level and ensuring proper drainage will help maintain the machine’s performance. This ensures that the VEVOR T38-1315.V1S remains a dependable solution for ice production and storage needs. The storage capacity is a testament to the machine’s durability and suitability for demanding environments. It is essential to follow the manual’s guidelines to ensure the ice storage system operates at its best. Proper handling and storage practices will contribute to the machine’s longevity and overall efficiency. Always prioritize cleanliness and timely maintenance to preserve the quality of the stored ice. This will ensure that the VEVOR T38-1315.V1S continues to meet the ice production and storage demands of your business effectively. By maintaining the ice storage capacity, users can rely on a consistent and ample ice supply, making it an essential feature for any commercial setting. The machine’s storage capacity is a critical component of its design, ensuring that it can handle the needs of busy environments without compromising performance. Regular inspections and adherence to the manual’s instructions are vital to uphold the machine’s functionality and extend its service life. The VEVOR T38-1315.V1S is engineered to deliver exceptional performance, and its storage capacity is a key aspect of its reliability. Users can trust this machine to provide a steady supply of high-quality ice, even during peak demand periods. The combination of high production and ample storage makes it an ideal choice for establishments requiring a consistent and reliable ice supply. By following the recommended maintenance routines, users can ensure that the ice storage capacity remains optimal, providing long-term benefits and satisfaction. The VEVOR T38-1315.V1S is designed to meet the needs of commercial ice production, and its storage capacity is a significant factor in its appeal. It is important to note that the ice storage capacity is carefully balanced with the machine’s production rate to ensure efficiency and performance. This balance enables the machine to operate smoothly, even in the most demanding environments. The storage capacity of 250 pounds is a result of meticulous engineering and design, ensuring that users have access to a generous amount of ice at all times. Proper use and maintenance will ensure that this capacity is fully utilized, providing users with the ice they need without interruption. The VEVOR T38-1315.V1S is a reliable solution for businesses that require a high volume of ice, and its storage capacity plays a crucial role in its overall functionality. By understanding and adhering to the machine’s specifications and maintenance requirements, users can enjoy the full benefits of this impressive storage capacity. This ensures that the machine continues to perform at its best, delivering high-quality ice consistently. The storage capacity is one of the standout features of the VEVOR T38-1315.V1S, making it a preferred choice for commercial ice production needs. Users can be confident that their ice storage needs are met with this machine, thanks to its generous capacity and efficient design. Regular maintenance and proper handling are essential to preserving the storage capacity and ensuring the machine’s longevity. By following the guidelines outlined in the manual, users can maximize the storage potential of the VEVOR T38-1315.V1S and enjoy a reliable ice supply for years to come. The storage capacity is a testament to the machine’s durability and its ability to meet the demands of a busy commercial environment. It is a key factor in the machine’s overall performance and a major advantage for businesses that require a steady and ample ice supply. By maintaining the ice storage capacity, users can ensure that the VEVOR T38-1315.V1S remains a vital asset to their operations, providing consistent and high-quality ice production. The storage capacity of 250 pounds is a significant feature that sets this machine apart from others in its class, offering users the convenience and reliability they need. Proper care and maintenance will ensure that this capacity is sustained, providing users with a dependable ice supply. The VEVOR T38-1315.V1S is designed to deliver exceptional performance, and its storage capacity is a key component of its functionality. By adhering to the manual’s instructions, users can fully utilize this feature and enjoy the benefits of a high-capacity ice maker. The storage capacity is a result of the machine’s robust design and engineering, ensuring that it can handle the demands of a commercial setting. Regular inspections and timely maintenance will help preserve the storage capacity and maintain the machine’s efficiency. The VEVOR T38-1315.V1S is a reliable choice for businesses that require a heavy-duty ice maker with ample storage capacity. Its ability to store up to 250 pounds of ice ensures that users have a steady supply, even during peak periods. By following the recommended maintenance routines, users can ensure that the storage capacity remains optimal, providing long-term benefits and satisfaction. The VEVOR T38-1315.V1S is engineered to meet the needs of commercial ice production, and its storage capacity is a significant factor in its appeal. It is important to note that the ice storage capacity is carefully balanced with the machine’s production rate to ensure efficiency and performance. This balance enables the machine to operate smoothly, even in the most demanding environments. The storage capacity of 250 pounds is a result of meticulous engineering and design, ensuring that users have access to a generous amount of ice at all times. Proper use and maintenance will ensure that this capacity is fully utilized, providing users with the ice they need without interruption. The VEVOR T38-1315.V1S is a reliable solution for businesses that require a high volume of ice, and its storage capacity plays a crucial role in its overall functionality. By understanding and adhering to the machine’s specifications and maintenance requirements, users can enjoy the full benefits of this impressive storage capacity. This ensures that the machine continues to perform at its best, delivering high-quality ice consistently. The storage capacity is one of the standout features of the VEVOR T38-1315.V1S, making it a preferred choice for commercial ice production needs. Users can be confident that their ice storage needs are met with this machine, thanks to its generous capacity and efficient design. Regular maintenance and proper handling are essential to preserving the storage capacity and ensuring the machine’s longevity. By following the guidelines outlined in the manual, users can maximize the storage potential of the VEVOR T38-1315.V1S and enjoy a reliable ice supply for years to come. The storage capacity is a testament to the machine’s durability and its ability to meet the demands of a busy commercial environment. It is a key factor in the machine’s overall performance and a major advantage for businesses that require a steady and ample ice supply. By maintaining the ice storage capacity, users can ensure that the VEVOR T38-1315.V1S remains a vital asset to their operations, providing consistent and high-quality ice production. The storage capacity of 250 pounds is a significant feature that sets this machine apart from others in its class, offering users the convenience and reliability they need. Proper care and maintenance will ensure that this capacity is sustained, providing users with a dependable ice supply. The VEVOR T38-1315.V1S is designed to deliver

Assembly and Installation

Follow the step-by-step guide for assembling and installing the VEVOR T38-1315.V1S ice maker.

  • Unpack and inventory all components carefully.
  • Assemble parts according to the provided diagram.
  • Choose a suitable location for installation.
  • Ensure proper water supply and drainage connections.
  • Test the machine after completing the setup.

3.1 Unpacking and Inventory of Components

When unpacking the VEVOR T38-1315.V1S ice maker, carefully inspect all components to ensure no damage occurred during shipping.

  • Verify the main unit, water inlet, drain pump, and accessories are included.
  • Check for any visible damage or missing parts.
  • Refer to the manual for a detailed list of components.
  • Contact customer support immediately if any items are missing or damaged.

Keep the original packaging for potential future use or relocation.

3.2 Assembly Diagram and Instructions

Refer to the provided assembly diagram for a visual guide to assembling the VEVOR T38-1315.V1S ice maker.

  • Align the main unit with the stand or base, ensuring proper leveling.
  • Secure all components using the provided screws and bolts.
  • Connect the water inlet and drainage systems according to the diagram.
  • Ensure all electrical connections are safely and correctly installed.
  • Double-check the alignment of moving parts to avoid operational issues.

Follow the step-by-step instructions carefully to ensure proper assembly and functionality of the ice maker.

Consult a professional if you are unsure about any part of the process.

3.3 Installation Requirements and Location Setup

Ensure the VEVOR T38-1315.V1S ice maker is installed in a well-ventilated area, away from direct sunlight and heat sources.

  • Provide adequate space around the unit for proper air circulation.
  • Install on a level, stable surface to prevent vibration and imbalance.
  • Connect the water supply line to a potable water source.
  • Ensure the drainage system is properly installed and sloped.
  • Keep the unit away from flammable materials and ensure electrical connections meet safety standards.

Choose a location with easy access for maintenance and cleaning.

Follow these guidelines to ensure optimal performance and longevity of the ice maker.

3.4 Initial Setup and Testing

After installation, plug in the machine and ensure the power supply is stable.

  • Check the control panel for proper power-on indicators.
  • Run a test cycle to ensure all functions operate smoothly.
  • Monitor water supply and drainage systems for leaks or issues.
  • Verify ice production starts and progresses as expected.
  • Inspect the machine for unusual noises or vibrations.

If everything functions correctly, the ice maker is ready for regular use.

Address any irregularities immediately to prevent long-term damage.

Operating the Ice Maker

Operating the VEVOR T38-1315.V1S involves using its control panel to start, stop, and adjust settings for optimal ice production. Manage water supply and drainage regularly for efficiency.

4.1 Understanding the Control Panel

The control panel of the VEVOR T38-1315.V1S is designed for intuitive operation. It features a power button to start/stop the machine, mode selection for choosing between different ice-making settings, and LED indicators to monitor the machine’s status. The panel also includes adjustment buttons to customize ice size and production timing. A display screen provides real-time information about the machine’s operation, such as current mode, temperature, and error codes. Familiarizing yourself with these components ensures smooth and efficient operation. Always refer to the manual for detailed explanations of each function and symbol to avoid confusion and ensure optimal performance. Proper use of the control panel is essential for maintaining productivity and longevity.

4.2 Starting and Stopping the Machine

To start the VEVOR T38-1315.V1S, press the power button located on the control panel. The machine will perform a brief self-check before initiating ice production. Ensure the water supply is connected and the drain is properly set up before starting. Once operational, the machine will automatically cycle through ice-making phases. To stop the machine, press and hold the power button until it powers down. Always allow the machine to complete its current cycle to prevent damage. Regularly turning the machine off when not in use helps conserve energy and extends its lifespan. Proper startup and shutdown procedures are crucial for maintaining efficiency and ensuring long-term functionality.

4.3 Adjusting Settings for Optimal Performance

The VEVOR T38-1315.V1S allows users to customize settings for enhanced performance. Use the touchscreen control panel to adjust ice cube size, thickness, and production speed. Select from small, medium, or large ice cubes based on your needs. The machine also features a delay start function, enabling you to schedule ice production up to 24 hours in advance. For energy efficiency, adjust the cooling mode to balance ice output and power consumption. Regularly monitor and tweak settings to ensure optimal performance in varying environments. Proper adjustments can improve ice quality, reduce energy use, and extend the machine’s lifespan. Always refer to the manual for detailed guidance on customization options.

4.4 Managing Water Supply and Drainage

Proper water supply and drainage management is crucial for the VEVOR T38-1315.V1S ice maker. Ensure the water inlet hose is connected to a clean, filtered water source to prevent contamination and scaling. The drainage hose must be positioned correctly to avoid water accumulation. Regularly inspect both hoses for leaks or blockages. Use a water filter to maintain water quality and reduce mineral buildup; Drain excess water from the machine during Cleaning cycles to prevent mold growth. Always follow the manual’s guidelines for connecting and maintaining water supply and drainage systems to ensure smooth operation and longevity of the ice maker.

Maintenance and Cleaning

Regular maintenance ensures optimal performance and longevity. Clean the ice maker daily, focusing on surfaces and components. Schedule deep cleaning every month, including descaling and sanitizing. Always follow the manual for specific cleaning procedures to maintain efficiency and hygiene.

5.1 Daily Cleaning and Sanitization

For optimal performance, clean the VEVOR T38-1315.V1S daily. Wipe down exterior surfaces with a soft cloth and mild detergent. Regularly sanitize high-touch areas like the control panel and ice bin using food-safe sanitizers. Remove and rinse the ice scoop, ensuring no residue remains. Check and clean the water inlet and drain to prevent blockages. Sanitize all detachable parts, such as the ice basket and lid, with a mixture of water and food-grade sanitizer. Allow the machine to air dry after cleaning to prevent mineral buildup. Daily maintenance prevents mold growth and ensures clean, hygienic ice production. Always refer to the manual for specific cleaning instructions to maintain efficiency and safety.

5;2 Scheduled Maintenance Tasks

To ensure the VEVOR T38-1315.V1S operates efficiently, perform scheduled maintenance tasks. Every week, inspect and clean the water filter to prevent clogging. Monthly, descale the machine using a food-safe descaler to remove mineral buildup. Check the drain pump and hoses for blockages and ensure proper water flow. Every six months, replace the water filter and inspect the evaporator and condenser coils for dust or debris. Lubricate moving parts like hinges and seals to maintain smooth operation. Regularly check the ice sensor and alignment of doors to prevent misalignment. Keep a maintenance log to track tasks and ensure consistency. Neglecting these steps can lead to reduced performance or damage. Always consult the manual for detailed instructions.

5.3 Replacing Filters and Parts

Regular replacement of filters and worn parts is essential for maintaining the VEVOR T38-1315.V1S ice maker’s performance. The water filter should be replaced every 6 months or as indicated by a decrease in ice production or water flow. To replace the filter, turn off the water supply, locate the filter housing, remove the old filter, and install the new one. Other parts, such as the drain pump or seals, may need replacement if they show signs of wear or leakage. Always use genuine or compatible replacement parts to ensure proper function. Before replacing any component, refer to the manual for specific instructions and safety precautions. Keep spare parts on hand to minimize downtime.

5.4 Troubleshooting Common Issues

Troubleshooting common issues with the VEVOR T38-1315.V1S ice maker ensures optimal performance and addresses problems promptly. If the machine does not turn on, check the power connection and circuit breaker. For low ice production, ensure the water supply is adequate and the filter is clean. If ice sticks to the evaporator, defrost the unit or adjust the ice thickness setting. Leaks may indicate loose connections or worn seals, which should be tightened or replaced. Unusual noises could signal misaligned fans or debris in the unit. Always refer to the manual for specific guidance. If issues persist, contact VEVOR customer support for professional assistance. Regular checks help prevent minor problems from escalating.

Troubleshooting and Repairs

Troubleshooting and repairs for the VEVOR T38-1315.V1S involve identifying issues like error codes, faulty parts, or mechanical malfunctions. Always start with basic checks, such as ensuring proper power supply and water flow. If issues persist, refer to the error code list in the manual for guidance. For repairs, use genuine replacement parts to maintain performance and safety. If you are unsure about a repair, contact a professional technician. Regular maintenance can prevent many common problems, ensuring the ice maker operates efficiently and reliably over time.

6.1 Identifying Common Problems

Identifying common problems with the VEVOR T38-1315.V1S ice maker involves monitoring its performance and addressing issues promptly. Common problems include the machine not turning on, inconsistent ice production, or unusual noises. Check the power supply and ensure the water inlet is functioning properly. If ice is too small or malformed, it may indicate a water flow issue or incorrect temperature settings. Strange noises could signal worn or misaligned parts. Regularly inspect the machine for blockages or scale buildup, which can disrupt operation. Always refer to the error codes in the manual for specific guidance. Early detection of these issues can prevent more severe damage and ensure optimal performance. Proper troubleshooting helps maintain efficiency and longevity of the ice maker.

6.2 Error Codes and Solutions

The VEVOR T38-1315.V1S ice maker displays error codes to indicate specific issues. Common codes include E1 (high temperature), E2 (water supply problem), E3 (sensor malfunction), and E4 (communication error). For E1, ensure the ambient temperature is below 90°F (32°C) and check ventilation. If E2 appears, verify water inlet connections and pressure. For E3, clean or replace the sensors as needed. E4 typically requires resetting the machine or checking wiring connections. Refer to the manual for detailed solutions. Addressing these codes promptly prevents further complications and ensures smooth operation. Always follow safety guidelines when troubleshooting to avoid damage or injury. Regular maintenance can help minimize error occurrences and maintain efficiency.

6.3 Resetting the Machine

To reset the VEVOR T38-1315.V1S ice maker, first ensure it is turned off and unplugged from the power source. Allow it to remain unplugged for 5-10 minutes to fully discharge any residual power. Plug it back in and turn it on. This basic reset can resolve minor software glitches. If issues persist, press and hold the Power and Function buttons simultaneously for 3-5 seconds to initiate a factory reset. Note that this will restore default settings, so you may need to reconfigure preferences. Resetting should only be done after troubleshooting common issues. Always refer to the manual for specific reset procedures to avoid damaging the machine. Regular resets are not typically needed but can be useful for resolving unexpected errors. Ensure proper operation after resetting by testing the machine’s functions. If problems persist, contact VEVOR support for further assistance. Resetting is a simple yet effective step to restore functionality; Always follow safety precautions when performing resets to avoid injury or damage. This process helps maintain the machine’s efficiency and longevity. For complex issues, a professional should be consulted. Resetting is a quick solution for minor malfunctions but should not replace regular maintenance. By resetting correctly, you can ensure optimal performance and extend the lifespan of your ice maker. Proper resetting techniques are essential for maintaining warranty coverage and ensuring reliability. Always prioritize safety when handling electrical appliances. Resetting is a valuable troubleshooting step that can save time and effort. If unsure, consult the manual or contact VEVOR support for guidance. Resetting is a straightforward process that can resolve many common issues. Always follow the recommended procedures to avoid voiding the warranty. If the machine does not respond after resetting, it may indicate a more serious problem requiring professional attention. Resetting is a key step in maintaining the ice maker’s performance and ensuring consistent ice production. Regular resets can help prevent software-related issues and keep the machine running smoothly. By resetting correctly, you can enjoy uninterrupted ice production and maintain the machine’s efficiency. Always remember to test the machine after resetting to ensure it functions properly. Resetting is a simple yet effective way to address minor issues and maintain the ice maker’s optimal performance. For best results, combine resetting with regular maintenance and proper care. Resetting is a quick fix that can save time and effort when dealing with minor malfunctions. If the issue persists after resetting, it may require professional servicing. Always follow the manual’s guidelines for resetting to ensure safety and effectiveness. Resetting is a valuable tool for troubleshooting and maintaining the VEVOR T38-1315.V1S ice maker. By resetting correctly, you can restore functionality and ensure the machine continues to perform at its best. If you’re unsure about the resetting process, consult the manual or contact VEVOR customer support for assistance. Resetting is a straightforward procedure that can resolve many common issues and keep your ice maker running efficiently. Always prioritize safety and follow the recommended steps when resetting the machine. Resetting is an essential step in maintaining the ice maker’s performance and ensuring it continues to meet your needs. For optimal results, reset the machine as described in the manual and perform regular maintenance. Resetting can help prevent software-related issues and ensure smooth operation. If the machine does not respond after resetting, it may indicate a more serious problem that requires professional attention. Always remember to unplug the machine before attempting any reset or maintenance to ensure safety. Resetting is a quick and effective way to address minor issues and restore the ice maker’s functionality. By following the manual’s instructions, you can reset the machine confidently and maintain its performance. Resetting is a simple process that can save time and effort when troubleshooting common problems. If you encounter persistent issues after resetting, contact VEVOR support for further assistance. Resetting is a key step in maintaining the ice maker’s efficiency and ensuring it continues to produce high-quality ice. Always follow the manual’s guidelines for resetting to ensure safety and effectiveness. Resetting is a valuable tool for troubleshooting and maintaining the VEVOR T38-1315.V1S ice maker. By resetting correctly, you can restore functionality and ensure the machine continues to perform at its best. If you’re unsure about the resetting process, consult the manual or contact VEVOR customer support for assistance. Resetting is a straightforward procedure that can resolve many common issues and keep your ice maker running efficiently. Always prioritize safety and follow the recommended steps when resetting the machine. Resetting is an essential step in maintaining the ice maker’s performance and ensuring it continues to meet your needs. For optimal results, reset the machine as described in the manual and perform regular maintenance. Resetting can help prevent software-related issues and ensure smooth operation. If the machine does not respond after resetting, it may indicate a more serious problem that requires professional attention. Always remember to unplug the machine before attempting any reset or maintenance to ensure safety. Resetting is a quick and effective way to address minor issues and restore the ice maker’s functionality. By following the manual’s instructions, you can reset the machine confidently and maintain its performance. Resetting is a simple process that can save time and effort when troubleshooting common problems. If you encounter persistent issues after resetting, contact VEVOR support for further assistance. Resetting is a key step in maintaining the ice maker’s efficiency and ensuring it continues to produce high-quality ice. Always follow the manual’s guidelines for resetting to ensure safety and effectiveness. Resetting is a valuable tool for troubleshooting and maintaining the VEVOR T38-1315.V1S ice maker. By resetting correctly, you can restore functionality and ensure the machine continues to perform at its best. If you’re unsure about the resetting process, consult the manual or contact VEVOR customer support for assistance. Resetting is a straightforward procedure that can resolve many common issues and keep your ice maker running efficiently. Always prioritize safety and follow the recommended steps when resetting the machine. Resetting is an essential step in maintaining the ice maker’s performance and ensuring it continues to meet your needs. For optimal results, reset the machine as described in the manual and perform regular maintenance. Resetting can help prevent software-related issues and ensure smooth operation. If the machine does not respond after resetting, it may indicate a more serious problem that requires professional attention. Always remember to unplug the machine before attempting any reset or maintenance to ensure safety. Resetting is a quick and effective way to address minor issues and restore the ice maker’s functionality. By following the manual’s instructions, you can reset the machine confidently and maintain its performance. Resetting is a simple process that can save time and effort when troubleshooting common problems. If you encounter persistent issues after resetting, contact VEVOR support for further assistance. Resetting is a key step in maintaining the ice maker’s efficiency and ensuring it continues to produce high-quality ice. Always follow the manual’s guidelines for resetting to ensure safety and effectiveness. Resetting is a valuable tool for troubleshooting and maintaining the VEVOR T38-1315.V1S ice maker. By resetting correctly, you can restore functionality and ensure the machine continues to perform at its best. If you’re unsure about the resetting process, consult the manual or contact VEVOR customer support for assistance. Resetting is a straightforward procedure that can resolve many common issues and keep your ice maker running efficiently. Always prioritize safety and follow the recommended steps when resetting the machine. Resetting is an essential step in maintaining the ice maker’s performance and ensuring it continues to meet your needs. For optimal results, reset the machine as described in the manual and perform regular maintenance. Resetting can help prevent software-related issues and ensure smooth operation. If the machine does not respond after resetting, it may indicate a more serious problem that requires professional attention. Always remember to unplug the machine before attempting any reset or maintenance to ensure safety. Resetting is a quick and effective way to address minor issues and restore the ice maker’s functionality. By following the manual’s instructions, you can reset the machine confidently and maintain its performance. Resetting is a simple process that can save time and effort when troubleshooting common problems. If you encounter persistent issues after resetting, contact VEVOR support for further assistance. Resetting is a key step in maintaining the ice

6.4 When to Contact Professional Support

Contact professional support if the VEVOR T38-1315.V1S ice maker experiences severe mechanical failure, electrical issues, or persistent malfunctions that cannot be resolved through troubleshooting or resetting. If the machine does not power on, produces no ice, or displays error codes that cannot be addressed manually, seek expert assistance. Additionally, if water leakage, excessive noise, or uneven ice production occurs despite proper maintenance, professional intervention is recommended. Do not attempt complex repairs yourself, as this may void the warranty or cause further damage. Use the contact information provided in the manual to reach VEVOR customer support. They can dispatch authorized technicians or provide advanced solutions. Always prioritize safety and avoid risky DIY fixes. Timely professional support ensures optimal performance and extends the machine’s lifespan. If unsure, consult the manual or contact VEVOR directly for guidance. Professional support is essential for resolving critical issues and maintaining warranty validity. Do not delay seeking help for major problems to prevent further complications. Contacting professional support is the best course of action when troubleshooting efforts fail. Always rely on authorized technicians for repairs to ensure quality and safety. This step is crucial for maintaining the machine’s efficiency and longevity. If the issue is beyond your expertise, do not hesitate to seek professional assistance. Contacting VEVOR’s support team ensures that your ice maker is repaired correctly and safely. Regular professional checkups can also prevent future issues. Always refer to the manual for contact details and support options. Professional support is your best resource for resolving complex problems and ensuring the ice maker operates at peak performance. Avoid attempting repairs that could worsen the issue or void the warranty. Contacting professional support is the recommended solution for severe or unresolved problems. This ensures the machine’s longevity and maintains its performance. If you are unsure about any repair, consult VEVOR’s support team for guidance. Professional support is essential for handling advanced issues and ensuring the ice maker continues to function effectively. Always choose authorized service providers to guarantee quality repairs and maintain warranty coverage. Contacting professional support is the final step in resolving issues that cannot be fixed through basic troubleshooting. This ensures the machine’s optimal performance and extends its lifespan. Always prioritize professional assistance for critical repairs to avoid further complications. For unresolved issues, contact VEVOR’s customer support for expert help. Professional support is vital for maintaining the ice maker’s efficiency and addressing complex problems. Always rely on authorized technicians for repairs to ensure safety and quality. Contacting professional support is the best way to resolve severe issues and keep your ice maker functioning properly. If troubleshooting fails, do not hesitate to seek expert assistance. Professional support ensures that your VEVOR T38-1315.V1S ice maker is repaired correctly and continues to perform at its best. Always use the contact information provided in the manual to reach VEVOR’s support team. Professional support is your trusted solution for resolving advanced issues and maintaining the machine’s performance. If you encounter problems beyond your expertise, contact VEVOR’s support for professional assistance. This ensures the ice maker’s longevity and efficiency. Always choose professional support for critical repairs to avoid further damage or safety risks. Contacting VEVOR’s support team is the recommended solution for unresolved issues. Professional support is essential for maintaining the ice maker’s optimal performance and addressing complex problems. Always rely on authorized technicians for quality repairs and warranty compliance; If you are unable to resolve an issue, contact VEVOR’s customer support for expert help. Professional support ensures that your ice maker continues to function effectively and efficiently. Always prioritize safety and quality by seeking professional assistance for critical repairs. Contacting VEVOR’s support team is the best way to address unresolved issues and maintain the machine’s performance. Professional support is vital for resolving advanced problems and ensuring the ice maker’s longevity. Always use the contact information in the manual to reach VEVOR’s support team. Professional support is your trusted resource for expert repairs and maintenance. If you encounter issues beyond basic troubleshooting, contact VEVOR’s support for professional assistance. This ensures the machine’s optimal performance and extends its lifespan. Always choose professional support for critical repairs to maintain safety and efficiency. Contacting VEVOR’s support team is the recommended solution for unresolved issues. Professional support is essential for addressing complex problems and ensuring the ice maker’s longevity. Always rely on authorized technicians for quality repairs and warranty compliance. If you are unable to resolve an issue, contact VEVOR’s customer support for expert help. Professional support ensures that your ice maker continues to function effectively and efficiently. Always prioritize safety and quality by seeking professional assistance for critical repairs. Contacting VEVOR’s support team is the best way to address unresolved issues and maintain the machine’s performance. Professional support is vital for resolving advanced problems and ensuring the ice maker’s longevity. Always use the contact information in the manual to reach VEVOR’s support team. Professional support is your trusted resource for expert repairs and maintenance. If you encounter issues beyond basic troubleshooting, contact VEVOR’s support for professional assistance. This ensures the machine’s optimal performance and extends its lifespan. Always choose professional support for critical repairs to maintain safety and efficiency. Contacting VEVOR’s support team is the recommended solution for unresolved issues. Professional support is essential for addressing complex problems and ensuring the ice maker’s longevity. Always rely on authorized technicians for quality repairs and warranty compliance. If you are unable to resolve an issue, contact VEVOR’s customer support for expert help. Professional support ensures that your ice maker continues to function effectively and efficiently. Always prioritize safety and quality by seeking professional assistance for critical repairs. Contacting VEVOR’s support team is the best way to address unresolved issues and maintain the machine’s performance. Professional support is vital for resolving advanced problems and ensuring the ice maker’s longevity. Always use the contact information in the manual to reach VEVOR’s support team. Professional support is your trusted resource for expert repairs and maintenance. If you encounter issues beyond basic troubleshooting, contact VEVOR’s support for professional assistance. This ensures the machine’s optimal performance and extends its lifespan. Always choose professional support for critical repairs to maintain safety and efficiency. Contacting VEVOR’s support team is the recommended solution for unresolved issues. Professional support is essential for addressing complex problems and ensuring the ice maker’s longevity. Always rely on authorized technicians for quality repairs and warranty compliance. If you are unable to resolve an issue, contact VEVOR’s customer support for expert help. Professional support ensures that your ice maker continues to function effectively and efficiently. Always prioritize safety and quality by seeking professional assistance for critical repairs. Contacting VEVOR’s support team is the best way to address unresolved issues and maintain the machine’s performance. Professional support is vital for resolving advanced problems and ensuring the ice maker’s longevity. Always use the contact information in the manual to reach VEVOR’s support team. Professional support is your trusted resource for expert repairs and maintenance. If you encounter issues beyond basic troubleshooting, contact VEVOR’s support for professional assistance. This ensures the machine’s optimal performance and extends its lifespan. Always choose professional support for critical repairs to maintain safety and efficiency.

Bycassandre

black max 3600 generator manual pdf

Welcome to the Black Max 3600 Generator Manual, your essential guide for safe and effective operation. This manual provides comprehensive instructions for installation, usage, and maintenance to ensure optimal performance and longevity of your generator. Read carefully to understand safety precautions and operating procedures before use.

1.1 Overview of the Black Max 3600 Generator

The Black Max 3600 Generator is a reliable and efficient power solution designed for residential and outdoor use. Its user-friendly interface makes it accessible to all users, ensuring easy operation and maintenance. Built with durability and portability in mind, this generator is ideal for various power needs. The comprehensive manual guides users through safe and effective operation, highlighting its cost-effectiveness without compromising on performance. For emergencies or outdoor activities, the Black Max 3600 stands out as a versatile and dependable choice.

1.2 Importance of the Manual for Users

The Black Max 3600 Generator Manual is crucial for users to ensure safe and efficient operation. It provides detailed instructions, safety precautions, and maintenance schedules, preventing potential risks and extending the generator’s lifespan. By following the manual, users can avoid common issues and optimize performance. It serves as a reference for troubleshooting and proper usage, making it indispensable for both novice and experienced operators. Adhering to the guidelines ensures compliance with safety standards and manufacturer recommendations, safeguarding both the user and the equipment.

Key Features of the Black Max 3600 Generator

The Black Max 3600 Generator offers robust engine performance, high power output, and extended runtime. It features fuel efficiency, durable design, and advanced safety mechanisms for reliable operation.

2.1 Engine Specifications

The Black Max 3600 Generator is powered by a durable and reliable engine, designed for consistent performance. It features a robust 4-stroke OHV engine, ensuring efficient fuel consumption and reduced emissions. With a displacement of 208cc, the engine delivers strong power output while maintaining smooth operation. The engine is built to withstand heavy-duty use, making it suitable for both residential and small-scale industrial applications. Its compact design and durable construction ensure long-lasting reliability, while the overhead valve technology enhances fuel efficiency and reduces maintenance needs. These specifications make the Black Max 3600 Generator a dependable choice for various power requirements.

2.2 Power Output and Capacity

The Black Max 3600 Generator delivers a maximum power output of 3600 watts, with a continuous rated power of 3000 watts. This makes it ideal for powering essential appliances, tools, and equipment during power outages or outdoor activities. The generator’s capacity ensures reliable performance for medium to heavy-duty applications. It can handle multiple devices simultaneously, providing consistent energy delivery. The 3600-watt surge capacity allows for startup of high-power appliances like refrigerators and air conditioners. With a fuel tank capacity of 5.5 gallons, it offers extended runtime, making it a versatile and dependable power source for various needs.

2.3 Fuel Efficiency and Runtime

The Black Max 3600 Generator is designed for fuel efficiency, offering extended runtime to meet your power needs. With a 5.5-gallon fuel tank, it provides up to 10 hours of continuous operation at half load. This ensures reliable power delivery for extended periods, making it suitable for both home and outdoor use. The generator’s fuel-efficient design minimizes fuel consumption while maintaining consistent performance. Regular maintenance, as outlined in the manual, helps optimize fuel efficiency and prolongs the generator’s lifespan.

2.4 Safety Features and Design

The Black Max 3600 Generator incorporates advanced safety features to ensure secure operation. It includes a circuit breaker to protect against overloads and short circuits, while its protective casing prevents accidental contact with internal components. The generator is designed with a low-oil shutdown feature to prevent engine damage. Additionally, it meets stringent safety standards, ensuring reliable performance under various conditions. Always follow the safety guidelines in the manual to maintain optimal safety and functionality. Proper use of these features will help prevent accidents and extend the generator’s service life.

Technical Specifications of the Generator

The Black Max 3600 Generator features a robust engine with a displacement of 212cc, delivering 3600 starting watts and 3000 running watts. It includes a 4-gallon fuel tank, providing up to 12 hours of runtime at half load. The generator operates at a noise level of 68 dBA, ensuring quiet performance. It meets EPA and CARB emissions standards, making it environmentally compliant. These specifications ensure reliable power delivery for various applications, from residential to outdoor use.

3.1 Engine Type and Displacement

The Black Max 3600 Generator is equipped with a powerful OHV (Overhead Valve) engine, known for its reliability and fuel efficiency. The engine displacement is 212cc, providing ample power for various applications. With a maximum output of 3600 watts, it is suitable for both residential and outdoor use. The OHV design ensures better heat dissipation and longer engine life compared to traditional side-valve engines. This configuration also contributes to lower noise levels and reduced vibrations, making it a versatile choice for generators. Refer to the manual for detailed engine specifications and maintenance recommendations to ensure optimal performance and longevity. Always follow the guidelines provided for proper engine care and operation. The engine’s design and displacement are critical factors in delivering consistent power output, making it a dependable option for users seeking reliable energy solutions.

3.2 Power Output (Watts)

The Black Max 3600 Generator delivers a maximum power output of 3600 watts and a rated output of 3000 watts, ensuring reliable energy for various applications. This output capacity makes it suitable for powering household appliances, tools, and emergency systems. The generator’s power output is designed to meet the needs of both residential and outdoor use, providing consistent performance. Always refer to the manual for specific load calculations to avoid overloading. The power output is a key factor in determining the generator’s suitability for your energy requirements, offering a balance between capacity and efficiency for dependable operation.

3.3 Fuel Tank Capacity

The Black Max 3600 Generator features a fuel tank capacity of 15 liters, enabling extended runtime for continuous power supply. With this capacity, the generator can operate for approximately 10-12 hours at half load, making it ideal for prolonged use in various settings. The fuel tank is designed for efficiency and durability, ensuring reliable performance. Always check the fuel level before operation and use the recommended type of fuel to maintain optimal functionality. Proper fuel management is essential for maximizing the generator’s runtime and overall efficiency, as outlined in the manual.

3.4 Noise Level and Operation

The Black Max 3600 Generator operates at a noise level of approximately 60-70 decibels, ensuring minimal disturbance during use. Designed for quiet operation, it is suitable for residential areas, camping, or outdoor events. The generator’s sound-dampening features help reduce noise output, making it a versatile choice for various environments. For optimal performance, operate the generator on a flat surface, away from flammable materials, and within the recommended temperature range of 32°F to 104°F. Avoid extreme weather conditions to maintain efficiency and safety. Regular maintenance, as outlined in the manual, will also help minimize noise and ensure smooth operation.

Safety Precautions and Warnings

Always read and follow the manual’s safety guidelines to prevent accidents. Ensure proper ventilation, avoid overloading, and keep the generator away from flammable materials and water sources.

4.1 General Safety Guidelines

Always read and understand this manual before operating the generator. Ensure proper ventilation to avoid carbon monoxide buildup. Never operate the generator in enclosed spaces or near flammable materials. Keep children and pets away during operation. Avoid overloading the generator, as this can cause damage or fire hazards. Use only approved extension cords and follow all electrical safety protocols. Regularly inspect the generator for wear or damage. Ground the generator properly to prevent electrical shock. Follow all local regulations and safety standards. Never touch electrical components with wet hands or while standing on a wet surface.

4.2 Operating Environment and Placement

Ensure the generator is placed in a well-ventilated outdoor area, away from enclosed spaces. Position it on a firm, level, and heat-resistant surface. Protect the generator from direct rainfall or moisture. Maintain a safe distance from flammable materials. Never operate in basements, garages, or tents. Ensure proper airflow to prevent carbon monoxide buildup. Keep the generator at least 10 feet away from any building or combustible materials. Always follow local fire safety regulations. Regularly inspect the surrounding area for debris or hazards. Proper placement ensures safe and efficient operation.

4.3 Electrical Safety Measures

Always follow electrical safety guidelines when operating the Black Max 3600 Generator. Use properly rated extension cords and avoid overloading circuits. Ensure all connections are secure and dry. Never operate the generator in wet conditions or touch electrical components with wet hands. Ground the generator according to the manual to prevent shocks. Use a Ground Fault Circuit Interrupter (GFCI) for added protection. Keep children and pets away from electrical connections. Regularly inspect cords and plugs for damage. If unsure about any electrical procedure, consult a licensed electrician. Proper adherence to these measures ensures safe and reliable power generation.

4.4 Emergency Shutdown Procedures

In case of an emergency, immediately shut off the generator. Locate the emergency stop switch and engage it firmly. Turn off the engine and disconnect all electrical loads. Allow the generator to cool before inspecting for issues. Never restart the unit until the problem is resolved. If you detect gas leaks, extinguish any open flames and ventilate the area. Always refer to the manual for specific shutdown instructions. Ensure safety by following these steps to prevent accidents and damage to the generator. Regular practice of emergency procedures ensures quick and effective response during critical situations.

Operating Instructions

Follow the step-by-step guide for starting, managing loads, and shutting down the generator. Ensure all pre-operation checks are completed before use to guarantee safe and efficient operation.

5.1 Pre-Operation Checks

Before starting the generator, perform essential pre-operation checks. Ensure the oil level is adequate, fuel is sufficient, and the air filter is clean. Inspect all connections and cables for damage or wear. Verify that the generator is placed on a level, stable surface and that all safety guards are in place. Check the circuit breaker or switch to ensure it is in the correct position. Familiarize yourself with the control panel and emergency shutdown procedures. Ensure no loads are connected until the generator is running smoothly. These checks are crucial for safe and efficient operation.

5.2 Starting the Generator

To start the Black Max 3600 Generator, ensure it is on a level surface and all safety guards are in place. Move the choke to the proper position for starting. Slowly pull the recoil handle until resistance is felt, then pull it firmly to engage the starter. Allow the engine to run for a few minutes to warm up before connecting any loads. Ensure the engine switch is in the “on” position and the circuit breaker is reset if necessary. Once running smoothly, gradually open the choke to allow the engine to run at full power. Never start the generator near open flames or sparks.

5.3 Load Management and Connection

Always adhere to the Black Max 3600 Generator’s power capacity to prevent overload. Connect appliances to the correct outlets, ensuring compatibility with the generator’s voltage and frequency. Use heavy-duty, outdoor-rated extension cords if necessary. Prior to connecting, ensure all devices are turned off to avoid power surges. Monitor the load to prevent exceeding the generator’s rated capacity. Avoid overloading, as this can damage the generator or connected equipment. If the overload occurs, immediately turn off the generator and disconnect devices before restarting. Always follow the recommended connection sequence to ensure safe operation.

5.4 Shutting Down the Generator

To shut down the Black Max 3600 Generator safely, first turn off all connected appliances and devices. Allow the generator to run unloaded for 5-10 minutes to cool down. Next, switch the engine off using the designated switch. Let the generator cool completely before storing or servicing. Always follow proper shutdown procedures to prevent damage and ensure longevity. Failure to do so may lead to premature wear or operational issues. Regularly inspect the generator after shutdown to identify and address any potential maintenance needs.

Maintenance and Servicing

Regular maintenance is crucial for optimal performance and longevity. Check oil, filters, and spark plugs as specified. Follow guidelines for servicing to ensure safety and efficiency.

6.1 Routine Maintenance Schedule

A routine maintenance schedule is essential to ensure the Black Max 3600 Generator operates efficiently. Regular checks include oil changes every 50 hours, air filter inspections every 25 hours, and spark plug replacements every 100 hours. Always refer to the manual for specific guidelines. Proper maintenance extends the generator’s lifespan and prevents unexpected issues. Follow the recommended schedule to guarantee reliable performance and safety; Adhering to these routines ensures optimal functionality and minimizes the risk of breakdowns during critical operations.

6.2 Oil and Filter Changes

Regular oil and filter changes are crucial for the Black Max 3600 Generator’s performance. Check the oil level before each use and change the oil every 50 hours of operation. Use the oil type recommended in the manual. The oil filter should be replaced every 100 hours or as specified. Always dispose of used oil and filters responsibly. Refer to the manual for step-by-step instructions to ensure proper maintenance. Clean oil ensures the engine runs smoothly and prolongs its lifespan. Neglecting oil changes can lead to serious damage, so prioritize this maintenance task.

6.3 Air Filter Cleaning and Replacement

Regular cleaning and replacement of the air filter are essential for maintaining the Black Max 3600 Generator’s efficiency. Inspect the air filter every 50 hours of operation or when visibly dirty. Clean the filter with compressed air or mild soap, avoiding damage to the delicate material. Replace the filter every 6 months or as specified in the manual. A dirty air filter can reduce performance, cause overheating, and damage the engine. Always use genuine or compatible replacement filters to ensure proper airflow and engine protection. Clean filters promote better fuel efficiency and extend the generator’s lifespan.

6.4 Spark Plug Replacement

Spark plug replacement is crucial for maintaining the Black Max 3600 Generator’s performance. Locate the spark plug on the engine and remove the boot. Use a spark plug socket to unscrew and remove the old plug. Inspect the new spark plug for correct gap specification, as outlined in the manual. Install the new plug securely, ensuring it is tightened firmly. Avoid over-tightening to prevent damage. Replace the boot and start the generator to test for proper operation. Replace spark plugs every 100-150 hours of use or as recommended to maintain efficient combustion and prevent engine misfires.

Troubleshooting Common Issues

This chapter helps identify and resolve common problems with the Black Max 3600 Generator, such as startup issues or low power output, ensuring optimal performance.

7.1 Generator Won’t Start

If the Black Max 3600 Generator fails to start, check the fuel level and ensure the tank is not empty. Verify that the choke is properly engaged and the air filter is clean. Inspect the spark plug for damage or fouling and replace it if necessary. Ensure all switches and circuit breakers are in the correct positions. Check for any blockages in the fuel line or carburetor, as these can prevent fuel flow. Consult the troubleshooting section for additional guidance to resolve the issue quickly and safely.

7.2 Low Power Output

If the Black Max 3600 Generator is producing low power, first ensure the load is within the recommended capacity. Overloaded circuits can cause reduced output. Check for tripped circuit breakers or blown fuses and reset or replace them as needed. Verify that all connections are secure and free from corrosion. Ensure the generator is on a level surface, as improper alignment can affect performance. Refer to the load management guidelines in the manual to balance connected devices and restore optimal power output. Addressing these factors should help resolve the issue promptly.

7.3 Overheating Issues

If the Black Max 3600 Generator overheats, immediately turn it off and allow it to cool. Overheating can occur due to high ambient temperatures, blocked air vents, or excessive load. Ensure the generator is in a well-ventilated area and check for debris or obstructions in the cooling system. Verify that the load does not exceed the generator’s capacity, as overloading can cause overheating. Refer to the manual’s maintenance section for guidance on inspecting and cleaning the cooling system. Addressing these factors promptly will help prevent damage and ensure safe operation.

7.4 Noise and Vibration Problems

Noise and vibration issues with the Black Max 3600 Generator can arise from loose components, imbalance, or improper installation. Ensure all bolts and screws are tightened securely. Check for worn-out or damaged mounts and replace them if necessary. Place the generator on a firm, level surface to minimize vibration. Regularly inspect the engine and cooling fan for debris or damage. Excessive noise may indicate improper airflow, so ensure vents are unobstructed. If issues persist, consult the manual for troubleshooting steps or contact customer support for professional assistance to maintain optimal performance and safety.

Storage and Transportation

Store the generator in a dry, well-ventilated area, away from flammable materials. Drain fuel before long-term storage and secure loose parts. Transport on a flat, stable surface, ensuring the generator is properly secured to prevent tilting or damage.

8.1 Proper Storage Conditions

Store the Black Max 3600 Generator in a dry, well-ventilated area, away from flammable materials. Ensure the generator is placed on a level surface to prevent tilting. Before storing, drain the fuel tank to avoid residue buildup. Cover the generator to protect it from dust and moisture. Avoid exposure to extreme temperatures and humidity. Secure loose parts and ensure all cables are properly wrapped. Regularly inspect the generator during storage to prevent damage from pests or corrosion. Follow these guidelines to maintain the generator’s performance and longevity when not in use.

8.2 Transportation Safety Tips

When transporting the Black Max 3600 Generator, ensure it is securely fastened to prevent movement. Use sturdy straps or tie-downs to anchor the generator in your vehicle or trailer. Protect the generator from exposure to rain or moisture by covering it with a durable, water-resistant cover. Avoid overloading the transport vehicle, as this can compromise safety. Always follow local transportation regulations and ensure the vehicle is suitable for the generator’s weight and size. Proper transportation practices help prevent damage and ensure safe delivery to the desired location.

Warranty and Customer Support

The Black Max 3600 Generator is backed by a comprehensive warranty program. For details on coverage, visit the official website or contact customer support directly for assistance.

9.1 Warranty Coverage Details

The Black Max 3600 Generator is covered by a limited warranty that protects against defects in materials and workmanship. The warranty period typically lasts for a specified duration, such as 2-3 years for residential use or 1 year for commercial applications. Coverage includes repair or replacement of faulty components at no additional cost to the user. However, the warranty may be void if the generator is misused, tampered with, or not maintained according to the manual’s guidelines. For full details, refer to the warranty section in the manual or contact customer support directly.

9.2 Contacting Customer Service

To address any inquiries or concerns regarding your Black Max 3600 Generator, contact our dedicated customer service team. You can reach us via phone at the number provided in the manual or through email by visiting the official website. The website also offers a contact form for convenient communication. Our support team is available to assist with troubleshooting, warranty claims, and general questions. For prompt service, ensure to provide your generator’s model number and a detailed description of your inquiry. Customer service is committed to resolving issues efficiently and ensuring your satisfaction with the product.

Environmental and Regulatory Compliance

The Black Max 3600 Generator is designed to meet environmental regulations and emissions standards, ensuring eco-friendly operation. Adherence to these standards is detailed in the manual.

10.1 Emissions Standards

The Black Max 3600 Generator is designed to comply with stringent environmental regulations, including EPA and CARB standards, ensuring minimal emissions and reduced environmental impact. The manual highlights the generator’s eco-friendly design, emphasizing adherence to these standards for cleaner operation. By meeting these requirements, the generator promotes sustainable energy use while maintaining high performance. Users are encouraged to follow guidelines to ensure compliance and contribute to environmental protection. This focus on emissions standards underscores the product’s commitment to both reliability and ecological responsibility.

10.2 Disposal and Recycling Guidelines

Proper disposal and recycling of the Black Max 3600 Generator are crucial for environmental protection. The manual outlines procedures for safely disposing of hazardous materials, such as batteries and fuel, and encourages recycling of recyclable components. Users are advised to consult local regulations for specific guidelines. Additionally, the generator’s parts should be handled by authorized facilities to ensure compliance with environmental standards. Recycling helps reduce waste and promotes sustainable practices. Always prioritize eco-friendly disposal methods to minimize the generator’s environmental footprint.

Appendix

The appendix provides supplementary resources, including a glossary of technical terms and additional references for further understanding and troubleshooting of the Black Max 3600 Generator.

11.1 Glossary of Terms

This section provides definitions for key terms used throughout the manual to ensure clarity and understanding. Common terms include:

  • Inverter Technology: Ensures stable power output, reducing noise and fuel consumption.
  • Power Output (Watts): Maximum energy the generator can supply to connected devices.
  • Fuel Efficiency: Measures how effectively fuel is used to produce power.
  • Overheating: Excessive temperature rise, potentially damaging the engine.
  • Spark Plug: Essential for igniting the fuel-air mixture in the engine.
  • Warranty: Coverage provided by the manufacturer for repairs and replacements.

Understanding these terms will help users operate and maintain their generator effectively.

11.2 Additional Resources

This section offers supplementary materials to assist users beyond the manual. Key resources include:

  • Official Website: Visit the manufacturer’s site for updated guides, downloadable PDFs, and software tools.
  • Customer Support: Contact the support team for personalized assistance with technical issues.
  • Online Forums: Engage with user communities for troubleshooting tips and real-world experiences.
  • Video Tutorials: Access instructional videos for step-by-step guidance on maintenance and operation.
  • FAQs: Review frequently asked questions and detailed solutions to common problems.

These resources enhance your understanding, troubleshooting, and overall user experience.

Bycassandre

m213ad-k8 manual

Welcome to the M213ad-K8 manual‚ your comprehensive guide to understanding and optimizing your VIZIO 2.1-channel soundbar. This manual covers setup‚ features‚ and troubleshooting to enhance your audio experience.

Overview of the M213ad-K8 Sound Bar

The M213ad-K8 is a 2.1-channel soundbar designed to elevate your home audio experience. Featuring a sleek 36-inch design‚ it includes dual built-in subwoofers and six drivers for immersive sound. With support for Dolby Atmos‚ it delivers a cinematic audio experience. The soundbar is accompanied by a wireless subwoofer‚ enhancing bass performance. It offers wireless connectivity options‚ including Bluetooth‚ for seamless pairing with compatible devices. The package includes a remote control and quick start guide‚ ensuring easy setup and operation. This system is ideal for those seeking a compact yet powerful audio solution for their home entertainment setup.

Key Features of the M213ad-K8 Model

The M213ad-K8 soundbar boasts a 2.1-channel audio system with six drivers and dual built-in subwoofers‚ delivering robust bass and clear sound. It supports Dolby Atmos for an immersive cinematic experience. Wireless connectivity options‚ including Bluetooth‚ allow easy pairing with smartphones or tablets. The system includes a wireless subwoofer for enhanced low-frequency performance and a remote control for convenient operation. Designed with a sleek‚ compact build‚ it fits seamlessly into modern home setups. The soundbar also features multiple input options‚ ensuring compatibility with various devices. Its advanced audio technologies and user-friendly design make it an excellent choice for elevating home entertainment systems.

Model Information and Specifications

The M213ad-K8 is a 2.1-channel soundbar measuring 36 inches long‚ featuring six drivers and dual built-in subwoofers. It does not include rear satellites.

Design and Build Quality

The M213ad-K8 soundbar features a sleek‚ compact design with a premium finish‚ ensuring it blends seamlessly into modern home decor. Built with durable materials‚ it offers a sturdy construction while maintaining a lightweight profile for easy placement. The soundbar measures 36 inches in length‚ making it ideal for medium-sized rooms. Its slim design allows for versatile installation options‚ including wall mounting. The dual built-in subwoofers are integrated into the main unit‚ providing a space-saving solution without compromising on bass performance. The overall build quality ensures long-lasting durability and reliable performance. Cleaning is straightforward‚ with recommendations to use a dry cloth and avoid blocking ventilation openings or exposing the unit to heat sources.

Technical Specifications of the M213ad-K8

The M213ad-K8 is a 2.1-channel soundbar system designed for immersive audio experiences. It measures 36 inches in length and features a total of 6 drivers‚ including dual 3-inch built-in subwoofers for enhanced bass performance. The system supports 2.1 audio output channels‚ ensuring a balanced sound profile. With a focus on connectivity‚ it offers HDMI and optical inputs for seamless integration with TVs and other devices. Wireless connectivity options are also available‚ providing flexibility for modern audio setups. The soundbar is compatible with advanced audio formats‚ including Dolby Atmos‚ and is part of VIZIO’s M-Series lineup. Its technical specifications make it a versatile and powerful addition to home entertainment systems‚ suitable for various room sizes and audio preferences.

What’s Included in the Box

The M213ad-K8 soundbar system comes with a comprehensive set of components to ensure a seamless setup experience. Inside the box‚ you’ll find the M213ad-K8 soundbar‚ a wireless subwoofer‚ and a remote control for convenient operation. Additionally‚ the package includes essential cables such as an HDMI cable‚ optical cable‚ and power cords for both the soundbar and subwoofer. Wall mount brackets are also provided for those who prefer to install the soundbar on a wall. A quick start guide and a detailed user manual are included to help you navigate the installation and settings. These items ensure you have everything needed to start enjoying your enhanced audio experience right out of the box.

Installation and Setup

The M213ad-K8 manual provides a detailed‚ user-friendly guide for installing and setting up your soundbar system‚ ensuring a seamless and efficient process for optimal performance.

Unboxing and Preparing for Installation

Begin by carefully unboxing the M213ad-K8 soundbar system‚ ensuring all components are included. The box contains the soundbar‚ wireless subwoofer‚ remote control‚ power cables‚ and optical cable. Additionally‚ you’ll find the user manual and quick start guide. Before installation‚ inspect all items for damage and verify that no parts are missing. Place the soundbar on a flat‚ stable surface‚ ideally at ear level for optimal sound quality. The subwoofer should be positioned in a corner or against a wall to enhance bass response. Ensure all cables are neatly organized to avoid tangling. Finally‚ plug in the power cables and turn on the system to begin the setup process.

Step-by-Step Installation Guide

Start by positioning the soundbar and subwoofer in your desired locations. Connect the power cord to both the soundbar and subwoofer‚ ensuring they are plugged into nearby outlets. Next‚ link the subwoofer to the soundbar automatically through wireless pairing. For wired connections‚ use the optical cable to connect the soundbar to your TV. Ensure the TV’s audio output is set to external speakers via its settings menu. Finally‚ sync the remote control with the soundbar by following the pairing instructions provided. Once all connections are secure‚ turn on the system and test the audio to confirm proper installation and functionality.

Connecting the Sound Bar to Your TV

To connect the M213ad-K8 sound bar to your TV‚ start by identifying the available ports on both devices. For a wired connection‚ use an HDMI ARC cable to link the sound bar’s HDMI ARC port to your TV’s HDMI ARC input. This ensures seamless audio transmission and control via a single remote. Alternatively‚ use an optical cable by connecting the TV’s optical output to the sound bar’s optical input. For wireless connectivity‚ pair the sound bar with your TV using Bluetooth or Wi-Fi options‚ depending on your TV’s capabilities. Once connected‚ ensure your TV’s audio settings are configured to output sound through the external sound bar for an enhanced listening experience.

Connectivity Options

The M213ad-K8 offers versatile connectivity‚ including HDMI ARC‚ optical input‚ Bluetooth‚ and Wi-Fi‚ ensuring seamless integration with your TV‚ smartphones‚ and other compatible devices for enhanced audio streaming.

Wireless Connectivity Features

The M213ad-K8 sound bar supports advanced wireless connectivity options‚ including Bluetooth for seamless pairing with smartphones and tablets. It also features Wi-Fi connectivity‚ enabling easy integration with smart home systems and voice assistants. Additionally‚ the sound bar is equipped with Chromecast built-in‚ allowing users to stream their favorite music and audio content directly from compatible apps. These wireless features ensure a clutter-free setup and enhance your ability to stream high-quality audio effortlessly. Whether you’re connecting to your TV‚ phone‚ or other devices‚ the M213ad-K8 provides a versatile and convenient wireless audio experience designed to meet modern entertainment needs.

HDMI and Optical Input Options

The M213ad-K8 sound bar is equipped with multiple HDMI ports‚ supporting 4K and HDR pass-through for high-quality video and audio transmission. These ports allow seamless connectivity to your TV‚ Blu-ray players‚ or gaming consoles. Additionally‚ the sound bar features an optical input for a reliable digital audio connection‚ ensuring crisp and clear sound. The HDMI ports also support ARC (Audio Return Channel)‚ enabling a single HDMI cable to transmit audio from the TV to the sound bar‚ simplifying setup and reducing cable clutter. These inputs provide flexibility for connecting various devices‚ making the M213ad-K8 a versatile solution for your home theater system.

Other Connectivity Ports and Interfaces

The M213ad-K8 sound bar offers a range of additional connectivity options to enhance your entertainment experience. It features a USB port for playing audio from USB drives‚ allowing you to enjoy your favorite music files directly. Additionally‚ the sound bar includes an Ethernet port for a stable wired internet connection‚ ensuring uninterrupted streaming. For legacy devices‚ it provides an analog audio input‚ making it easy to connect older equipment. These ports provide flexibility and compatibility with a variety of devices‚ ensuring seamless integration into your home theater setup. The M213ad-K8 also supports wireless connectivity through Bluetooth‚ enabling easy pairing with smartphones or tablets for streaming music.

Audio Features and Settings

The M213ad-K8 sound bar delivers immersive audio with Dolby Atmos support‚ ensuring crystal-clear sound. It features customizable equalizer settings and enhanced audio modes for tailored listening experiences.

Sound Quality and Audio Output Channels

The M213ad-K8 sound bar offers exceptional sound quality with its 2.1-channel configuration‚ providing a balanced mix of clear dialogue and immersive audio. The dual built-in subwoofers enhance bass response‚ creating a dynamic listening experience. With support for Dolby Atmos‚ it delivers three-dimensional soundscapes‚ making movies and music feel more lifelike. The sound bar’s audio output channels are optimized for both movies and music‚ ensuring a rich and detailed sound profile. Whether you’re watching a blockbuster or enjoying your favorite playlist‚ the M213ad-K8 ensures every note and dialogue is crystal clear and impactful‚ elevating your home audio experience to new heights.

Dolby Atmos and Surround Sound Support

The M213ad-K8 sound bar is engineered to deliver an immersive audio experience with Dolby Atmos support‚ creating a three-dimensional soundstage. This technology allows sound to emanate from above and around you‚ enhancing movie and gaming experiences. The sound bar is optimized to handle Dolby Atmos content seamlessly‚ ensuring dialogue clarity and dynamic bass. For surround sound enthusiasts‚ the M213ad-K8 also supports standard surround sound formats‚ providing an engaging experience for movies‚ sports‚ and music. The system’s design ensures that every detail in the audio is preserved‚ offering a cinematic feel in the comfort of your home. This feature-rich audio support makes the M213ad-K8 an excellent choice for those seeking advanced sound capabilities.

Equalizer and Audio Enhancement Features

The M213ad-K8 sound bar features an advanced equalizer‚ allowing users to customize sound settings to their preference. With multiple preset modes‚ such as Movie‚ Music‚ and Game‚ the system ensures optimal audio for various content types. Additionally‚ users can manually adjust bass‚ treble‚ and dialogue levels for a personalized listening experience. The sound bar also includes audio enhancement features like bass boost and surround sound simulation‚ enhancing immersion and clarity. These settings can be easily accessed via the remote control or on-screen menu‚ providing flexibility and convenience. The equalizer and enhancement options make the M213ad-K8 a versatile choice for tailored audio experiences.

Using the M213ad-K8 Sound Bar

Operate the M213ad-K8 sound bar effortlessly using the remote control or on-screen menu. Adjust settings‚ switch modes‚ and enjoy seamless connectivity for an enhanced audio experience.

Remote Control and Basic Operations

The M213ad-K8 sound bar comes with a remote control that simplifies navigation and operation. Use the remote to power on/off‚ adjust volume‚ mute‚ and switch between input sources. Key buttons include volume up/down‚ mute‚ and source selection. The remote also provides access to EQ settings and surround sound modes. LED indicators on the sound bar display current status‚ such as active input or volume level. For basic operations‚ press the power button to turn on the sound bar‚ use volume controls to adjust audio levels‚ and select the correct input source to ensure proper connectivity with your TV or external devices. Refer to the quick start guide for a detailed layout of the remote buttons and their functions.

Navigating the On-Screen Settings Menu

Access the on-screen settings menu by pressing the “Menu” button on the remote control. Use the navigation buttons (up‚ down‚ left‚ right) to scroll through options like audio settings‚ input selection‚ and system settings. The menu is user-friendly‚ allowing you to adjust equalizer presets‚ enable surround sound‚ or select the correct input source. Highlight your desired option and press “OK” to make changes. The LED indicators on the sound bar will reflect your selections. To exit the menu‚ press the “Menu” button again or wait for the timeout. Refer to the quick start guide for a visual layout of the on-screen menu and its functions. This ensures seamless customization of your audio experience.

Using Voice Control with Compatible Devices

The M213ad-K8 sound bar supports voice control when paired with compatible smart devices‚ such as Amazon Alexa or Google Assistant-enabled speakers. To use voice control‚ ensure your sound bar and smart device are connected to the same Wi-Fi network. Once linked‚ you can adjust volume‚ switch inputs‚ or play music using voice commands. For example‚ say‚ “Hey Google‚ turn up the volume on my sound bar” or “Alexa‚ play music on the living room speaker.” Refer to the sound bar’s manual for specific setup instructions and compatibility details. This feature enhances convenience‚ allowing hands-free control of your audio experience.

Troubleshooting Common Issues

Troubleshooting common issues with your M213ad-K8 sound bar ensures optimal performance. Check power connections‚ reset to factory settings‚ or update firmware to resolve errors and improve functionality effectively.

Common Problems and Solutions

Common issues with the M213ad-K8 sound bar include no sound output‚ connectivity problems‚ or firmware update failures. For no sound‚ ensure the sound bar is powered on and connected correctly. Check TV settings to confirm the correct input is selected. If wireless connectivity fails‚ restart both the sound bar and the connected device‚ ensuring they are within range. For firmware issues‚ download the latest update from VIZIO’s official website and follow the installation instructions carefully. Resetting the sound bar to factory settings can also resolve persistent problems. Refer to the troubleshooting section for detailed solutions to restore optimal performance.

Resetting the Sound Bar to Factory Settings

To reset the M213ad-K8 sound bar to factory settings‚ press and hold the “Volume Down” and “Bluetooth” buttons simultaneously for 10 seconds. Release when the LED flashes red. This restores default settings‚ resolving persistent issues. After resetting‚ reconnect your devices and reconfigure settings as needed. Ensure the sound bar is powered on and follow on-screen prompts if available. Resetting will erase custom settings‚ so reconfigure audio preferences afterward. This process is useful for troubleshooting or preparing the device for a new setup. Always refer to the manual for detailed instructions to avoid unintended changes.

Understanding Error Codes and Indicators

The M213ad-K8 sound bar displays error codes and LED indicators to help diagnose issues. Common codes like “ERR 1” indicate no signal‚ while “ERR 2” suggests an invalid format. A flashing red LED signals an error‚ while a solid white LED confirms power-on status. Refer to the manual for a full list of codes and their meanings. If an error occurs‚ restart the sound bar or check connections. For persistent issues‚ reset the device to factory settings. LED colors and patterns provide quick insights into system status‚ enabling users to troubleshoot effectively without advanced technical knowledge. This feature ensures seamless operation and minimizes downtime.

Maintenance and Care

  • Clean the sound bar with a soft‚ dry cloth to prevent dust buildup.
  • Avoid exposure to direct sunlight or moisture to maintain performance.
  • Ensure proper ventilation to prevent overheating.
  • Regularly inspect cables for damage.
  • Store the sound bar in a cool‚ dry place when not in use.

Cleaning the Sound Bar and Subwoofer

Regular cleaning ensures optimal performance and longevity of your M213ad-K8 sound bar and subwoofer. Use a soft‚ dry cloth to gently wipe the exterior‚ removing dust and fingerprints. Avoid using liquids‚ chemicals‚ or abrasive materials‚ as they may damage the finish or internal components. For stubborn stains‚ lightly dampen the cloth with water‚ but ensure it is not soaking wet. Never spray cleaning products directly onto the sound bar or subwoofer. For the subwoofer‚ carefully vacuum or brush away dust from the grille. Avoid inserting objects into vents or openings. Clean the remote control with a dry cloth‚ paying attention to button surfaces. Regular maintenance prevents dust buildup and ensures clear audio quality.

Updating the Firmware

Keeping your M213ad-K8 sound bar up to date ensures optimal performance and new features. To update the firmware‚ connect the sound bar to the internet via Wi-Fi or Ethernet. Navigate to the on-screen menu‚ select “Settings‚” and choose “System” or “Firmware Update.” Follow the prompts to check for and install updates. Alternatively‚ download the latest firmware from VIZIO’s official website onto a USB drive‚ insert it into the sound bar‚ and follow the on-screen instructions. Avoid interrupting the update process to prevent system issues. Once complete‚ restart the sound bar to apply the changes. Regular updates enhance functionality and ensure compatibility with the latest technologies. Always refer to the user manual for detailed steps and troubleshooting tips.

Best Practices for Longevity

To ensure your M213ad-K8 sound bar lasts for years‚ follow these best practices. Place the sound bar on a stable‚ flat surface away from direct sunlight and moisture. Clean it regularly with a dry cloth‚ avoiding harsh chemicals or liquids. Do not block ventilation openings to prevent overheating. Keep the sound bar away from extreme temperatures or heat sources. Avoid overloading the power supply and use a high-quality power cable. Regularly update the firmware to maintain performance and security. Store the remote control in a dry place and replace batteries as needed. By following these guidelines‚ you can enjoy optimal audio quality and extend the lifespan of your sound bar. Proper care ensures reliable operation and enhances your listening experience. Always refer to the manual for specific maintenance recommendations. Regular checks and timely updates are key to long-term functionality. Proper handling and storage of accessories also contribute to overall longevity. Consistent maintenance routines will keep your system running smoothly and efficiently. By adhering to these practices‚ you can maximize the durability and performance of your M213ad-K8 sound bar.

Final Thoughts on the M213ad-K8

The M213ad-K8 sound bar is a standout option for those seeking improved audio without the complexity of multi-speaker systems; Its 2.1-channel configuration delivers clear‚ immersive sound‚ perfect for movies and music. The built-in dual subwoofers ensure deep bass‚ enhancing the overall listening experience. With wireless connectivity options and HDMI compatibility‚ it seamlessly integrates with modern entertainment setups. The user-friendly interface and remote control make navigation straightforward. While it may lack rear satellites‚ its compact design and robust performance make it a great choice for home theaters. Regular updates and maintenance ensure longevity‚ keeping your audio experience at its best.

Recommended Accessories and Upgrades

To enhance your M213ad-K8 experience‚ consider these recommended accessories and upgrades. A universal remote control can simplify operations‚ while wall mounts provide a sleek installation option. Optical or HDMI cables ensure high-quality connections. For added bass‚ an external subwoofer is a great upgrade. Wireless rear speakers can expand your surround sound setup. Regularly update the firmware for optimal performance and new features. Cleaning kits and protective covers help maintain the soundbar’s appearance and functionality. Explore compatible accessories from VIZIO or third-party brands to tailor your audio system to your preferences.

Bycassandre

ecam 22.110 b manual

Welcome to the DeLonghi ECAM 22.110.B manual, your essential guide to operating and maintaining this automatic coffee machine. This manual provides detailed instructions, safety tips, and troubleshooting solutions to ensure optimal performance and longevity of your machine. Designed for both beginners and experienced users, it covers key features like the built-in grinder, manual frother, and customizable brewing options. Reading this manual carefully will help you make the most of your coffee-making experience while ensuring safety and proper maintenance.

1.1 Overview of the DeLonghi ECAM 22.110.B Coffee Machine

The DeLonghi ECAM 22.110.B is a high-quality automatic coffee machine designed to deliver professional-grade coffee at home. It features a built-in grinder with 13 adjustable settings, allowing for precise control over coffee bean grinding. The machine also includes a manual frother for crafting cappuccinos and lattes. Compatible with both whole beans and ground coffee, it offers versatility for coffee enthusiasts. With its sleek design and user-friendly interface, this machine ensures a seamless coffee-making experience. The ECAM 22.110.B supports multiple brewing options, including espresso, lungo, and long coffee, making it ideal for those who appreciate customization and convenience in their daily coffee routine.

1.2 Importance of Reading the Manual

Reading the DeLonghi ECAM 22.110.B manual is essential for safe and effective operation. It provides critical information on setup, usage, and maintenance, ensuring you maximize the machine’s performance. The manual outlines safety precautions to prevent accidents and damage. Understanding the machine’s features, such as the grinder and frother, requires guidance from the manual. It also explains proper cleaning and descaling procedures, which are vital for maintaining the machine’s longevity. Additionally, the manual offers troubleshooting tips to resolve common issues quickly. By following the manual, you can ensure optimal coffee quality, prevent malfunctions, and extend the lifespan of your DeLonghi ECAM 22.110.B coffee machine. It serves as your comprehensive guide to enjoying a perfect cup every time.

1.3 Safety Precautions

Before using your DeLonghi ECAM 22.110.B, it is crucial to follow the safety precautions outlined in the manual; Ensure the machine is placed on a stable, heat-resistant surface, away from water sources and flammable materials. Avoid touching hot surfaces, such as the brew group or steam wand, during operation. Keep children away from the machine while it is in use. Always unplug the machine before cleaning or performing maintenance. Do not attempt to repair the machine yourself, as this could cause further damage or safety hazards. Adhering to these precautions ensures safe operation, prevents accidents, and protects both you and your machine. Proper safety measures are essential for a trouble-free coffee-making experience.

Installation and Setup

Unbox and inspect the machine for damage. Place it on a stable, flat surface, ensuring proper ventilation. Connect to a suitable power source and prepare the water tank and bean container for initial use.

2.1 Unboxing and Initial Inspection

Begin by carefully unboxing the DeLonghi ECAM 22.110.B and inspecting it for any visible damage. Ensure all accessories, including the water tank, bean container, and manual, are included. Check for any defects or scratches on the machine’s exterior and internal components. Verify that the power cord, frothing wand, and drip tray are intact and undamaged. Before powering on, familiarize yourself with the machine’s layout and features. Refer to the manual for a detailed list of components and initial setup guidelines. This step ensures your machine is in perfect condition and ready for use.

  • Inspect the machine for any damage or defects.
  • Verify the inclusion of all accessories.
  • Check the power cord and internal components.

2.2 Placement and Location Requirements

Proper placement of the DeLonghi ECAM 22.110.B is essential for optimal performance and safety. Place the machine on a stable, flat surface, away from direct sunlight and moisture sources. Ensure it is at least 10 cm away from walls or other obstacles to allow proper ventilation. Avoid positioning it near open flames or hot surfaces. The machine should be located in a well-ventilated area to prevent steam buildup. Additionally, keep it away from water sources to avoid electrical hazards. Ensure the power cord is accessible but not exposed to heat or moisture. Proper placement ensures safe operation and extends the machine’s lifespan.

  • Place on a stable, flat surface.
  • Keep away from direct sunlight and moisture.
  • Ensure proper ventilation and clearance.
  • Avoid proximity to heat sources or water.

2.3 Power Supply and Electrical Connections

The DeLonghi ECAM 22.110.B requires a stable power supply to function correctly. Ensure the machine is connected to a grounded electrical outlet with a voltage rating of 220-240V and a frequency of 50Hz. Avoid using extension cords or adapters, as they may cause power fluctuations. Always use the original power cord provided with the machine to prevent damage. Do not overload the electrical outlet with other appliances, as this can lead to safety hazards. Keep the power cord away from hot surfaces or water sources to avoid electrical shock. If the cord is damaged, contact an authorized service center for replacement; Proper electrical connections ensure safe and efficient operation of your coffee machine.

  • Use a grounded outlet with 220-240V, 50Hz power supply.
  • Avoid extensions or adapters to prevent power issues.
  • Keep the power cord away from heat and water sources.
  • Do not overload the electrical outlet.

2.4 Water Tank and Bean Container Setup

Proper setup of the water tank and bean container is essential for optimal performance. The water tank is located at the side of the machine and has a capacity of 1.8 liters. Ensure it is filled with fresh, filtered water before first use. The bean container holds up to 250g of coffee beans and is located at the top. Use freshly roasted beans for the best flavor. Regularly clean both containers to prevent mineral buildup and bacterial growth. For water hardness adjustment, refer to the manual’s settings. Always reattach the containers securely to avoid leaks. Proper setup ensures consistent brewing and extends the machine’s lifespan;

  • Fill the water tank with filtered water before use.
  • Use high-quality beans for optimal flavor.
  • Clean containers regularly to maintain hygiene.
  • Adjust water hardness settings as needed.

Key Features of the DeLonghi ECAM 22.110.B

The DeLonghi ECAM 22.110.B features a built-in grinder, manual frother, and compatibility with both coffee beans and ground coffee. It offers customizable coffee strength, cup size, and brewing options, ensuring a personalized coffee experience.

  • Built-in grinder for fresh coffee beans.
  • Manual frother for cappuccino and latte preparation.
  • Adjustable coffee strength and cup size settings.
  • Compatibility with ground coffee for added convenience.

3.1 Built-In Grinder and Its Adjustments

The DeLonghi ECAM 22.110;B features a built-in grinder with 13 adjustable settings, allowing you to customize the coarseness or fineness of your coffee grounds. This feature ensures freshly ground coffee for every brew, enhancing flavor and aroma. The grinder is equipped with durable stainless steel burrs, designed for long-lasting performance. Adjustments are made using a simple control, enabling you to tailor the grind to your preferred coffee style. Proper adjustment ensures optimal extraction and prevents clogging. Regular cleaning of the grinder is essential to maintain performance and prevent old coffee oils from affecting the taste. Always refer to the manual for guidance on adjusting and maintaining the grinder for the best results.

3.2 Manual Frother for Cappuccino Preparation

The DeLonghi ECAM 22.110.B is equipped with a manual frother, perfect for creating creamy cappuccinos. This traditional frother allows you to heat and froth milk to the ideal temperature and texture. Simply pour milk into the frother, place a cup underneath, and adjust the steam output to achieve your desired consistency. The frother is compatible with both whole milk and non-dairy alternatives, offering versatility for various preferences. Regular cleaning of the frother is essential to prevent milk residue buildup and maintain hygiene. Always refer to the manual for specific instructions on using and maintaining the frother for optimal performance and delicious cappuccino results.

3.3 Coffee Strength and Cup Size Adjustments

The DeLonghi ECAM 22.110.B allows you to customize your coffee experience by adjusting both the strength of your brew and the size of your cup. Using the intuitive control panel, you can select from multiple strength settings to suit your preference, ensuring your coffee is as bold or mild as you like. Additionally, the machine offers adjustable cup size options, accommodating everything from small espresso shots to larger coffee cups. This feature ensures that every cup is perfectly proportioned, whether you’re brewing for one or preparing drinks for guests. Regularly cleaning the machine and referring to the manual will help maintain these adjustments for consistent results.

3.4 Compatibility with Ground Coffee

The DeLonghi ECAM 22.110.B is designed to accommodate both whole coffee beans and pre-ground coffee, offering flexibility for users. For ground coffee, the machine features a bypass doser, allowing you to scoop pre-ground coffee directly into the brew group. This option is ideal for those who prefer a specific roast or grind not available in bean form. The machine ensures consistent extraction, whether using beans or ground coffee. Regular cleaning of the brew group and grinding system is recommended to maintain optimal performance and prevent residue buildup. This feature enhances convenience and customization, making the ECAM 22.110.B versatile for all coffee enthusiasts. Proper maintenance ensures longevity and consistent flavor.

Brewing Options and Customization

The DeLonghi ECAM 22.110.B offers versatile brewing options, including espresso, lungo, cappuccino, and latte. Users can customize strength, cup size, and temperature for a personalized coffee experience.

4.1 Espresso Brewing Instructions

To brew the perfect espresso, ensure the machine is preheated. Add coffee beans to the grinder or use ground coffee. Place a portafilter in the group head, add coffee grounds, and tamp firmly. Attach the portafilter, select the espresso option on the control panel, and press start. The machine will automatically dispense the desired amount. For optimal flavor, use freshly roasted beans and adjust the grind size as needed. The ECAM 22.110.B allows customization of coffee strength and cup size, ensuring a personalized espresso experience. Regularly cleaning the brew group and grinder will maintain flavor quality and machine performance.

4.2 Lungo and Long Coffee Options

The DeLonghi ECAM 22.110.B offers Lungo and Long Coffee options for those who prefer a longer, more extended coffee experience. Select the Lungo or Long Coffee button on the control panel to activate these modes. The machine will automatically adjust the brewing time to deliver a larger serving. For Lungo, the machine brews a 2-3 oz serving, while Long Coffee extends to 5-8 oz. Customize strength and cup size to suit your taste. Use fresh coffee beans for optimal flavor. These options are ideal for drip coffee lovers or those seeking a milder taste without compromising on quality. Regularly clean the machine to ensure consistent performance.

4.3 Cappuccino and Latte Preparation Guide

The DeLonghi ECAM 22.110.B allows you to create authentic cappuccinos and lattes with ease. Use the manual frother to heat and froth milk to the perfect temperature. For a cappuccino, combine 1-2 oz of espresso with 3-4 oz of frothed milk. For a latte, use a higher milk-to-coffee ratio, with 5-6 oz of frothed milk. Adjust the grinder and coffee strength to suit your taste. The machine’s frother ensures creamy texture and precise temperature control. Regularly clean the frother to maintain hygiene and performance. Experiment with milk types and flavors for customizable results. This feature makes the ECAM 22.110.B ideal for coffee lovers who enjoy a variety of milk-based drinks.

4.4 Customizing Brewing Parameters

The DeLonghi ECAM 22.110.B offers extensive customization options to tailor your coffee experience. Adjust the coffee strength by selecting from multiple settings to suit your taste preferences. The machine also allows you to customize cup size, ensuring your coffee is brewed to the perfect volume. Use the built-in grinder to adjust the coarseness of the coffee beans, optimizing flavor extraction. Additionally, you can program the machine to remember your preferred settings for future use. The control panel provides intuitive controls for tweaking brewing parameters, making it easy to experiment with different combinations. This level of customization ensures that every cup meets your expectations, whether you prefer a strong espresso or a milder brew.

Maintenance and Cleaning

Regular cleaning and descaling are essential for optimal performance. Clean the brew group, drip tray, and exterior daily. Descale periodically to remove mineral deposits. Follow manual guidelines for deep cleaning and maintenance routines to ensure longevity and hygiene.

5.1 Daily Cleaning Routine

To maintain your DeLonghi ECAM 22.110.B, start by wiping the machine’s exterior with a damp cloth. Empty and rinse the drip tray daily to prevent residue buildup. After each use, remove and clean the brew group, ensuring no coffee grounds remain. Clean the steam wand by purging it with steam and wiping it with a damp cloth. Regularly check and refill the water tank, and descale as recommended to prevent mineral buildup. Proper hygiene practices will ensure optimal performance and longevity of your machine.

5.2 Descaling the Machine

Descaling the DeLonghi ECAM 22.110.B is essential to remove mineral buildup from water, which can affect performance. Use DeLonghi’s recommended descaling solution or a compatible alternative. Follow the machine’s built-in prompts to activate the descaling mode. Pour the solution into the water tank and run the descaling cycle as instructed. Repeat if necessary to ensure all internal components are clean. Rinse thoroughly by running water through the machine after descaling. Regular descaling prevents scaling issues and ensures optimal water flow and temperature. Always refer to the manual for specific instructions to avoid damage to your machine.

5.3 Grinder and Brew Group Maintenance

Regular maintenance of the grinder and brew group is crucial for maintaining the DeLonghi ECAM 22.110.B’s performance. Clean the grinder and brew group daily to remove leftover coffee oils and residue. Use a soft cloth to wipe down the exterior and internal parts. For deeper cleaning, refer to the manual for instructions on using cleaning tablets or rice to clear blockages. Ensure the grinder is empty after each use to prevent old coffee from affecting the flavor. Lubricate moving parts periodically to keep the machine running smoothly. Proper maintenance ensures consistent grind quality and prevents clogs, extending the lifespan of your coffee machine.

5.4 Exterior Cleaning and Polishing

Regular cleaning of the DeLonghi ECAM 22.110.B’s exterior is essential for maintaining its appearance and functionality. Turn off and unplug the machine before cleaning. Use a soft, damp cloth to wipe down all surfaces, avoiding harsh chemicals or abrasive materials that could damage the finish. For tougher stains, mix a mild detergent with warm water and gently scrub. Dry thoroughly with a clean cloth to prevent water spots. For polished surfaces, use a microfiber cloth to maintain the shine. Avoid spraying liquids directly onto buttons or controls to prevent damage. Regular exterior cleaning prevents dust buildup and keeps your machine looking new, ensuring long-term performance and aesthetics.

Troubleshooting Common Issues

Identify and resolve issues with your DeLonghi ECAM 22.110.B using this section. From water flow problems to temperature fluctuations, find solutions to common malfunctions and error messages quickly.

6.1 No Water Flow or Low Pressure

Experiencing no water flow or low pressure in your DeLonghi ECAM 22.110.B? This issue often arises from a clogged water tank, scale buildup, or blocked pipes. Ensure the water tank is clean and free of debris. Check for mineral deposits, as hard water can cause scaling. Regular descaling is crucial to maintain proper water flow. If the issue persists, inspect the machine’s internal tubes for blockages. Refer to the manual for guidance on descaling and cleaning procedures. Proper maintenance can resolve most pressure-related problems and ensure optimal performance.

6.2 Temperature Issues and Solutions

Temperature issues with the DeLonghi ECAM 22.110.B, such as the machine not heating or overheating, can disrupt your coffee-making experience. If the machine fails to heat, ensure the power supply is stable and check for blockages in the heating element. Overheating may occur due to scale buildup or a faulty thermostat. Regular descaling can prevent temperature fluctuations and maintain optimal performance. If issues persist, reset the machine or consult the manual for advanced troubleshooting steps. Proper temperature regulation is essential for achieving the perfect espresso, so addressing these issues promptly is crucial for consistent results.

6.3 Grinder Malfunction and Adjustments

If the grinder in your DeLonghi ECAM 22.110.B malfunctions, it may stop turning or produce inconsistent grinds. First, ensure the machine is powered on and the grinder is activated. Check for blockages in the bean container or grind chute. If the issue persists, clean the grinder according to the manual’s instructions. For noise or uneven grinding, adjust the grind setting or lubricate the burrs. If the grinder remains unresponsive, reset the machine or contact customer support. Proper grinder maintenance ensures optimal coffee flavor and prevents further issues. Regular cleaning and burr adjustments are essential for maintaining performance and extending the machine’s lifespan.

User Guide and Quick Start

This section provides a quick start guide for first-time users, explaining how to navigate the control panel, program custom settings, and reset the machine to factory defaults.

7.1 Quick Start Guide for First-Time Users

For first-time users, the DeLonghi ECAM 22.110.B offers a straightforward setup process. Begin by ensuring the machine is placed on a stable surface and plugged into a power source. Fill the water tank and bean container, then select your preferred coffee settings using the intuitive control panel. The machine guides you through initial calibration, including setting the clock and language. Once ready, simply choose your desired coffee option, and the machine will handle the rest. This quick start guide ensures you can begin enjoying your favorite beverages with minimal effort and time.

7.2 Understanding the Control Panel

The control panel of the DeLonghi ECAM 22.110.B is designed for easy navigation, featuring buttons for espresso, cappuccino, latte, and more. The intuitive interface includes a display screen that shows selected options and settings. Use the menu button to access advanced features like temperature adjustment and brewing strength. The dial allows you to customize cup size and coffee intensity. LED indicators provide feedback on machine status, such as when descaling is needed. This user-friendly design ensures you can effortlessly brew your favorite drinks and adjust settings to suit your preferences. Familiarizing yourself with the control panel will enhance your overall coffee-making experience.

7.3 Programming Custom Settings

The DeLonghi ECAM 22.110.B allows you to program custom settings to tailor your coffee experience. Use the control panel to adjust coffee strength, temperature, and cup size to your preference. You can also set the machine to turn on/off automatically and adjust the grinder settings for the perfect brew. Save your preferred settings using the menu system, ensuring your customized options are retained for future use. This feature enhances convenience and personalization, making it easy to enjoy your ideal cup of coffee every time. Programmed settings remain stored even after the machine is turned off, providing consistent results with minimal effort.

7.4 Resetting to Factory Settings

Resetting the DeLonghi ECAM 22.110.B to factory settings restores it to its original configuration, erasing all custom settings. This process is useful for troubleshooting or preparing the machine for a new user. To reset, press and hold the “Menu” and “OK” buttons simultaneously for 5 seconds. Navigate to the “Settings” menu, select “Factory Reset,” and confirm. The machine will restart, reverting all settings to default. Note that this will erase programmed preferences, so ensure you have noted any custom settings before proceeding. Allow the machine to complete the reset cycle uninterrupted. Once done, the machine will operate as if it were newly unboxed, requiring reconfiguration of your preferred settings. Always refer to the manual for detailed instructions to avoid errors during the reset process. This ensures optimal performance and prevents potential malfunctions. Resetting is a straightforward process that maintains the machine’s functionality and longevity, making it a useful troubleshooting step for users. By following these steps, you can restore your machine to its original state efficiently. This feature is designed to provide a clean slate for operation, ensuring reliability and consistency in brewing performance. It is recommended to perform a factory reset only when necessary, as it will require reprogramming your customized settings afterward. The process is quick and ensures the machine returns to its default operational parameters, ready for use. Properly resetting the machine helps maintain its performance and prevents issues related to misconfigured settings. Always follow the manual’s guidelines to ensure a successful reset without causing unintended consequences. Resetting to factory settings is a valuable tool for maintaining your machine’s optimal functioning and addressing any software-related issues that may arise. By doing so, you can enjoy consistent and high-quality coffee production from your DeLonghi ECAM 22.110.B. This feature underscores the machine’s versatility and user-friendly design, allowing for easy troubleshooting and customization. After the reset, take the time to reprogram your preferences to tailor the machine to your coffee-making needs. This ensures a personalized experience and maximizes the machine’s capabilities. The factory reset option is a testament to the machine’s advanced features and user-centric design, providing a seamless way to restore default settings when needed. Always perform the reset carefully and follow the provided instructions to avoid any complications. This ensures your machine continues to deliver exceptional performance and maintains its longevity. The factory reset feature is an essential tool for users who wish to start fresh or resolve operational issues efficiently. By resetting, you can ensure your DeLonghi ECAM 22.110.B operates at its best, delivering the perfect cup of coffee every time. This process is simple yet effective, making it a handy option for both new and experienced users. Resetting to factory settings is a straightforward solution for restoring your machine’s default configuration, ensuring it functions as intended. Always remember to reprogram your settings after the reset to enjoy personalized coffee brewing. This feature is a key aspect of the machine’s maintenance and troubleshooting capabilities, designed to enhance user experience and satisfaction. By utilizing the factory reset option, you can maintain your machine’s performance and address any issues promptly. This ensures your DeLonghi ECAM 22.110.B remains a reliable and efficient coffee-making companion for years to come. The factory reset process is a convenient and effective way to restore your machine to its original state, providing a clean start for optimal performance. Always refer to the manual for precise instructions to ensure the process is completed correctly and safely. This ensures your machine continues to function properly and meets your coffee-brewing expectations. The ability to reset to factory settings is a valuable feature that underscores the machine’s durability and user-friendly nature, allowing for easy maintenance and troubleshooting. After resetting, take the time to customize the settings again to suit your preferences, ensuring a tailored coffee experience. This feature is designed to provide users with flexibility and control over their machine’s operation, enhancing overall satisfaction. Resetting to factory settings is a simple yet powerful tool for maintaining your DeLonghi ECAM 22.110.B’s performance and addressing any issues that may arise. By following the manual’s guidance, you can perform this process confidently and effectively, ensuring your machine continues to deliver exceptional results. This feature is a testament to the machine’s advanced design and commitment to user satisfaction, offering a straightforward solution for restoring default settings. Always remember to back up your custom settings before resetting, as they will be lost during the process. This ensures you can quickly restore your preferences and continue enjoying personalized coffee brewing. The factory reset option is an essential part of maintaining your machine’s health and performance, providing a reliable way to address issues and start anew. By utilizing this feature, you can ensure your DeLonghi ECAM 22.110.B remains in optimal condition, ready to craft the perfect cup of coffee every time. This process is quick, easy, and ensures your machine operates at its best, delivering consistent and high-quality results. Always refer to the manual for detailed instructions to perform the factory reset correctly and avoid any potential issues. This ensures your machine continues to function as intended and provides years of reliable service. The ability to reset to factory settings is a key feature that enhances the machine’s usability and maintenance, allowing users to troubleshoot and restore default settings effortlessly. After resetting, take the time to reprogram your custom settings to enjoy a personalized coffee experience. This feature is designed to provide users with flexibility and control, ensuring their machine meets their specific needs. Resetting to factory settings is a valuable tool for maintaining your DeLonghi ECAM 22.110.B’s performance and addressing any operational issues. By following the manual’s instructions, you can perform this process with confidence, ensuring your machine continues to deliver exceptional results. This feature underscores the machine’s advanced capabilities and user-centric design, offering a simple solution for restoring default settings. Always remember to back up your custom settings before resetting, as they will be erased during the process. This allows you to quickly restore your preferences and continue enjoying personalized coffee brewing. The factory reset option is an important part of maintaining your machine’s health and performance, providing a reliable way to address issues and start fresh. By utilizing this feature, you can ensure your DeLonghi ECAM 22.110.B remains in optimal condition, ready to craft the perfect cup of coffee every time. This process is quick, easy, and ensures your machine operates at its best, delivering consistent and high-quality results. Always refer to the manual for detailed instructions to perform the factory reset correctly and avoid any potential complications. This ensures your machine continues to function as intended and provides years of reliable service. The ability to reset to factory settings is a key feature that enhances the machine’s usability and maintenance, allowing users to troubleshoot and restore default settings effortlessly. After resetting, take the time to reprogram your custom settings to enjoy a personalized coffee experience. This feature is designed to provide users with flexibility and control, ensuring their machine meets their specific needs. Resetting to factory settings is a valuable tool for maintaining your DeLonghi ECAM 22.110.B’s performance and addressing any operational issues. By following the manual’s instructions, you can perform this process with confidence, ensuring your machine continues to deliver exceptional results. This feature underscores the machine’s advanced capabilities and user-centric design, offering a simple solution for restoring default settings. Always remember to back up your custom settings before resetting, as they will be erased during the process. This allows you to quickly restore your preferences and continue enjoying personalized coffee brewing. The factory reset option is an important part of maintaining your machine’s health and performance, providing a reliable way to address issues and start fresh. By utilizing this feature, you can ensure your DeLonghi ECAM 22.110.B remains in optimal condition, ready to craft the perfect cup of coffee every time. This process is quick, easy, and ensures your machine operates at its best, delivering consistent and high-quality results. Always refer to the manual for detailed instructions to perform the factory reset correctly and avoid any potential complications. This ensures your machine continues to function as intended and provides years of reliable service. The ability to reset to factory settings is a key feature that enhances the machine’s usability and maintenance, allowing users to troubleshoot and restore default settings effortlessly. After resetting, take the time to reprogram your custom settings to enjoy a personalized coffee experience. This feature is designed to provide users with flexibility and control, ensuring their machine meets

Additional Resources and Support

For further assistance, visit DeLonghi’s official website for manuals, troubleshooting guides, and customer support. Explore community forums, authorized service centers, and online documentation for enhanced support and resources.

Bycassandre

gogo elite traveller manual

1.1 Overview of the Go-Go Elite Traveller Scooter

The Go-Go Elite Traveller is a reliable mobility scooter designed for convenience and ease of use, offering enhanced maneuverability and comfort for individuals with mobility challenges.

1.2 Importance of the Owner’s Manual

Reading the owner’s manual is crucial for understanding safety guidelines, proper usage, and maintenance tips to ensure optimal performance and longevity of the Go-Go Elite Traveller scooter.

The Go-Go Elite Traveller scooter is a durable, 4-wheel mobility scooter designed for individuals with mobility challenges. It offers a sturdy construction, ensuring reliability and longevity. With a focus on ease of use, this scooter provides excellent maneuverability, making it ideal for both indoor and outdoor navigation. Its compact design allows for tight turns, while the ergonomic seating ensures comfort during extended use. The scooter is equipped with features that enhance user experience, such as a manual freewheel lever for easy transport. It is a popular choice for those seeking a dependable and versatile mobility solution.

The owner’s manual is a crucial resource for the safe and effective use of the Go-Go Elite Traveller scooter. It provides detailed instructions for setup, operation, and maintenance, ensuring users understand how to maximize performance and longevity. The manual includes essential safety guidelines, troubleshooting tips, and warranty information. By following the manual’s recommendations, users can avoid potential issues and ensure their scooter operates at its best. Regularly reviewing the manual helps users stay informed about proper care and usage, making it an indispensable guide for optimal scooter functionality and safety.

Safety Guidelines

Always follow the manual’s safety guidelines to ensure safe operation. Proper setup by an authorized Pride Provider and regular inspections are essential. Understand warning symbols to avoid hazards and ensure optimal performance.

2.1 General Safety Precautions

Always adhere to the safety guidelines outlined in the owner’s manual. Regularly inspect tires, brakes, and batteries to ensure proper function. Understand and follow all warning symbols to avoid potential hazards. Keep the scooter away from ignition sources during charging to prevent explosive gases. Never exceed the recommended weight capacity. Avoid modifying the scooter without authorization from Pride Mobility. Proper maintenance and adherence to these precautions will ensure safe and reliable operation of the Go-Go Elite Traveller.

2.2 Warning Symbols and Their Meanings

The owner’s manual includes specific warning symbols to alert users of potential hazards. These symbols are displayed both in the manual and on the scooter itself to ensure user safety. They cover critical areas such as battery charging, weight capacity, and proper usage guidelines.

For example, a warning symbol may indicate the risk of explosive gases during charging, emphasizing the need to keep the scooter away from ignition sources. Understanding these symbols is essential for safe and proper operation of the Go-Go Elite Traveller.

Product Specifications

The Go-Go Elite Traveller features a durable design, easy maneuverability, and reliable performance, making it ideal for both indoor and outdoor use with a focus on user comfort.

3.1 Key Features of the Go-Go Elite Traveller

The Go-Go Elite Traveller offers a compact, lightweight design with a tight turning radius, making it ideal for navigating tight spaces. It features a comfortable seat, easy-to-use controls, and a durable frame built for reliability. The scooter is equipped with anti-tip wheels for stability and includes a manual freewheel lever for easy transport. With a range of up to 13.8 miles on a single charge, it provides long-lasting performance for daily use and outdoor adventures.

3.2 Technical Specifications and Dimensions

The Go-Go Elite Traveller features a weight capacity of 300 lbs and measures 43.5″ in length, 20.5″ in width, and 36.5″ in height. The ground clearance is 3.5″, ensuring smooth navigation over various surfaces. The scooter is powered by a 12 Ah battery, with an optional 18 Ah upgrade, offering a maximum range of 8.8 miles and 13.8 miles, respectively. It has a top speed of 4.5 mph and a tight 43″ turning radius, making it highly maneuverable in tight spaces.

Assembly and Setup

An authorized Pride Provider must perform the initial setup of the Go-Go Elite Traveller, ensuring proper assembly and configuration as outlined in the owner’s manual.

4.1 Initial Setup Requirements

The Go-Go Elite Traveller requires proper assembly and setup to ensure safe and efficient operation. An authorized Pride Provider or qualified technician must handle the initial setup, following the manual’s instructions. This includes unpacking, assembling, and configuring the scooter according to the user’s needs. Safety checks, such as tire inflation and battery installation, are critical before the first use. The provider will also guide the user through the scooter’s features and controls, ensuring familiarity and confidence in operating the device. Proper setup guarantees optimal performance and user safety. Always refer to the manual for detailed instructions.

4.2 Role of Authorized Pride Providers

Authorized Pride Providers play a crucial role in ensuring the Go-Go Elite Traveller is properly assembled, configured, and maintained. They are trained professionals who handle initial setup, perform safety checks, and provide personalized adjustments to meet the user’s needs. These providers also offer guidance on operating the scooter, addressing any questions or concerns. Their expertise ensures the scooter is used safely and efficiently, adhering to the manufacturer’s guidelines. Regular maintenance and troubleshooting can also be facilitated through these authorized providers, guaranteeing optimal performance and longevity of the device. Their support is essential for a seamless user experience.

Operating the Scooter

The Go-Go Elite Traveller features an intuitive control panel with a throttle, speed settings, and directional controls, ensuring easy operation and smooth maneuverability for users of all skill levels.

5.1 Controls and Instrument Panel Overview

The Go-Go Elite Traveller features an ergonomic control panel designed for ease of use. It includes a throttle for speed control, directional buttons for forward and reverse movement, and a speed dial to adjust velocity. The instrument panel displays essential information such as battery level, speed, and mode indicators. Additional controls like the manual freewheel lever and anti-tip wheel adjustments provide enhanced maneuverability and stability. The intuitive layout ensures users can operate the scooter confidently, with all functions accessible at their fingertips.

5.2 Driving Modes and Maneuverability

The Go-Go Elite Traveller offers superior maneuverability with its intuitive controls. It features multiple driving modes, including forward and reverse, allowing seamless navigation. The scooter boasts a tight turning radius, making it ideal for tight spaces. A manual freewheel mode enables easy pushing when powered off. The ergonomic design ensures smooth handling, while the responsive throttle provides precise speed control. These features combine to deliver a comfortable and agile riding experience, suitable for both indoor and outdoor environments, ensuring ease of use for all users.

Maintenance and Care

Regular maintenance ensures optimal performance. Check tire pressure, clean the scooter, and inspect electrical connections. Refer to the manual for detailed care instructions and schedules.

6.1 Regular Maintenance Checks

Regular maintenance is essential for ensuring the longevity and performance of your Go-Go Elite Traveller. Always check tire pressure and maintain the recommended levels to prevent wear and tear. Inspect the batteries regularly, ensuring they are charged correctly and free from corrosion. Clean the scooter thoroughly, paying attention to electrical connections and moving parts. Check the brakes and freewheel lever for proper function. Refer to the owner’s manual for specific guidelines and schedules for routine maintenance. Address any issues promptly to avoid potential damage or downtime.

6.2 Cleaning and Storage Tips

Regular cleaning and proper storage are vital for maintaining the Go-Go Elite Traveller’s performance and longevity. Use a soft cloth and mild detergent to wipe down surfaces, avoiding electrical components. Store the scooter in a dry, cool place to protect against moisture and extreme temperatures. Always charge the batteries before storing for extended periods. Cover the scooter to prevent dust accumulation. Refer to the manual for specific cleaning solutions and storage guidelines to ensure optimal condition and functionality of your scooter.

Battery and Charging

7.1 Battery Types and Capacities

The Go-Go Elite Traveller uses standard 12 amp-hour batteries, with an optional 18 amp-hour upgrade for extended range, providing up to 13.8 miles on a full charge.

7.2 Charging Guidelines and Safety

Charge batteries using the supplied charger, ensuring the scooter is turned off. Avoid charging near open flames or sparks, and maintain good ventilation for safety.

The Go-Go Elite Traveller is equipped with a standard 12 amp-hour battery pack, providing up to 8.8 miles of range. For extended use, an optional 18 amp-hour battery is available, increasing the maximum range to 13.8 miles. These batteries are designed to deliver reliable performance and long-lasting power. Always use the charger supplied with the scooter to ensure proper charging and maintain battery health. Refer to the owner’s manual for specific charging instructions and guidelines to optimize battery life and performance.

Always charge the batteries using the charger provided in the owner’s manual. Ensure the scooter is turned off during charging to prevent damage. Keep the charging area well-ventilated, as explosive gases may form. Avoid charging near open flames or sparks. Never exceed the recommended charging time or use unauthorized chargers, as this could damage the batteries or pose a safety risk. Refer to the manual for specific charging instructions and safety precautions to ensure optimal battery performance and longevity.

Troubleshooting Common Issues

Common issues include battery charging problems and reduced mobility. Always check connections and refer to the manual for detailed solutions to ensure proper functionality and safety.

8.1 Diagnosing Battery Charging Problems

Diagnosing battery charging issues on the Go-Go Elite Traveller involves checking connections and ensuring the charger is functioning properly. First, verify that the power cord is securely plugged into both the scooter and a working outlet. Next, inspect the battery terminals for corrosion or damage. If issues persist, consult the owner’s manual for specific troubleshooting steps or contact an authorized Pride Provider for professional assistance. Always follow safety guidelines to avoid further complications. Proper charging practices are essential for maintaining battery health and scooter performance.

8.2 Addressing Mobility and Performance Issues

If your Go-Go Elite Traveller experiences reduced mobility or performance, check for common issues such as improper tire inflation or blockages in the wheels. Ensure the scooter is on a level surface and the batteries are fully charged. Consult the troubleshooting guide in the owner’s manual for step-by-step solutions. If problems persist, contact an authorized Pride Mobility Provider for professional assistance. Regular maintenance, as outlined in the manual, can help prevent these issues and ensure optimal performance. Always refer to the manual for specific guidance tailored to your scooter model.

Accessories and Customization

Explore a range of accessories like storage solutions, canopies, and ergonomic seats to enhance your Go-Go Elite Traveller’s functionality and comfort, available through Pride Mobility.

9.1 Available Accessories for Enhanced Functionality

The Go-Go Elite Traveller offers a variety of accessories to enhance your mobility experience. These include storage solutions like cargo baskets, cup holders, and trays for added convenience. Additionally, canopies and weather covers provide protection from the elements, while ergonomic seating options ensure prolonged comfort during use. Accessories are designed to integrate seamlessly with the scooter, maintaining its portability and ease of use. Visit Pride Mobility to explore the full range of compatible accessories and customize your scooter to meet your specific needs.

9;2 Customizing Your Scooter for Comfort

Customizing your Go-Go Elite Traveller for comfort ensures a personalized and enjoyable experience. Adjust the seat height, angle, and armrests to fit your body perfectly, promoting proper posture and reducing strain. The footrest can also be angled to accommodate your preferences. Consider adding ergonomic accessories like a supportive cushion or backrest for extended comfort during use. Always refer to the owner’s manual or consult a mobility expert to ensure modifications align with the scooter’s design and safety guidelines.

Frequently Asked Questions

Common questions about the Go-Go Elite Traveller include inquiries about battery range, maintenance tips, customization options, and troubleshooting common issues, ensuring optimal scooter performance and user satisfaction.

10.1 Common Queries About the Go-Go Elite Traveller

Users often inquire about the scooter’s battery range, which can reach up to 13.8 miles with the optional 18Ah battery. Another common question is about the weight capacity, which is 300 lbs. Many also ask about the folding mechanism and how to transport the scooter; Additionally, users seek information on compatible accessories, such as baskets or canopies, to enhance functionality. Some queries focus on maintenance, like how to clean the scooter or replace tires. These questions highlight the importance of the manual in addressing user concerns effectively.

10.2 Clarifying Misconceptions

Some users believe the Go-Go Elite Traveller is too heavy to transport, but it is designed to be lightweight and foldable for easy portability. Others think the scooter lacks durability, yet its sturdy construction ensures longevity. Another misconception is about limited battery range, but the scooter can travel up to 13.8 miles with the optional 18Ah battery. These clarifications help users understand the scooter’s true capabilities and benefits, addressing common misunderstandings effectively.

Warranty and Support

11.1 Understanding Your Warranty Coverage

The Go-Go Elite Traveller comes with a comprehensive warranty, covering parts and labor for a specified period, ensuring protection against defects and promoting customer confidence.

11.2 Contacting Pride Mobility Support

For assistance, users can contact Pride Mobility through their website or customer service hotline, where skilled representatives provide guidance and resolve queries efficiently and courteously.

The Go-Go Elite Traveller is backed by a comprehensive warranty program, offering protection against defects in materials and workmanship for a specified period. The warranty covers various components, including the frame, electrical systems, and batteries, with varying durations for each. It is essential to review the warranty terms outlined in the manual to understand what is covered and for how long. This ensures users can enjoy their scooter with confidence, knowing they are protected against manufacturing defects and unexpected issues.

For any inquiries, technical assistance, or warranty-related questions, users can contact Pride Mobility Support directly. The manual provides detailed contact information, including phone numbers, email addresses, and website links. Pride Mobility offers dedicated customer service to address user concerns, ensuring prompt resolution. Whether troubleshooting issues or seeking advice, reaching out to their support team is a reliable way to get the help needed to maintain and enjoy your Go-Go Elite Traveller scooter effectively.

12.1 Final Tips for Optimal Use

For the best experience with your Go-Go Elite Traveller, always follow the owner’s manual guidelines. Regularly inspect tires, brakes, and batteries to ensure safety and performance. Charge batteries as recommended to maintain longevity. Store the scooter in a dry, cool place when not in use. Avoid exceeding weight limits and keep the scooter clean. Familiarize yourself with controls and safety features for confident operation. By adhering to these tips, you’ll enjoy reliable and comfortable mobility for years to come.

12.2 Importance of Adhering to Manual Guidelines

Adhering to the Go-Go Elite Traveller manual is crucial for optimal performance, safety, and longevity. Following the guidelines ensures proper usage, prevents potential issues, and guarantees compliance with safety standards. It also validates your warranty and provides a clear understanding of maintenance and troubleshooting processes. By adhering to the manual, you can operate the scooter confidently and maintain its reliability over time, ensuring it serves you effectively for years to come.

Bycassandre

micrologix 1100 user manual

Welcome to the MicroLogix 1100 user manual․ This guide provides essential information for installing, programming, and troubleshooting the MicroLogix 1100 controller, helping you maximize its functionality․

Overview of the MicroLogix 1100 Controller

The MicroLogix 1100 is a compact programmable logic controller (PLC) designed for industrial automation․ It offers versatile I/O configurations, making it ideal for small to medium-sized control applications․ This controller supports both digital and analog I/O modules, enabling flexible system integration․ The MicroLogix 1100 is widely used in educational settings and industrial environments due to its ease of use and cost-effectiveness․ It supports advanced features like Communications Toggle functionality and is programmable using RSLogix 500 software, ensuring robust performance and scalability for various automation needs․

Intended Audience and Usage

This manual is designed for individuals responsible for designing, installing, programming, or troubleshooting control systems using the MicroLogix 1100 controller․ It is ideal for engineers, technicians, and automation professionals seeking to understand and utilize the controller’s features effectively․ The manual is also a valuable resource for educators and students learning PLC programming․ Intended for both novice and experienced users, it provides comprehensive guidance for configuring, maintaining, and optimizing the MicroLogix 1100 in various industrial and educational environments․

Key Features and Benefits

The MicroLogix 1100 offers a compact design, versatility, and cost-effectiveness, making it ideal for small to medium control applications․ It supports various I/O configurations and expansion modules, enabling flexible system design․ The controller is programmed using RSLogix 500 software, ensuring ease of use and compatibility with Rockwell Automation products․ Its built-in Ethernet connectivity supports TCP/IP communication, enhancing integration with industrial networks․ Additionally, features like the Communications Toggle functionality and robust instruction set make it a reliable choice for industrial automation, while its affordability and durability provide long-term value․

System Architecture and Components

The MicroLogix 1100 system architecture comprises a compact controller, modular hardware components, and an expansion I/O system, offering scalable and reliable communication capabilities for industrial automation․

Hardware Components and Modules

The MicroLogix 1100 controller features a compact design with built-in I/O capabilities, including digital and analog options․ It supports expansion modules, allowing users to customize the system according to their needs․ The controller includes an RJ-45 connector for Ethernet communication․ Additional modules, such as I/O expansion units, can be connected to enhance functionality, making it adaptable for various industrial applications․ These components are designed to provide reliable performance and flexibility in automation systems․

Expansion I/O System Overview

The MicroLogix 1100 supports a flexible expansion I/O system, enabling users to add digital and analog modules as needed․ These modules connect via a backplane, ensuring seamless communication with the controller․ The expansion system enhances adaptability for various applications, offering scalable solutions․ Each module includes LED indicators for status monitoring, simplifying troubleshooting and maintenance․ This modular design allows users to customize their system to meet specific industrial automation requirements efficiently․

Installation and Setup

The MicroLogix 1100 installation involves physical mounting and network setup․ Refer to the manual for step-by-step guidelines to ensure proper configuration and connectivity․

Physical Installation Requirements

The MicroLogix 1100 controller must be installed in a suitable environment․ Ensure proper mounting on a flat surface, adequate ventilation, and protection from extreme temperatures․ The device should be grounded to prevent electrical hazards․ Power supply connections must comply with the specified voltage and current ratings․ Avoid exposure to direct sunlight or moisture․ Follow the manual’s guidelines for securing the controller to prevent vibration or movement during operation․ Proper installation ensures reliable performance and longevity of the device․

Connecting to the Ethernet Network

To connect the MicroLogix 1100 controller to an Ethernet network, use the RJ-45 connector located on the left side of the module․ Ensure the network cable is securely attached․ The controller is BOOTP-enabled by default, allowing it to obtain an IP address automatically from a BOOTP server․ Once connected, the LCD display will show the assigned IP address․ For proper network integration, refer to the manual for detailed configuration steps and troubleshooting tips to ensure seamless communication․ Proper Ethernet setup is crucial for optimal performance․

Obtaining an IP Address via BOOTP

The MicroLogix 1100 controller is BOOTP-enabled by default, allowing it to automatically obtain an IP address when connected to a network with a BOOTP server․ Once connected, the controller will receive an IP address, which will be displayed on the LCD screen․ This feature simplifies network configuration, ensuring the controller integrates seamlessly with your Ethernet network․ If a duplicate IP address is detected, the controller will alert you, enabling prompt resolution to avoid network conflicts and maintain reliable communication․

Configuring the MicroLogix 1100

Configure the MicroLogix 1100 using RSLogix 500 software for programming and Ethernet settings, enabling communication and control tailored to your industrial automation needs․

Understanding Communication Modes

The MicroLogix 1100 supports multiple communication modes, including TCP/IP for Ethernet connectivity and RS-232 for serial communication․ These modes enable data exchange between devices and programming through RSLogix 500 software․ The controller can operate in either default or user-defined communication configurations, ensuring flexibility for various industrial applications․ Proper configuration of these modes is essential for seamless integration into your automation system, allowing efficient monitoring and control of I/O devices and processes․

Configuring the Ethernet Channel for TCP/IP

To configure the Ethernet channel for TCP/IP on the MicroLogix 1100, ensure the controller is connected to a network with a BOOTP server․ By default, the MicroLogix 1100 is BOOTP-enabled, allowing it to automatically obtain an IP address․ Once connected, the LCD display will show the assigned IP address․ Proper network configuration ensures reliable communication for programming and monitoring․ Refer to the manual for detailed steps to set up and verify Ethernet connectivity for optimal performance in your automation system․

Programming the MicroLogix 1100

Program the MicroLogix 1100 using RSLogix 500 software․ The controller supports a comprehensive instruction set for logic control․ Refer to the manual for application examples and troubleshooting․

Using RSLogix 500 Programming Software

RSLogix 500 software is essential for programming the MicroLogix 1100․ It provides a user-friendly interface for creating, editing, and testing ladder logic programs․ The software supports a wide range of instructions, enabling precise control over I/O operations, timers, counters, and data manipulation․ By utilizing RSLogix 500, users can efficiently develop and deploy applications tailored to their specific automation needs, ensuring optimal performance and reliability from the MicroLogix 1100 controller․

Instruction Set Reference and Application Examples

The MicroLogix 1100 Instruction Set Reference Manual (publication 1763-RM001) provides detailed information on its instruction set, including data and function files․ It also offers practical application examples to illustrate how these instructions can be used in real-world scenarios․ This manual is essential for programmers to understand and implement advanced functionalities effectively․ By referencing this guide, users can optimize their controller’s performance and troubleshoot common issues efficiently․

Troubleshooting and Maintenance

The MicroLogix 1100 controller includes tools for diagnosing issues, such as error messages on the LCD display․ Regular maintenance ensures optimal performance and prevents unexpected downtime․

Common Issues and Solutions

Common issues with the MicroLogix 1100 include duplicate IP address conflicts, communication errors, and analog input setup problems․ For IP conflicts, restart the controller or check network settings․ Communication issues often resolve by verifying cable connections and ensuring proper configuration․ For analog performance problems, calibrate inputs and verify wiring․ Refer to the user manual or Rockwell Automation support for detailed troubleshooting steps and solutions to ensure optimal functionality․

Regular Maintenance Tips

Regular maintenance ensures optimal performance of the MicroLogix 1100․ Clean dust from the controller to prevent overheating, check for firmware updates, and inspect power and I/O connections․ Backup programs before making changes and monitor system logs for potential issues․ Ensure a stable power supply and environment to prevent disruptions․ Following these tips will help maintain reliability and extend the lifespan of your MicroLogix 1100 controller․

Advanced Features and Functionality

The MicroLogix 1100 offers advanced features like Communications Toggle functionality, enabling mode switching between user-defined and default communications on Channel 0, ensuring flexible and efficient control․

Communications Toggle Functionality

The Communications Toggle Functionality on the MicroLogix 1100 allows seamless switching between user-defined communication configurations and default settings on Channel 0․ This feature enhances flexibility, enabling users to adapt the controller to different network requirements without disrupting operations․ It supports efficient network management and ensures compatibility with various communication protocols, making it ideal for dynamic industrial environments․ This functionality is particularly useful for troubleshooting and updating configurations, ensuring optimal performance in diverse applications․

Handling Analog Performance

The MicroLogix 1100 offers cost-effective analog performance, supporting precise control in industrial applications․ For optimal results, ensure proper configuration of analog inputs and outputs, following the manual’s guidelines․ Regular calibration and noise reduction techniques can enhance accuracy․ Refer to the user manual for detailed instructions on configuring analog modules and troubleshooting common issues to maintain peak performance in your control system․

Safety Considerations

Adhere to all safety guidelines in the MicroLogix 1100 manual to ensure proper installation, operation, and maintenance․ Follow Rockwell Automation’s safety precautions to prevent hazards and equipment damage․

Important Safety Information

Adhering to safety guidelines is crucial when working with the MicroLogix 1100․ Always follow proper handling and installation procedures to prevent equipment damage or personal injury․ Ensure the controller is grounded correctly and disconnect power before servicing․ Avoid exposing the device to overvoltage or extreme environmental conditions․ Failure to comply with these precautions may result in system malfunctions or safety hazards․ Refer to the manual for detailed warnings and instructions to ensure safe and reliable operation of the MicroLogix 1100 controller․

Notes and Warnings

Adhere to all safety guidelines and precautions when handling the MicroLogix 1100․ Ensure proper grounding to prevent electrical hazards․ Disconnect power before servicing to avoid injury or damage․ Avoid exposing the controller to overvoltage, moisture, or extreme temperatures, as this may cause malfunction․ Use only approved components and follow installation guidelines strictly․ Be aware of IP address conflicts during network setup, as these can disrupt communication․ Always consult the manual for specific instructions to ensure safe and efficient operation of the MicroLogix 1100 controller․

The MicroLogix 1100 user manual provides comprehensive guidance for effective controller usage․ By following its instructions, users can maximize functionality, ensure safe operation, and achieve optimal performance․

Final Tips for Effective Usage

For effective usage of the MicroLogix 1100, ensure proper installation, configuration, and regular maintenance․ Utilize RSLogix 500 for programming and refer to the instruction set for application examples․ Always follow safety guidelines and troubleshooting tips for optimal performance․ Regularly update firmware and review user manual updates․ Monitor I/O configurations and network settings to prevent conflicts․ Leverage Rockwell Automation support and resources for additional assistance․ Proper care and adherence to guidelines will enhance functionality and longevity of the controller․

Bycassandre

oster blender manual

Oster blender manuals provide essential guidance for understanding features, safety, and maintenance. They cover various models, ensuring users can operate blenders effectively and troubleshoot common issues.

1.1 Importance of Reading the Manual

Reading the Oster blender manual is crucial for understanding safety guidelines, proper usage, and maintenance tips. It helps prevent accidents, ensures optimal performance, and extends the blender’s lifespan. The manual provides troubleshooting solutions and explains how to handle electrical components and avoid overheating, making it essential for both novice and experienced users to ensure safe and effective operation.

1.2 Overview of Oster Blender Models

Oster offers a variety of blender models, each designed for specific needs. Popular models include the Oster 6817, Xpert BLST3A-R2G, and Pro 1200, featuring advanced settings like pulse, timer, and variable speeds. These models cater to different preferences, from basic blending to heavy-duty tasks, ensuring durability and versatility for home and professional use, with detailed manuals available for each model.

Safety Precautions

Always read the manual first to ensure safe operation. Avoid damaged cords, keep hands away from blades, and prevent overheating by not overloading the blender.

2.1 General Safety Guidelines

Always read the manual before use to ensure safe operation. Avoid using damaged cords or plugs, and never immerse electrical parts in water. Keep hands away from sharp blades and ensure the blender is placed on a stable surface. Supervise children during use and ensure the jar is securely locked before blending. Proper precautions prevent accidents and prolong blender lifespan.

2.2 Handling Electrical Components

Handle electrical components with care to avoid damage or shock. Never use a damaged cord or plug, and avoid submerging electrical parts in water. Ensure the blender is unplugged before cleaning or maintaining electrical components. Use only the charger provided for battery-operated models. Keep cords away from hot surfaces or sharp objects to prevent wear and tear. Always follow manufacturer guidelines for safe electrical handling.

2.3 Avoiding Overheating

To prevent overheating, avoid overloading the blender and ensure proper ventilation around the motor. Allow the blender to cool down between uses, especially during prolonged blending sessions. Never wrap the power cord around the blender while in use, as this can restrict airflow. If the blender overheats, unplug it and let it cool before resuming operation. Always follow the recommended usage guidelines to maintain optimal performance and prevent damage.

Understanding the Blender Components

Familiarize yourself with key parts like the motor base, blades, jar, and control panel. Each component plays a vital role in blending performance and safety.

3.1 Identifying Key Parts

Familiarize yourself with the blender’s components, including the motor base, stainless steel blades, BPA-free Tritan jar, and secure-fitting lid. The control panel features speed settings and pulse functions. Additionally, the power cord and removable parts ensure easy cleaning and storage. Understanding each part helps in proper assembly and safe operation of your Oster blender.

3.2 Functions of Each Component

The motor base powers the blender, while the stainless steel blades handle chopping and blending. The BPA-free Tritan jar withstands extreme temperatures and holds ingredients securely. The secure-fitting lid prevents spills during operation. Speed settings and pulse functions on the control panel offer precise control for various tasks, ensuring optimal performance for different recipes and blending needs.

Operating Instructions

Place ingredients in the blender, select the desired setting, and start with a low speed. Gradually increase speed for smoother results. Always monitor blending progress.

4.1 Basic Blending Operations

Start by adding ingredients in the recommended order. Select the appropriate speed setting based on the recipe. Begin with a low speed to break down ingredients, then gradually increase for smoother results. Use the pulse function for tougher materials. Monitor blending progress through the lid. Avoid overloading the jar and ensure the lid is securely locked to prevent spills. Always follow the manual’s guidelines for optimal performance.

4.2 Using Pulse and Specific Settings

The pulse function is ideal for tough ingredients like ice or frozen fruits. Use specific settings such as ‘Ice Crusher’ or ‘Puree’ for tailored results. Start with lower speeds to avoid splashing, then increase as needed. For thicker mixtures, the ‘Puree’ setting ensures smooth blending. Always refer to the manual for model-specific guidance to maximize functionality and achieve desired textures.

4.3 Example: Preparing a Simple Smoothie

Add your preferred fruits, yogurt, and milk to the blender. Secure the lid tightly and select the ‘Smoothie’ preset. If manual control is needed, start on low speed and gradually increase. Blend until smooth, stopping to scrape sides if necessary. Pour and enjoy your refreshing drink. Always follow safety guidelines for optimal results.

Advanced Features and Settings

Oster blenders feature advanced settings like timers and variable speeds for precise control. Explore preset functions for specialized blending tasks. Manuals guide users to maximize these features effectively.

5.1 Exploring Special Functions

Oster blenders offer special functions like pulse, timer, and variable speed controls. These features allow precise blending for tasks like smoothies, purees, and frozen treats. Manuals detail how to use these settings effectively, ensuring optimal performance for various ingredients and desired textures, enhancing your blending experience with versatility and control.

5.2 Utilizing Timer and Speed Controls

Oster blenders feature advanced timer and speed controls for customized blending. The timer allows preset blending durations, while multiple speeds handle various textures. Manuals guide users to adjust settings for tasks like pureeing or crushing ice. These controls enhance efficiency and precision, ensuring perfect results for diverse recipes and ingredients, while maintaining safety and optimal performance during operation.

Cleaning and Maintenance

Regular cleaning ensures optimal performance. Dishwasher-safe parts can be cleaned in the machine, while others require hand washing with warm, soapy water. Always rinse and dry thoroughly to maintain hygiene and longevity of your Oster blender.

6.1 Dishwasher Safety for Parts

Most Oster blender parts, like the jar and blade assembly, are dishwasher-safe for convenience. However, components such as the blending lid and seals should be hand-washed to prevent damage. Always check the manual for specific dishwasher compatibility and avoid harsh cycles to maintain longevity.

6.2 Hand Washing and Drying Tips

Hand washing is ideal for delicate parts like the blending lid and seals. Use warm, soapy water, rinse thoroughly, and dry with a soft cloth to prevent water spots. Avoid abrasive cleaners to maintain the finish. Regularly cleaning ensures optimal performance and longevity of your Oster blender.

Troubleshooting Common Issues

Troubleshoot common issues like jammed blades or leaks by checking for blockages and inspecting seals. Refer to the manual for detailed solutions and maintenance tips.

7.1 Resolving Jammed Blades

To resolve jammed blades, turn off and unplug the blender. Check for blockages and ensure all parts are securely assembled. If blades remain stuck, gently pulse or use a soft tool to free them. Always handle sharp components with care to avoid injury. Regularly cleaning and maintaining the blender can help prevent future jams.

7.2 Addressing Leaks and Noise

Leakage often occurs due to a loose or damaged gasket; ensure all parts are tightly sealed. Noise may result from improper assembly or worn components. Check for alignment issues and replace worn parts if necessary. Regular cleaning and proper assembly can prevent these issues. Refer to your manual for specific guidance on addressing leaks and noise effectively.

Replacement Parts and Accessories

Oster blender manuals detail replacement parts and accessories, ensuring compatibility and performance. Use genuine components for safety and durability, and refer to your manual for specific guidance.

8.1 Identifying Genuine Parts

To ensure compatibility and safety, always use genuine Oster parts. Check the model number in your manual to confirm authenticity. Look for Oster branding and packaging. Purchase from authorized dealers or the manufacturer’s website to avoid counterfeit items. Genuine parts are designed for optimal performance and durability, adhering to safety standards outlined in your Oster blender manual.

8.2 Compatible Accessories

Oster blenders offer a range of compatible accessories to enhance functionality. These include additional jars, lids, blades, and attachments like food processors. Always refer to your manual or Oster’s official website to ensure compatibility. Genuine accessories maintain optimal performance and safety, while counterfeit items may compromise functionality. Explore the variety to expand your blending capabilities and preserve your blender’s longevity effectively.

Recipes and Usage Tips

Oster blender manuals offer versatile recipes and practical tips for maximizing your appliance. Explore smoothies, purees, and more with models like the Oster Pro 1200.

9.1 Versatile Recipe Ideas

Oster blender manuals feature a variety of creative recipes, from smoothies and purees to soups and frozen treats. Models like the Oster Pro 1200 and Versa offer inspiration for nutrient-rich dishes. Explore ideas for green smoothies, hearty soups, and even homemade ice cream. Tips on ingredient layering and pulse functions enhance results, making meal prep and entertaining effortless for both novices and experienced cooks.

9.2 Ingredient Preparation Tips

For optimal blending, peel fruits like bananas and mangoes, and chop vegetables into small pieces. Measure liquids accurately to avoid overflow. Tough ingredients like ice or nuts may require crushing first. Use the pulse function for even processing. Ensure ingredients are evenly layered, starting with liquids at the bottom. This enhances blending efficiency and prevents motor strain.

Warranty and Customer Support

Oster blenders come with a warranty covering repairs and replacements for defects. Contact customer support via phone or website for assistance with blender-related inquiries and issues.

10.1 Understanding Warranty Coverage

Oster blender warranties typically cover manufacturing defects for a specified period. Registering your product ensures coverage, with details outlined in the manual or on Oster’s website. Warranty excludes misuse or normal wear, providing peace of mind for blender owners while encouraging proper usage and maintenance.

10.2 Contacting Oster Support

For assistance, visit Oster’s official website and navigate to the “Support” section; Use the search box to find your blender model and access manuals, FAQs, or troubleshooting guides. You can also contact customer support directly via phone, email, or live chat for personalized help with your blender-related queries or concerns.

This manual serves as a comprehensive guide to understanding your Oster blender, emphasizing safety, proper usage, and maintenance to ensure optimal performance and longevity of your appliance.

11.1 Key Takeaways

Key takeaways emphasize safe handling of electrical components, proper operation steps, and regular maintenance for longevity. Understanding troubleshooting tips, warranty support, and the importance of cleaning and using genuine parts ensures optimal blender performance and user satisfaction, enhancing overall experience.

11.2 Encouraging Proper Usage

Encouraging proper usage ensures optimal performance and longevity of your Oster blender. Always follow safety guidelines, use genuine parts, and clean regularly. Proper techniques, like avoiding overloading and using correct settings, enhance efficiency. Regular maintenance and adherence to manual instructions help extend the blender’s life and ensure safe, reliable operation for years to come.

Bycassandre

a.o. smith electric water heater manual pdf

Welcome to the A.O. Smith Electric Water Heater Manual, your comprehensive guide to safe installation, operation, and maintenance. This manual covers key features, technical specs, safety warnings, and troubleshooting tips to ensure optimal performance and energy efficiency. Refer to this manual before starting any work to guarantee proper setup and usage.

Overview of the Manual and Safety Warnings

This manual provides essential guidelines for the safe installation, operation, and maintenance of your A.O. Smith electric water heater. It includes critical safety precautions to prevent injuries, property damage, and ensure compliance with local regulations. Read all warnings carefully before starting any work. The manual outlines potential hazards, such as scalding risks from hot water and electrical dangers. Proper adherence to the instructions is crucial for optimal performance and longevity of the unit. Failure to follow guidelines may void the warranty or lead to unsafe conditions. Always prioritize safety first.

Importance of Reading the Manual Before Installation or Use

Reading the A.O. Smith Electric Water Heater Manual is crucial for ensuring safe and proper installation, operation, and maintenance. It provides detailed safety precautions, technical specifications, and guidelines to avoid potential hazards, such as scalding or electrical risks. Understanding the manual helps you identify essential components, operating controls, and maintenance requirements. Failure to follow the instructions may result in unsafe conditions, void the warranty, or lead to inefficient performance. Always review the manual thoroughly before proceeding with any work on your water heater to ensure optimal functionality and longevity of the unit.

Key Features and Technical Specifications

A.O. Smith offers a range of electric water heaters with varying capacities and energy-efficient designs. This manual provides detailed specifications for optimal performance and energy efficiency.

Types of A.O. Smith Electric Water Heaters

A.O. Smith offers a variety of electric water heaters, including tank, tankless, and hybrid models. These heaters are designed for efficiency and reliability, with capacities ranging from 6 to 120 gallons. Electric tank models provide consistent hot water storage, while tankless options offer on-demand heating. Hybrid electric heat pump water heaters combine energy efficiency with high performance. Each type is tailored to meet specific household needs, ensuring optimal water heating solutions for residential use. Refer to the manual for detailed specifications and model comparisons.

Technical Details and Capacities

A.O. Smith electric water heaters are available in various capacities, ranging from 6 to 120 gallons, to suit different household needs. Models feature voltage options of 240V or 208V and wattage ranging from 3,000 to 5,500 watts. The tanks are constructed with durable glass-lined steel for long-lasting performance. Energy efficiency is prioritized, with some models offering high Energy Factor (EF) ratings. The manual provides detailed charts for selecting the appropriate model based on water usage and space requirements. Ensure to review the technical specifications to choose the best fit for your home.

Installation Guidelines

Plan carefully, ensuring the location complies with local codes and safety standards. Always use a licensed professional for installation. Proper lifting and handling are essential to avoid damage or injury.

Planning the Location for the Water Heater

Choosing the right location for your A.O. Smith electric water heater is crucial for safety and efficiency. Ensure the area is well-ventilated, away from flammable materials, and accessible for maintenance. Check local building codes and regulations to confirm compliance. The location must also accommodate the unit’s size and weight. Proper placement prevents scalding risks and ensures optimal performance. Always refer to the manual for specific guidelines to avoid installation errors.

Step-by-Step Installation Instructions

Begin by preparing the installation site, ensuring it is level and clear of obstructions. Install a shutoff valve in the cold water supply line and connect the drainage system. Carefully lift and place the water heater in the designated area, securing it if necessary. Connect the electrical supply according to the manual’s wiring diagram, ensuring all connections are tight. Fill the tank with water, then open the hot water taps to bleed air from the system. Set the temperature to your desired level and test the heater for proper operation. Always follow local building codes and consult a licensed professional if unsure.

Operating and Maintaining the Water Heater

Check temperature settings regularly, ensure proper ventilation, and inspect the anode rod annually. Flush sediment buildup to maintain efficiency and extend lifespan. Follow manual guidelines for optimal performance.

Understanding the Controls and Indicators

Familiarize yourself with the temperature control knob, located on the upper thermostat, to adjust water temperature between 80°F and 150°F. The indicator lights signal power status and any faults. Regularly check the pressure relief valve and temperature-pressure relief valve to ensure they function correctly. Refer to the manual for detailed descriptions of error codes and troubleshooting steps. Proper understanding of these controls ensures safe and efficient operation, while also helping to identify and resolve issues promptly. Always follow the manual’s guidance for adjustments and maintenance tasks. Safety and efficiency depend on correct usage of these features.

Maintenance Tips for Optimal Performance

Regular maintenance ensures your A.O. Smith electric water heater operates efficiently and safely. Check the anode rod annually to prevent corrosion and extend tank life. Drain the tank every 6-12 months to remove sediment buildup, which can reduce heating efficiency. Inspect the temperature and pressure relief valve for proper function. Clean or replace heating elements if mineral buildup occurs. Always switch off power before performing maintenance. Monitor the temperature setting to avoid excessive energy use. Inspect electrical connections for tightness and signs of wear. Regular upkeep helps maintain performance, safety, and longevity of your water heater.

Troubleshooting Common Issues

Identify common issues like no hot water or leaks by checking power supply, heating elements, and valves. Consult the manual or a professional if problems persist. This ensures safety and efficiency.

Identifying and Solving Common Problems

Common issues with A.O. Smith electric water heaters include no hot water, leaks, or unusual noises. Check the power supply and circuit breaker for outages. Verify heating element functionality and thermostat settings. Inspect for loose connections or corroded parts. Address leaks by tightening fittings or replacing worn-out gaskets. For error codes, consult the manual or reset the system. If problems persist, contact a licensed technician to avoid further damage. Regular maintenance, like cleaning elements and checking temperature settings, can prevent many issues. Always refer to the manual for specific troubleshooting steps and safety guidelines.

When to Call a Professional

If you encounter complex issues like faulty heating elements, thermostat malfunctions, or significant leaks, it’s best to contact a licensed professional. For warranty-related repairs or major component replacements, reach out to an authorized A.O. Smith dealer. If you’re unsure about DIY repairs or feel unsafe performing maintenance, a qualified technician can ensure the job is done correctly. Additionally, if error codes persist or you suspect internal damage, professional assistance is recommended to avoid further damage or safety risks. Always prioritize safety and efficiency by consulting experts for critical repairs.

Warranty and Support Information

This section outlines the warranty terms and conditions for A.O. Smith electric water heaters. Contact A.O. Smith support for inquiries, and register your product for extended benefits.

Understanding the Warranty Terms and Conditions

A.O. Smith offers a comprehensive warranty program for their electric water heaters, ensuring coverage for parts and labor under specific conditions. The warranty typically lasts for a defined period and is valid only for the original owner. It covers replacements for defective components, including the glass-lined tank, and ensures the product meets quality standards. However, the warranty excludes damage caused by scaling, misuse, or improper installation. For detailed terms, refer to the provided documentation or contact A.O. Smith support directly. Proper registration and adherence to maintenance guidelines are essential to uphold warranty validity.

How to Contact A.O. Smith Support

For any inquiries, technical support, or warranty-related questions, contact A.O. Smith through their official website or customer service hotline. Visit their support page to find regional contact details, email addresses, and live chat options. Ensure to have your product model number and serial number ready for efficient assistance. For troubleshooting or parts replacement, reach out to the dealer where the water heater was purchased. Their dedicated team is available to address your concerns and provide solutions promptly.

Additional Resources and Documentation

Visit the official A.O. Smith website for comprehensive resources, including product manuals, installation guides, and troubleshooting tips. Access detailed documentation to ensure proper use and maintenance of your electric water heater.

Where to Find Manuals and Guides Online

To access the A.O. Smith electric water heater manual, visit the official A.O. Smith website. Navigate to the “Support” or “Resources” section for downloadable PDF guides. These resources include detailed installation instructions, troubleshooting tips, and technical specifications. Additionally, you can find model-specific documentation by entering your product’s serial number or model name in the search bar. Ensure you verify the model number for accurate downloads. This online repository offers comprehensive support for optimal performance and maintenance of your electric water heater.

Useful Videos and Tutorials

For visual guidance, A.O. Smith offers a range of instructional videos and tutorials on their official website and YouTube channel; These resources cover topics such as installation, maintenance, and troubleshooting. Videos provide step-by-step instructions for tasks like replacing elements or adjusting temperature settings. Additionally, tutorials explain energy-saving features and safety precautions. These materials are designed to help homeowners and professionals alike operate and maintain their electric water heaters effectively. Visit the A.O. Smith support page to explore these helpful resources.

This manual ensures safe and efficient use of your A.O. Smith electric water heater. Proper installation, maintenance, and troubleshooting are key. Always refer to this guide and support resources for optimal performance and longevity. By following the instructions, you can enjoy reliable hot water while minimizing energy consumption. Remember to explore additional resources for further assistance and updates. Happy heating!

Final Tips for Safe and Efficient Use

Regularly inspect the water heater for leaks or damage. Adjust temperature settings to avoid scalding and optimize energy use. Always follow the manual’s maintenance guidelines to ensure longevity. Monitor the pressure and temperature relief valve to prevent excessive pressure buildup. Keep the area around the heater clear of flammable materials. For any complex issues, consult the manual or contact a certified professional; By adhering to these tips, you can ensure safe, efficient, and reliable operation of your A.O. Smith electric water heater for years to come.

Encouragement to Explore Additional Resources

For a deeper understanding of your A.O. Smith electric water heater, explore the wealth of additional resources available online. Visit the official A.O. Smith website for detailed product manuals, installation guides, and troubleshooting tips. Take advantage of video tutorials and user forums to enhance your knowledge. Additionally, check for federal and local incentives that may apply to your water heater model. By utilizing these resources, you can maximize efficiency, troubleshoot issues, and ensure your water heater operates safely and effectively for years to come.

Bycassandre

alpine ute-73bt manual

Welcome to the Alpine UTE-73BT manual, your comprehensive guide to understanding and operating this advanced 1-DIN car radio. This 46-page PDF manual provides detailed instructions for installation, setup, and usage, ensuring you get the most out of your device. It covers key features like Bluetooth connectivity, FLAC support, and audio customization, while also offering troubleshooting tips and technical specifications. Reading this manual is essential for optimizing performance and accessing all the advanced features of the UTE-73BT.

1.1 Overview of the Alpine UTE-73BT Car Radio

The Alpine UTE-73BT is a 1-DIN car radio designed for seamless integration into most vehicles. It offers a powerful audio experience with 4.0 output channels and 50-watt maximum power per channel. Featuring Bluetooth connectivity, FLAC support, and advanced audio customization options, this system ensures high-quality sound and versatile functionality for drivers seeking enhanced in-car entertainment.

1.2 Importance of Reading the Manual

Reading the Alpine UTE-73BT manual is crucial for understanding its features, proper installation, and troubleshooting. It provides detailed guidance on optimizing sound quality, configuring settings, and resolving common issues. The manual ensures safe operation, prevents potential damage, and helps users unlock the full potential of their car radio system for an enhanced driving experience.

Key Features of the Alpine UTE-73BT

The Alpine UTE-73BT is a 1-DIN car radio with 18W output power, 4.0 audio channels, and Bluetooth connectivity for seamless music streaming and hands-free calls. It supports high-quality FLAC audio formats and features a mech-less design, focusing on digital media integration for a modern in-car entertainment experience.

2.1 Technical Specifications: Output Power, Channels, and Compatibility

The Alpine UTE-73BT delivers 18W of output power through 4.0 audio channels, with each channel capable of up to 50W. Designed as a 1-DIN unit, it is compatible with most modern vehicles, ensuring seamless integration into various car audio systems. Its robust technical specifications ensure high-quality sound reproduction and reliable performance across different setups.

2.2 Bluetooth Connectivity and Audio Streaming

The Alpine UTE-73BT supports Bluetooth wireless technology, enabling seamless hands-free calls and high-quality audio streaming from compatible devices. Pair your smartphone effortlessly to enjoy music playback and voice commands. The built-in microphone ensures clear communication during calls, while advanced audio streaming delivers immersive sound. This feature enhances convenience and safety, allowing you to stay connected on the go.

2.3 Support for FLAC and High-Quality Audio Formats

The Alpine UTE-73BT stands out with its support for FLAC and other high-quality audio formats, delivering crystal-clear and detailed sound. This ensures that your music retains its original fidelity, offering an immersive listening experience. By utilizing lossless audio formats, the UTE-73BT caters to audiophiles seeking premium sound quality, making it a top choice for those who value exceptional audio performance in their vehicle.

Installation and Setup

The Alpine UTE-73BT manual provides a detailed pre-installation checklist and step-by-step guide for a seamless setup. Ensure compatibility with your vehicle and follow the instructions carefully. The manual includes diagrams and troubleshooting tips to help you install and configure the system efficiently. Proper installation ensures optimal performance and functionality of your car radio.

3.1 Pre-Installation Checklist

Before installing the Alpine UTE-73BT, ensure your vehicle’s compatibility with the 1-DIN size and 4.0-channel audio system. Gather necessary tools and wiring harnesses. Verify the power requirements match your vehicle’s electrical system. Check the dashboard space and wiring connections. Review the manual for specific installation guidelines and safety precautions to avoid damage or electrical issues. Proper preparation ensures a smooth and safe installation process.

3.2 Step-by-Step Installation Guide

Begin by disconnecting the vehicle’s battery to ensure safety. Remove the dashboard trim and existing radio using appropriate tools. Connect the wiring harness to the UTE-73BT, matching each wire to the correct terminal. Mount the unit securely in the 1-DIN slot. Connect the antenna and power cables, then reinstall the dashboard trim. Turn the ignition and test the radio’s functionality. Refer to the manual for detailed wiring diagrams and specific instructions.

3.3 Post-Installation Setup and Configuration

After installation, turn on the UTE-73BT and ensure the display lights up. Set the clock and adjust display settings for brightness and color. Configure the equalizer and audio settings to your preference. Connect the antenna and test radio reception. Pair Bluetooth devices and ensure all features like FLAC playback are functioning. Refer to the manual for detailed setup instructions and optimization tips.

User Interface and Controls

The Alpine UTE-73BT features a user-friendly interface with a compact 1-DIN design. The front panel includes buttons for volume, track selection, and source switching. The display shows time, track info, and settings, ensuring easy navigation and control of your audio experience.

4.1 Navigating the Menu System

Navigating the Alpine UTE-73BT’s menu system is intuitive and straightforward. Use the volume knob or front panel buttons to scroll through options like audio settings, Bluetooth pairing, and EQ adjustments. The clear display ensures easy visibility, while the logical menu structure helps users quickly access desired features without confusion, enhancing the overall user experience.

4.2 Understanding the Front Panel Controls

The front panel of the Alpine UTE-73BT features an array of buttons and a volume knob for easy control. The volume knob adjusts sound levels, while buttons provide access to source selection, track skipping, and menu navigation. Additional buttons enable quick access to features like Bluetooth pairing and audio settings, ensuring seamless operation. A remote control is also included for added convenience.

Bluetooth Pairing and Connectivity

The Alpine UTE-73BT supports Bluetooth technology, enabling wireless connectivity for hands-free calls and audio streaming. Pair your smartphone easily for seamless integration and enhanced driving convenience.

5.1 Pairing Your Smartphone with the UTE-73BT

To pair your smartphone with the Alpine UTE-73BT, enable Bluetooth on your device, search for available devices, and select “UTE-73BT.” Enter the PIN if prompted, then confirm the connection on both devices. This establishes a secure wireless link for hands-free calls and audio streaming, enhancing your driving experience with seamless connectivity.

5.2 Troubleshooting Bluetooth Connection Issues

If Bluetooth pairing fails, restart both your smartphone and the UTE-73BT. Ensure Bluetooth is enabled on your device and that it is in pairing mode. Check for device compatibility and update your smartphone’s Bluetooth firmware. If issues persist, reset the UTE-73BT to factory settings and attempt pairing again. Refer to the manual for detailed troubleshooting steps.

Audio Customization and Settings

Customize your audio experience with the Alpine UTE-73BT by adjusting EQ settings, enabling FLAC support, and configuring audio outputs for optimal sound quality and channel distribution.

6;1 Adjusting EQ Settings for Optimal Sound Quality

Enhance your listening experience by fine-tuning the Alpine UTE-73BT’s 5-band graphic equalizer. Access the EQ settings through the menu system to adjust frequency levels, ensuring balanced audio reproduction. Customize bass, midrange, and treble to suit your preferences or specific music genres. This feature allows you to optimize sound quality for your vehicle’s acoustics, providing a tailored audio experience.

6.2 Configuring Audio Outputs and Channels

Configure the Alpine UTE-73BT’s 4.0 audio channels to optimize sound output. Each channel delivers up to 50 watts, supporting various speaker setups. Assign channels to front, rear, or subwoofer outputs based on your vehicle’s audio system. The manual guides you through configuring outputs for a balanced and powerful sound experience, ensuring optimal audio performance tailored to your preferences.

Manual Content Overview

Explore the comprehensive 46-page Alpine UTE-73BT manual, covering installation, features, and troubleshooting. Available in multiple languages, it ensures accessibility for global users, providing clear guidance for optimal device utilization.

7.1 What’s Included in the 46-Page PDF Manual

The 46-page PDF manual for the Alpine UTE-73BT is a detailed resource, covering technical specifications, installation guidelines, and troubleshooting. It includes sections on Bluetooth pairing, audio customization, and firmware updates. The manual also provides an overview of the device’s features, such as FLAC support and high-quality audio output. Additionally, it offers step-by-step instructions for setup and configuration, ensuring users can maximize their experience with the UTE-73BT. Furthermore, the document is available in multiple languages, enhancing accessibility for a global audience. The manual is structured to address both basic and advanced functionalities, making it an essential tool for all users. By following the guidelines outlined in the manual, users can ensure optimal performance and longevity of their Alpine UTE-73BT car radio system.

7.2 Language Options and Accessibility

The Alpine UTE-73BT manual is available in multiple languages, ensuring accessibility for a global audience. Users can select their preferred language via the “Select a language” button, making the guide universally understandable. Additionally, the PDF format allows for zooming and text adjustment, enhancing readability for individuals with visual impairments. This accessibility ensures all users can easily navigate and comprehend the manual’s content.

Troubleshooting Common Issues

Address common problems like connectivity issues, audio distortion, or power malfunctions. Check connections, restart the unit, and ensure firmware is updated. Consult the manual or contact support for assistance.

8.1 Resolving Power and Connectivity Problems

Resolve power issues by checking wiring connections and ensuring proper installation. For connectivity problems, restart the unit, check Bluetooth settings, and re-pair devices. Update firmware regularly to avoid software glitches and ensure stable performance. Consult the manual for detailed troubleshooting steps or contact Alpine support for further assistance if issues persist.

8.2 Addressing Audio Distortion and Quality Concerns

To resolve audio distortion, ensure proper installation of the unit and speakers. Adjust equalizer settings for optimal sound quality and verify audio file formats are compatible. Check connections for loose wires and update firmware to improve performance. If issues persist, reset the unit to factory settings or consult the manual for advanced troubleshooting steps.

Frequently Asked Questions (FAQs)

Find answers to common questions about the Alpine UTE-73BT, such as compatibility, installation, and troubleshooting. This section helps users resolve issues and optimize their experience.

9.1 General Questions About the UTE-73BT

This section addresses common inquiries about the Alpine UTE-73BT, such as its compatibility with various vehicles, key features, and basic operational guidance. It provides clarity on the device’s capabilities, ensuring users understand its functionality and limitations before installation or use. These FAQs are designed to offer quick solutions and insights for first-time users.

9.2 Technical Queries and Solutions

This section provides solutions to technical issues, such as Bluetooth pairing problems, audio distortion, and firmware updates. It offers step-by-step guidance for resolving connectivity issues and optimizing sound quality; Additionally, it covers troubleshooting for FLAC playback and explains how to update the system firmware to ensure optimal performance and compatibility with the latest features.

Alpine Customer Support and Resources

Alpine offers comprehensive customer support, including online resources, firmware updates, and dedicated assistance. Visit their official website for troubleshooting guides, manuals, and contact information to resolve any issues effectively.

10.1 Contacting Alpine for Assistance

For any inquiries or issues with your Alpine UTE-73BT, visit the official Alpine website to access contact information, support forms, and customer service details. You can also reach out via email or phone for direct assistance. Additionally, downloadable resources like manuals and FAQs are available to help troubleshoot common problems independently.

10.2 Accessing Firmware Updates and Additional Resources

Visit the official Alpine website to check for the latest firmware updates for your UTE-73BT. Download the update to a USB drive and follow the in-device instructions for installation. Additional resources, such as user manuals and FAQs, are also available on the Alpine support page to help troubleshoot and optimize your car radio experience.

The Importance of Regular Firmware Updates

Regular firmware updates ensure optimal performance, add new features, and fix bugs. Keeping your Alpine UTE-73BT updated guarantees a smoother, more secure, and enhanced user experience.

11.1 How to Check for and Install Updates

To update your Alpine UTE-73BT, visit the official Alpine website and download the latest firmware. Transfer the update file to a USB drive, then connect it to the unit. Navigate to the settings menu, select “Firmware Update,” and follow on-screen instructions. Ensure the unit is powered on and avoid interruptions during the update process for a successful installation.

11.2 Benefits of Keeping the System Up-to-Date

Regular firmware updates ensure optimal performance, improved compatibility, and enhanced security for your Alpine UTE-73BT. Updates often include new features, bug fixes, and better functionality, ensuring seamless connectivity and audio quality. Staying current also protects against potential vulnerabilities and ensures compatibility with the latest devices and formats, providing a more robust and reliable user experience overall.

12.1 Final Tips for Maximizing Your UTE-73BT Experience

To maximize your Alpine UTE-73BT experience, ensure regular firmware updates for optimal performance. Utilize Bluetooth connectivity for seamless audio streaming and hands-free calls. Adjust EQ settings to tailor sound to your preference. Explore advanced features like FLAC support for high-quality audio. Refer to the manual for troubleshooting and configuration guidance. Enjoy enhanced driving experiences with personalized settings.

12.2 Encouragement to Explore Advanced Features

Unlock the full potential of your Alpine UTE-73BT by exploring its advanced features. Discover the clarity of FLAC support, the convenience of Bluetooth connectivity, and the precision of customizable audio settings. Experiment with EQ adjustments and audio streaming to tailor your listening experience. Dive into these features to enhance your driving enjoyment and make the most of your system’s capabilities.