Current Landscape of Manual Transmissions in Modern Fast Cars
Mazda pours love into manual gearboxes, giving crisp shifts even in the CX‑30 and Mazda 3. Ford, meanwhile, is phasing out stick‑shift options, leaving few high‑performance models with a manual. Shiftable automatics now dominate, yet fast manual cars like the Toyota MR2 remain. Enthusiasts love them. now!!!!
Mazda’s Commitment to Manual Gearboxes
Mazda’s dedication to manual transmissions is evident in every detail of its gearboxes. Engineers invest significant time, resources, and passion to create a shift experience that feels almost tactile, turning even modest naturally‑aspirated engines into engaging machines. The CX‑30 crossover, often dismissed as a family vehicle, surprises with a gearbox that delivers a punchy, linear feel, rivaling the responsiveness of many hot‑hatch French rivals. Likewise, the Mazda 3 hatchback’s manual option offers a crisp, precise engagement that makes each gear change feel deliberate and rewarding, a quality rarely found in its segment. The brand’s flagship roadster, the MX‑5, showcases the pinnacle of this philosophy. Its lightweight chassis combined with a finely tuned manual gearbox creates a symphony of motion; the shift points are sharp, the clutch bite is well‑balanced, and the overall feel is almost effortless, allowing drivers to extract the maximum from the naturally‑aspirated 2.0‑liter engine without feeling like a chore. Mazda’s commitment extends beyond performance; it emphasizes durability, reliability, and a sense of ownership that resonates with enthusiasts who value the connection between driver and machine; By prioritizing manual gearboxes, Mazda not only preserves a classic driving experience but also reinforces its identity as a brand that values driver engagement and mechanical integrity. The company’s “Skyactiv‑M” manual series incorporates lightweight gearsets, optimized gear ratios, and a refined clutch system that reduces wear while maintaining a responsive feel. In addition, Mazda’s use of a close‑ratio gearbox in the MX‑5 keeps the engine within its peak torque band, enhancing acceleration and throttle response. The company also offers a “Manual‑Only” option in select markets, acknowledging that some drivers prefer the tactile feedback and control that only a stick‑shift can provide. This approach has cultivated a loyal fan base that appreciates the hands‑on experience and the sense of mastery that comes with mastering a manual transmission. Mazda’s philosophy is clear: the manual gearbox is not a relic but a living, breathing component that enhances the joy of driving, and the brand’s continued investment in this technology signals its unwavering commitment to the enthusiast community. Moreover, the brand’s collaboration with tuning companies has produced aftermarket gearboxes that further refine shift quality, offering enthusiasts the ability to tailor the feel to personal preference. Mazda’s commitment to manuals is also reflected in its marketing, where the brand highlights the “feel of the road” and the “connection to the engine” as core selling points. This focus has helped Mazda maintain a distinct identity in an era where many manufacturers are moving toward automatics.
Ford’s Shift Away from Stick‑Shift in Performance Models
Ford has steadily moved away from offering manual transmissions in its high‑performance lineup, a shift that reflects broader market trends and the company’s focus on efficiency and technology. The once‑iconic Mustang GT, which historically celebrated a 6‑speed manual as a core selling point, now offers a 10‑speed automatic as the standard, with the manual relegated to a limited‑edition package that is hard to obtain. This change is mirrored in the new F‑150 Lightning, where even the sport‑tuned Raptor variant uses a dual‑clutch automatic to deliver rapid gear changes and improved torque management. The decision stems from several factors: stricter emissions regulations, the desire for smoother power delivery, and the growing consumer preference for paddle‑shift automatics that provide the feel of a stick‑shift without the mechanical complexity. Ford’s engineering teams have invested heavily in developing torque‑converter automatics that can match, and in some cases exceed, the acceleration performance of traditional manuals. The company also emphasizes the safety benefits of automatics, noting that a driver’s focus can remain on the road rather than on clutch engagement, which is especially valuable in high‑speed scenarios. Ford keeps manual options alive for drivers. Overall, Ford’s strategy reflects a pragmatic balance between preserving performance heritage and embracing the future of automotive technology. The result is a lineup that prioritizes power, efficiency, and driver convenience, even if it means moving beyond the traditional manual experience.
The Rise of Shiftable Automatics in Non‑Performance Segments
Shiftable automatics have become the new norm in everyday vehicles that once relied on traditional manual gearboxes. These transmissions, often equipped with paddle shifters or electronic controls, provide the tactile engagement of a stick‑shift while delivering the convenience of an automatic. Manufacturers such as Subaru, Honda, and Volkswagen have integrated dual‑clutch and continuously variable units that allow drivers to manually select gears without the need for a clutch pedal. The result is a smoother, more responsive driving experience that appeals to both casual commuters and enthusiasts seeking a quick, engaging feel. In compact cars, the shiftable automatic offers better fuel economy and reduced emissions, aligning with stricter environmental regulations. Luxury brands like Mercedes‑Benz and BMW have also embraced the technology, offering high‑performance models with a manual‑style interface that lets drivers feel the power of the engine while benefiting from advanced torque‑vectoring and traction control systems. The trend is also evident in minivans and crossover SUVs, where paddle shifters provide a sporty touch in otherwise family‑friendly vehicles, as the automotive industry continues to evolve, shiftable automatics are likely to become the default choice for most mainstream models, offering a blend of performance, efficiency, and user‑friendly operation that satisfies a broad spectrum of drivers. This shift signals a new era where driver feel meets tech convenience now!!!.
Performance Benchmarks: Zero‑to‑Sixty Records
The Corvette Z51 Performance Package clocks the fastest 0‑60 mph time of any Corvette built, at 2.9 seconds. The S550 Mustang, with TREMEC Magnum XL rev‑matching, delivers a thrilling manual experience that pushes speed limits. These benchmarks showcase peak manual power. Each shift feels a conversation with the engine.

Corvette Z51 Performance Package – 2.9 Seconds
The 2026 Corvette Z51 Performance Package redefines what a manual sports car can achieve, delivering a jaw‑dropping 0‑60 mph time of only 2.9 seconds. At its heart lies a 6.2‑liter V8 that churns out 495 horsepower and 470 lb‑ft of torque, featuring an active valve lift system that optimizes airflow at high RPMs. Paired with a 6‑speed manual transmission engineered for rapid, precise gear changes, the gearbox’s short throw shifter and close‑ratio gear spread keep the engine in its sweet spot, allowing the driver to feel every shift as a direct link to the road!
Weight reduction is key: a lightweight aluminum hood, a carbon‑fiber roof, and a revised suspension shave hundreds of pounds off curb weight, while 14‑inch ventilated brakes and dual‑channel ABS provide stopping power to match acceleration. Aerodynamics—larger rear spoiler, front splitter, sculpted rear diffuser—generate downforce that keeps the car planted during high‑speed cornering. The revised suspension also includes adaptive dampers that adjust to road conditions, ensuring consistent handling!
Inside, the cockpit is driver‑centric: a six‑speed shifter with a short, tactile throw, a high‑grip steering wheel, and a digital instrument cluster that displays real‑time data such as engine RPM, gear position, and lap times. The manual’s refined shift feel, combined with aggressive throttle response, creates an immersive experience unmatched by modern automatics. The digital cluster also offers a customizable display for performance metrics.
Drivers report the engine’s growl is unmistakable, especially during launch, and the manual’s crisp shifts add satisfaction that dual‑clutch systems lack. A 100,000‑mile endurance test proved the transmission’s durability, maintaining shift quality without loss, and also confirmed the gearbox’s smoothness under extreme conditions!
TREMEC Magnum XL Rev‑Matching in S550 Mustang
The 2026 S550 Mustang’s new TREMEC Magnum XL 6‑speed manual delivers a rev‑matching system that syncs engine speed with gear shifts, removing double‑clutching. A high‑precision hydraulic actuator adjusts clutch engagement, allowing seamless up‑ and down‑shifts during aggressive driving. The result is a smoother, faster launch and a more engaging experience, with a short throw shifter and a lightweight chassis!!!
Under the hood, the Magnum XL sports a lightweight aluminum case, a 1.5‑inch bore, and a 4‑stage gear ratio that keeps the engine in its optimal power band. The rev‑matching algorithm calculates target RPM for each gear based on throttle, vehicle speed, and engine load, ensuring the engine revs just enough to match the next gear’s speed.
Drivers report the system feels almost invisible; the shift lever moves with a short, crisp throw, and rev‑matching takes place in milliseconds. The Mustang’s 5.0‑liter V8 produces 480 horsepower, and the car can sprint from 0‑60 mph in 3.8 seconds—an improvement of 0.2 seconds over the previous manual!!!!!!!!
Durability is key: the Magnum XL’s forged steel synchronizers and reinforced bearing housings withstand high torque loads. TREMEC software updates via OBD‑II allow future refinements, and the system supports a manual mode for drivers who want a traditional stick‑shift feel and a shift lever that feels like a super racing stick.
Overall, the TREMEC Magnum XL Rev‑Matching system elevates the S550 Mustang’s manual experience, combining the tactile satisfaction of a stick shift with the smoothness of modern tech. It keeps the driver in control while delivering race‑ready performance, proving that a manual can still be the ultimate thrill in a high‑powered sports car!!
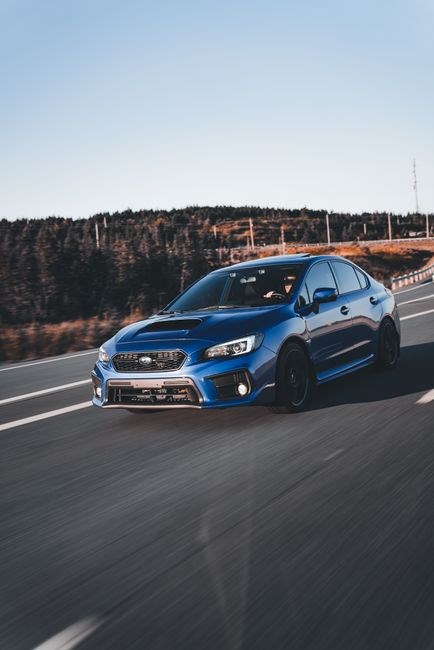
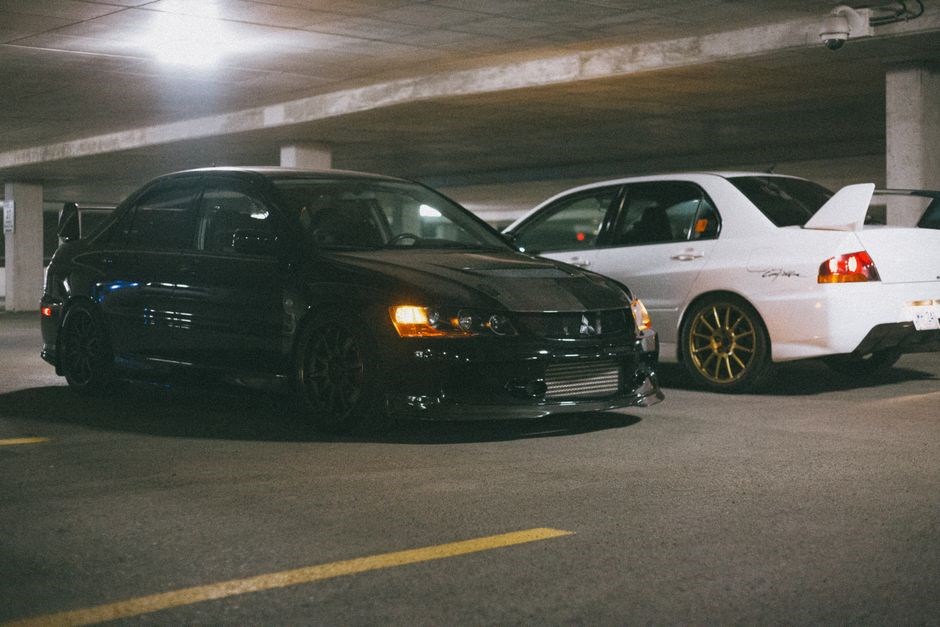
Available Fast Manual Cars Still on the Market
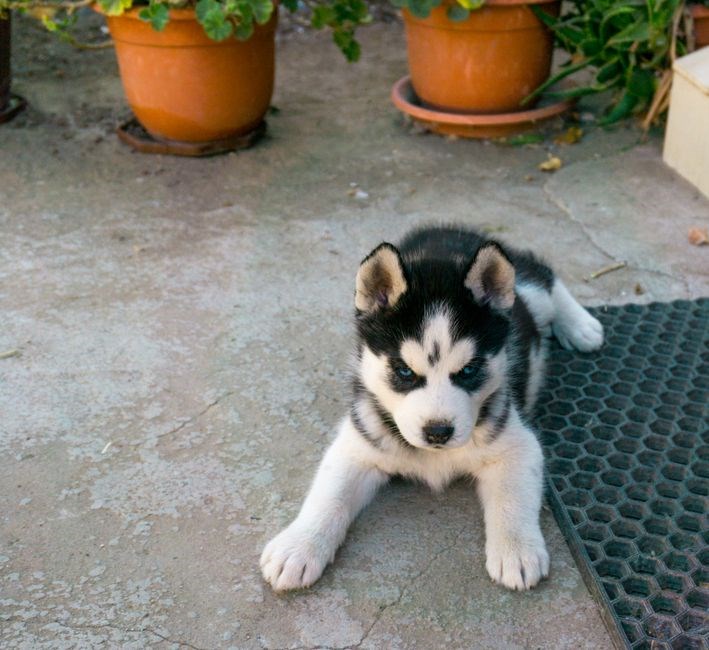
Fast manual cars remain rare but prized. The lightweight Toyota MR2 offers RWD, 2,195 lb, and a 5‑speed that thrills. Porsche still sells manuals in the 911 and Cayman, keeping the stick‑shift alive for purists. These models prove manual joy endures. Manual joy thrives, keeping pure driving alive in heavy times.
Toyota MR2 – Lightweight, Reliable, RWD
The Toyota MR2 remains a benchmark for lightweight, rear‑wheel‑drive sports cars that still offer a manual gearbox. Weighing just 2,195 pounds, its mid‑rear‑engine layout delivers balanced handling and a responsive driving experience that feels more akin to a high‑performance sports car than a budget sedan. The MR2’s 1.6‑liter engine produces about 140 horsepower, and its low weight and short wheelbase allow it to reach 0‑60 mph in roughly 8.5 seconds. Reliability is a hallmark, with many owners reporting over 200,000 miles of trouble‑free driving. The 5‑speed manual is praised for crisp, precise shifts, giving drivers full control. Fuel economy is impressive for a sports car, with about 30 mpg city and 38 highway, making it practical for daily use. The MR2’s small size and agile handling make it a favorite for track days, and its iconic design has earned a cult following among journalists and collectors. In short, the Toyota MR2 proves that a manual transmission can still deliver excitement and practicality in the modern era.
Owners often upgrade the MR2 with aftermarket components such as a lightweight flywheel, performance clutch, and upgraded suspension to squeeze more performance out of the modest engine. The car’s compact dimensions make it easy to navigate tight corners. The MR2’s reputation as a “driver’s car” is cemented by its presence in popular culture, appearing in films and video games that celebrate classic sports cars!! Despite being discontinued in 2007, the MR2 remains a sought‑after model in the used‑car market, with enthusiasts willing to pay a premium for well‑maintained examples that retain original parts. The continued availability of the MR2 in many countries, along with a thriving community of owners and clubs, ensures that the manual transmission experience it offers will not be lost anytime soon!!!
Porsche’s Continued Manual Offerings
Porsche’s dedication to the manual gearbox remains unmistakable, with the 911, Cayman, and Boxster still available in 6‑speed manual configurations. The 911’s legendary 997 and 991 generations offer a 6‑speed manual that delivers a visceral connection between driver and machine, while the newer 992 models feature a 7‑speed manual that enhances both performance and efficiency. The Cayman and Boxster, built on the same platform, provide a 6‑speed manual that is praised for its crisp shifts and engaging character. Porsche’s manual transmissions are engineered with lightweight gear sets, short throw, and a short gear‑ratio spread, allowing drivers to feel every rev and maintain a high rev‑limit for maximum acceleration. The company’s commitment to manual gearboxes is also evident in the 718 models, where the 6‑speed manual option remains a staple for enthusiasts seeking an authentic driving experience. In addition, Porsche’s 911 Turbo S and GT3 models offer a 7‑speed manual that combines the thrill of a manual with the performance of a high‑output engine, delivering 0‑60 times in the 2.8‑second range. The manual gearbox is also available in the 911 Carrera and 911 GT2 RS, where it provides a unique blend of precision and power. Porsche’s manual transmissions are built to last, with high‑strength materials and rigorous testing, ensuring durability and reliability. The brand’s focus on driver engagement, combined with its engineering excellence, guarantees that the manual remains a cornerstone of Porsche’s performance lineup. Enthusiasts continue to celebrate the tactile feedback, the audible gear changes, and the pure driving pleasure that only a manual can provide, keeping Porsche’s manual legacy alive for generations to come. Moreover, Porsche’s manuals are often paired with paddle‑shifter options for those who prefer a hybrid driving style, blending the tactile feel of a stick shift with the convenience of a semi‑automatic.
Future Outlook for Manual Transmissions
Manual gearboxes will remain niche, cherished by purists. Emerging tech may revive them via lightweight, hybrid‑friendly designs. Limited production models will keep the stick‑shift alive, but mainstream adoption will wane as automatics dominate. Hybrid tech. 2026
Niche Status and Enthusiast Demand
In today’s automotive world, manual transmissions have become a niche yet prized feature. Mazda still invests heavily in stick‑shift gearboxes, giving the CX‑30 and Mazda 3 a surprisingly sharp shift feel that rivals classic hot hatches. Ford, however, has largely abandoned manual options in its performance lineup, leaving only a handful of models with a stick‑shift. Enthusiasts value the tactile engagement and the sense of driver control that a manual offers, especially in lightweight sports cars like the Toyota MR2 and the Porsche 911. The manual’s mechanical simplicity and the ability to fine‑tune gear ratios keep it attractive to hobbyists. While the market share of manuals has dropped to roughly 5–7 % of new sales, a dedicated aftermarket community keeps the legacy alive through restoration projects and performance tuning. Events such as the Stick‑Shift Rally and online simulators help bridge the gap between legacy and modern technology, ensuring that the manual experience endures for future generations. Collectors also share restoration stories on dedicated forums, keeping the legacy alive for new enthusiasts daily!!!
The future of manual transmissions is uncertain, yet the community’s passion keeps them alive. While automakers push for efficiency and convenience, enthusiasts argue that the tactile joy of a stick‑shift cannot be replicated by any electronic system. As electric vehicles rise, some manufacturers explore dual‑clutch or torque‑vectoring solutions that mimic manual! Meanwhile, models continue to be prized by collectors, ensuring that the manual legacy endures.
Legacy of Manual Transmissions in Supercars
Supercars have long been the epitome of speed, technology, and driver engagement. In the golden age of the 1970s and 1980s, the manual gearbox was the default, offering drivers a direct link to the engine’s power band. Iconic models such as the Lamborghini Miura, Ferrari 308, and the early McLaren F1 all featured a 5‑ or 6‑speed manual, allowing the driver to feel every gear shift and to master the car’s performance envelope. The tactile feedback of a clutch pedal and a gear lever became a hallmark of the supercar experience, a feeling that many enthusiasts still crave today.
Today, most manufacturers have moved to dual‑clutch or torque‑vectoring automatics, prioritizing efficiency and rapid shift times. Yet a select few continue to honor the manual legacy. Porsche remains the most prominent example, offering the 911 and Cayman with a manual gearbox in their standard and special editions. These models preserve the hand‑crafted connection between driver and machine, allowing owners to modulate power and maintain engine rhythm in a way that modern automatics can only approximate.
Limited‑edition releases and special packages often re‑introduce a manual for enthusiasts. For example, the 2025 Porsche 911 Turbo S “Classic Edition” includes a 7‑speed manual, a nod to the brand’s heritage. Similarly, the 2026 Ferrari 488 GTB offers a manual option in its “Sport” package, catering to drivers who value the skill required to master a stick‑shift.
Owners often report that manual gearbox provides a sense of control absent in automated systems.!!!