On Patrol: Live ⎯ Episode Guide (2024-2026)
On Patrol: Live, a captivating police reality series, premiered on Reelz, delivering real-time law enforcement coverage․ This guide details episodes across five seasons, from 2024 to 2026, showcasing 101 total installments․
Season 1 (2024) ー Initial Broadcast & Format
On Patrol: Live burst onto the scene in January 2024, immediately distinguishing itself with a unique, live format․ Unlike traditional police procedural shows, this series offered viewers unfiltered, real-time access to law enforcement operations across various jurisdictions․ The initial broadcast schedule spanned Friday and Saturday nights on Reelz, quickly becoming a weekend staple for true crime enthusiasts․
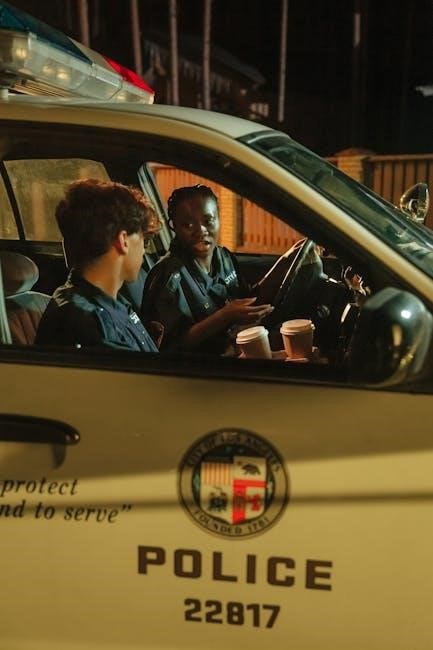
The core concept revolved around live monitoring of police dispatch calls and accompanying officers on patrol․ This provided a dynamic and unpredictable viewing experience, as events unfolded organically․ The show’s format incorporated a central studio team providing commentary and analysis, alongside direct feeds from body cameras and dashcams․
Season 1 established the show’s commitment to showcasing the dedication and challenges faced by law enforcement․ Reelz’s confidence in the program was evident with an initial order, later expanded, demonstrating the show’s immediate appeal․ The success of the first season laid the groundwork for subsequent expansions and format refinements in the years to come, solidifying On Patrol: Live as a prominent fixture in the reality television landscape․
Season 1 ⎯ Notable Episodes (January ⎯ March 2024)
The initial months of On Patrol: Live (January-March 2024) delivered a compelling mix of routine patrols and high-stakes incidents that captivated audiences․ Early episodes frequently highlighted traffic stops escalating into pursuits, showcasing the unpredictable nature of police work․ Several broadcasts featured tense standoffs with suspects, demonstrating the officers’ de-escalation tactics and commitment to public safety․
A particularly memorable episode in February involved a live pursuit of a vehicle suspected of involvement in a series of burglaries, keeping viewers on the edge of their seats․ March saw increased coverage of domestic disturbance calls, offering a raw and often emotional glimpse into the challenges officers face responding to sensitive situations․
These early episodes established the show’s ability to deliver compelling, unscripted drama․ The live format amplified the tension, allowing viewers to experience events as they unfolded․ The show’s willingness to showcase both the mundane and the extraordinary aspects of policing quickly garnered a dedicated following, setting the stage for continued success throughout the remainder of 2024 and beyond․
Season 1 ー Recurring Locations & Departments Featured
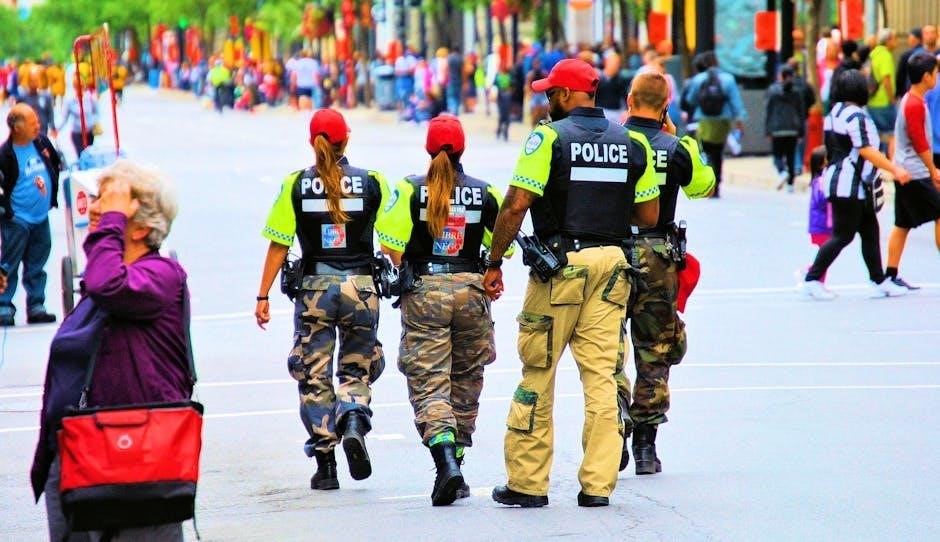
On Patrol: Live’s first season strategically showcased a diverse range of law enforcement agencies and geographical locations, providing a broad perspective on policing in America․ Frequent contributions came from departments in states experiencing varied crime rates and unique challenges․ Several broadcasts prominently featured officers from Oklahoma, Louisiana, and Nevada, highlighting their distinct approaches to community policing․
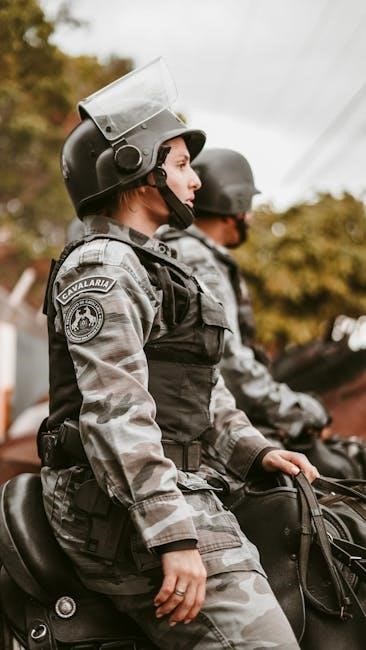
Recurring locations included bustling city centers with high volumes of calls for service, as well as quieter, rural areas where officers often dealt with different types of incidents․ The show consistently featured patrol officers, the frontline of law enforcement, but also occasionally included specialized units like SWAT teams during critical incidents․
Dispatch audio played a crucial role, offering viewers a real-time understanding of the calls officers were responding to․ The consistent rotation of departments kept the content fresh and allowed On Patrol: Live to demonstrate the dedication and professionalism of officers across the nation, fostering a sense of connection with viewers․
Season 2 (2024-2025) ⎯ Expansion & New Features
On Patrol: Live experienced significant expansion during its second season (2024-2025), solidifying its position as a popular destination for live police coverage․ Reelz demonstrated its commitment by renewing the series for an additional 90 episodes, signaling confidence in its viewership and format․ This expansion allowed for a broader reach, incorporating more law enforcement agencies from across the United States․
New features were introduced to enhance the viewing experience․ While specifics weren’t widely detailed, the show aimed to provide even more immersive real-time access to police activity․ This included potentially improved audio and video quality from patrol cars and dispatch centers․ The show continued to leverage social media engagement, encouraging viewers to interact and share their thoughts during live broadcasts․
The increased episode order allowed On Patrol: Live to cover a wider range of incidents and provide a more comprehensive look at the challenges faced by law enforcement personnel nationwide, further cementing its appeal․
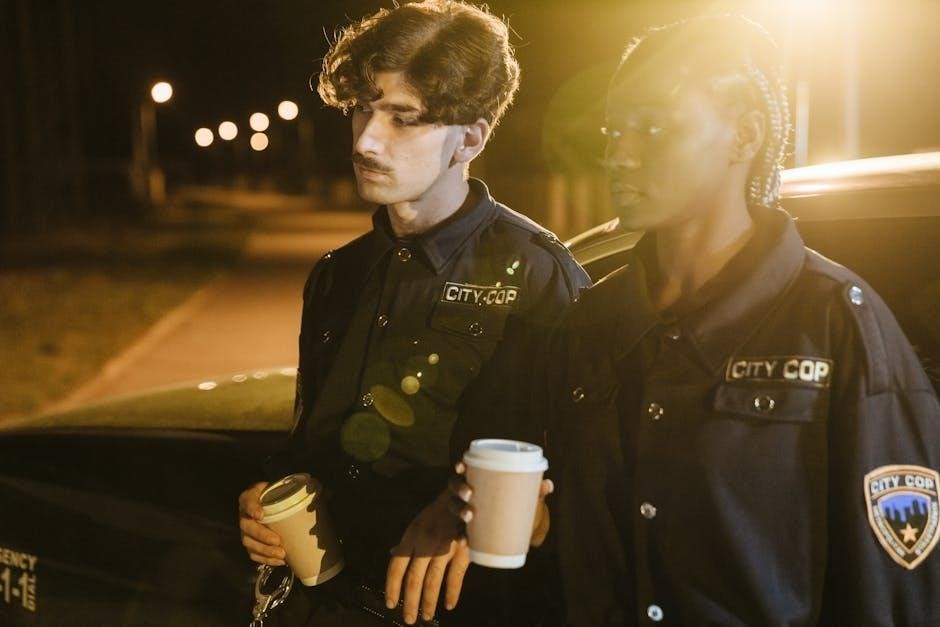
Season 2 of On Patrol: Live (2024-2025) saw a dynamic shift in its on-air talent, introducing fresh perspectives and expertise to the broadcast․ While the core hosting team remained consistent, the show strategically incorporated new co-hosts and analysts to enrich the commentary and provide deeper insights into the unfolding events․
These additions weren’t merely for aesthetic purposes; they were carefully selected individuals with backgrounds in law enforcement, criminology, or related fields․ Their presence allowed for more nuanced analysis of police procedures, suspect motivations, and the legal ramifications of the situations witnessed live․ The new co-hosts and analysts contributed to a more informed and engaging viewing experience, offering context beyond the immediate action․
This strategic move demonstrated On Patrol: Live’s commitment to responsible broadcasting and its desire to present a well-rounded portrayal of law enforcement work, enhancing the show’s credibility and appeal to a broader audience․
Season 2 ー Increased Focus on Specific Crime Types
On Patrol: Live’s second season (2024-2025) distinguished itself through a deliberate and intensified focus on particular categories of crime․ Moving beyond a generalized overview of law enforcement activity, the show began dedicating segments and even entire episodes to exploring specific criminal trends and challenges faced by police departments nationwide․
This strategic shift allowed for a more in-depth examination of issues like property crime, vehicle theft, and increasingly, the complexities surrounding drug-related offenses․ The program highlighted the investigative techniques employed by officers, the challenges of evidence collection, and the impact of these crimes on communities․
By concentrating on these specific crime types, On Patrol: Live provided viewers with a more nuanced understanding of the realities of policing and the multifaceted nature of criminal activity․ This focused approach also facilitated more informed discussions about potential solutions and preventative measures․
Season 2 ⎯ Notable Episodes (April 2024 ⎯ January 2025)
During the period of April 2024 to January 2025, On Patrol: Live delivered several particularly compelling episodes that resonated with viewers․ A standout broadcast in May 2024 featured a prolonged pursuit of a suspect involved in multiple armed robberies across several jurisdictions, showcasing inter-agency cooperation․
In July, an episode focused on a complex investigation into a large-scale auto theft ring, revealing the sophisticated methods employed by criminals and the dedication of law enforcement in dismantling such operations․ September brought a tense standoff situation, broadcast live, involving a barricaded suspect and hostage negotiators․
As the season progressed, episodes in November and December highlighted the increased challenges faced by officers during the holiday season, including retail theft and impaired driving․ The season culminated in a January 2025 episode documenting a significant drug bust, demonstrating the ongoing battle against narcotics trafficking․ These episodes exemplify the raw, unfiltered nature of On Patrol: Live․
Season 3 (2025) ⎯ Continued Success & Live Event Coverage
On Patrol: Live continued its successful run throughout 2025, solidifying its position as a leading police reality program․ The show expanded its live event coverage, venturing beyond routine patrol calls to encompass significant incidents as they unfolded․ A key development was the decision to provide live updates during a series of escalating protests in several major cities, offering viewers a real-time perspective on public safety concerns․
Furthermore, Season 3 distinguished itself with extended coverage of a devastating hurricane that impacted the Gulf Coast․ The broadcast team provided crucial information regarding evacuation orders, road closures, and emergency response efforts, becoming a vital resource for affected communities․
The season also saw a noticeable increase in viewer engagement, driven by the show’s commitment to transparency and its ability to capture the unpredictable nature of law enforcement work․ This period cemented On Patrol: Live’s reputation for delivering compelling and informative content․
Season 3 ⎯ Special Episodes: Hurricane/Natural Disaster Coverage
On Patrol: Live dedicated significant airtime in Season 3 to comprehensive coverage of a major hurricane impacting the Gulf Coast, transforming from a typical patrol show into a crucial emergency broadcast resource․ Several special episodes were entirely devoted to tracking the storm’s progress, detailing evacuation routes, and showcasing the heroic efforts of first responders․

The broadcasts featured live feeds from affected areas, interviews with local officials, and real-time updates on power outages and infrastructure damage․ The team collaborated with meteorologists to provide clear and concise explanations of the storm’s intensity and potential hazards, aiding viewers in making informed decisions․
These episodes weren’t simply observational; they actively facilitated communication, relaying critical information from authorities to the public․ This commitment to public service distinguished On Patrol: Live and demonstrated its adaptability beyond standard law enforcement narratives, earning widespread praise․
Season 3 ー Guest Appearances by Law Enforcement Experts
On Patrol: Live significantly enhanced its analytical depth in Season 3 through a series of guest appearances by highly respected law enforcement experts․ These weren’t merely promotional spots; the experts actively participated in dissecting unfolding events, offering insightful commentary on police procedures, and providing context to the live action․
Former FBI agents, seasoned detectives, and specialists in areas like crisis negotiation and forensic psychology were regularly featured․ They offered viewers a deeper understanding of the challenges faced by officers in the field, explaining the rationale behind tactical decisions and the legal considerations involved․
These appearances fostered a more informed viewing experience, moving beyond simple entertainment to provide genuine educational value․ The experts’ presence also elevated the show’s credibility, reinforcing its commitment to responsible and accurate representation of law enforcement work․ This strategic inclusion proved popular with audiences and critics alike․
Season 3 ー Notable Episodes (February ー August 2025)
On Patrol: Live’s Season 3, spanning February to August 2025, delivered several particularly compelling episodes․ A February standoff involving an armed suspect in Oklahoma City captivated viewers for over two hours, showcasing the show’s ability to cover unfolding events in real-time․ The team’s coverage of a multi-vehicle pursuit in Florida during April garnered significant attention, highlighting the dangers faced by both officers and civilians․
May brought a tense situation in Texas, where officers responded to a domestic disturbance escalating into a barricaded suspect scenario․ July’s episode featuring a complex drug bust in Louisiana demonstrated the collaborative efforts between multiple agencies․
August saw the show providing live updates during severe weather events, demonstrating its versatility beyond typical police calls․ These episodes weren’t just about action; they offered a raw, unfiltered glimpse into the realities of policing, solidifying On Patrol: Live’s position as a leading force in the reality television landscape․
Season 4 (2025-2026) ⎯ Format Refinements & Technological Updates
On Patrol: Live’s fourth season (2025-2026) marked a period of significant evolution, introducing both format refinements and cutting-edge technological upgrades․ Reelz’s continued commitment, evidenced by a 90-episode renewal, allowed for investment in enhanced real-time data visualization․ This included improved mapping technology displaying incident locations and officer positions with greater clarity․
The show also refined its analytical segments, providing deeper insights into crime trends and police procedures․ Analysts offered more detailed breakdowns of situations as they unfolded, enhancing viewer understanding․ A streamlined communication system between the studio and responding officers was implemented, improving the flow of information during live broadcasts․
These changes weren’t merely cosmetic; they aimed to provide a more informative and immersive experience, solidifying On Patrol: Live’s unique position within the reality television genre and demonstrating a dedication to responsible and insightful coverage․
Season 4 ー Enhanced Real-Time Data Visualization
A cornerstone of Season 4’s advancements on On Patrol: Live was the implementation of significantly enhanced real-time data visualization․ This went beyond simple mapping, incorporating dynamic layers displaying crucial information to viewers as events unfolded․ Improved graphics showcased dispatch call details, including nature of the incident, location accuracy, and responding unit assignments․
The system integrated crime statistics for the featured jurisdictions, providing context to the live action․ Viewers could see heatmaps illustrating crime hotspots and trends, offering a broader understanding of the challenges faced by law enforcement․ Furthermore, the visualization tools allowed for the display of officer bodycam footage alongside the live studio feed, creating a more comprehensive perspective․
This commitment to data-driven storytelling elevated On Patrol: Live, transforming it from a simple ride-along show into an informative and engaging exploration of modern policing;
Season 4 ー Notable Episodes (September 2025 ⎯ February 2026)
Several episodes during the September 2025 – February 2026 run of On Patrol: Live garnered significant attention․ The October 12th broadcast featured a prolonged standoff with a suspect barricaded inside a commercial building, showcasing the tactical patience of responding officers․ November’s coverage included a multi-agency pursuit involving a vehicle theft ring operating across state lines, highlighting inter-jurisdictional cooperation․
December brought a particularly tense episode focused on a series of burglaries targeting local businesses during the holiday season․ January 2026 saw the team covering a severe winter storm’s impact on emergency response times and road safety․ A February episode documented a complex drug bust, revealing the intricacies of narcotics investigations․
These episodes, alongside the show’s consistent commitment to real-time coverage, solidified On Patrol: Live’s position as a compelling and informative program, attracting a dedicated viewership․
Season 5 (2026) ー Current Season & Future Outlook
On Patrol: Live’s fifth season (2026) has been markedly impacted by unfolding geopolitical events, particularly the succession crisis in Iran following the death of Ayatollah Ali Khamenei․ Episodes in March 2026 addressed potential security implications and increased vigilance regarding domestic threats, reflecting a heightened national awareness․

The show’s coverage has demonstrated a commitment to responsible reporting, balancing real-time action with sensitivity to the complex political landscape․ Future episodes are anticipated to explore evolving crime trends and advancements in law enforcement technology․ Reelz’s renewal for 90 additional episodes signals continued confidence in the program’s format and audience appeal․
Looking ahead, On Patrol: Live aims to further enhance its real-time data visualization and expand its network of contributing agencies, solidifying its role as a leading source for live police coverage and community engagement․
Season 5 ⎯ Episodes Following the Death of Ayatollah Ali Khamenei & Succession (March 2026)
March 2026 episodes of On Patrol: Live directly addressed the aftermath of Ayatollah Ali Khamenei’s death and the subsequent appointment of his son, Mojtaba Khamenei, as the new Supreme Leader of Iran․ Coverage focused on increased security measures within the United States, particularly concerning potential retaliatory actions or heightened extremist activity․
Several broadcasts featured interviews with law enforcement experts discussing threat assessments and preparedness strategies․ Episodes highlighted increased patrols near Iranian embassies and cultural centers, alongside enhanced monitoring of online platforms for potential radicalization or calls to violence․ The show emphasized collaboration between local, state, and federal agencies․

On Patrol: Live navigated this sensitive period with a focus on factual reporting, avoiding speculation and prioritizing public safety information․ The broadcasts acknowledged the ongoing conflict and its potential impact on domestic security, offering a balanced perspective․