Bunny PDFs are versatile resources, offering Easter craft templates and DIY guides․ They also provide access to literary works like Mona Awad’s Bunny, available for free download, catering to creative and academic interests․
What is Bunny PDF?
Bunny PDF refers to a collection of digital resources centered around bunny-themed content․ These PDF files often include Easter bunny templates, coloring pages, and activity sheets for crafts․ They also encompass literary works, such as Mona Awad’s novel Bunny, which explores themes of loneliness, friendship, and imagination․ The PDF format allows users to download and print these resources easily, making them accessible for various creative projects․ Free downloads are widely available, catering to both children and adults․ Whether for DIY crafts, educational activities, or literary purposes, Bunny PDFs provide versatile and engaging content․ Their popularity stems from their convenience and the diverse range of bunny-related materials they offer, making them a go-to choice for Easter celebrations, educational projects, and personal entertainment․
Significance of Bunny PDF in Modern Context

Bunny PDFs hold significant value in today’s digital age, offering accessible and versatile content for various purposes․ They cater to the growing demand for printable resources, such as Easter bunny templates and coloring pages, which are popular for DIY projects and educational activities․ Additionally, literary works like Mona Awad’s Bunny are widely shared in PDF format, making them easily accessible for readers worldwide․ The convenience of free downloads aligns with modern preferences for instant access to digital materials․ Bunny PDFs also serve as a creative outlet, fostering imagination and engagement, particularly during celebrations like Easter․ Their versatility and widespread availability make them a valuable resource in both personal and educational settings, reflecting the adaptability of digital content to meet contemporary needs․
Easter Bunny Crafts and Templates

Easter bunny templates are popular for spring crafts, offering adorable designs for DIY projects․ They include bunny faces, ears, and full outlines, perfect for decorations, cards, and activities with kids․
Free Printable Easter Bunny Templates
Free printable Easter bunny templates are widely available online, offering a variety of designs for crafts, decorations, and activities․ These templates are perfect for creating bunny faces, ears, and full-body outlines, ideal for Easter-themed projects․ They can be downloaded as PDF files, making it easy to print and use them for DIY crafts, such as making bunny masks, cards, or decorations․ Many templates are designed for both kids and adults, fostering creativity and fun during the Easter season․ These printables are often customizable, allowing users to personalize colors and details․ Whether for school projects, home decor, or gift wrapping, free Easter bunny templates provide a cost-effective and imaginative way to celebrate spring․ They are also great for educational activities, teaching children about shapes, colors, and crafting skills while enjoying the festive spirit․
How to Use Bunny Templates for Easter Crafts
Using bunny templates for Easter crafts is a fun and creative way to celebrate the holiday․ Start by downloading a free printable bunny template in PDF format, which can be easily printed on paper or cardstock․ Once printed, cut out the bunny shapes or designs, which can then be used for various projects․ For example, you can decorate Easter eggs, create bunny masks, or make Easter cards․ Adding colors, glitter, or other embellishments can make the templates more vibrant․ These templates are also great for DIY decorations, such as garlands or gift tags․ Additionally, they can be used in educational activities for children, teaching them about shapes and colors while fostering creativity․ With a little imagination, bunny templates can transform simple crafts into memorable Easter traditions for the whole family․
Popular Bunny Designs for DIY Projects
Popular bunny designs for DIY projects are both adorable and versatile, making them perfect for Easter crafts and beyond․ One of the most sought-after designs is the bunny face template, which features cute whiskers and ears, ideal for decorations, cards, or gift tags․ Another favorite is the full-body bunny outline, often used for paper cutouts, stencils, or even sewing patterns․ Many DIY enthusiasts also opt for bunny accessories, such as separate ear or foot templates, to add detail to their creations․ Additionally, layered bunny designs are trending, allowing for intricate and dimensional crafts․ These designs are widely available in PDF format, making them easy to download and print․ Whether you’re creating Easter-themed decor, DIY gifts, or fun activities for kids, bunny templates offer endless possibilities for creativity․ They are perfect for both beginners and seasoned crafters, ensuring everyone can join in the fun․

Literary Aspects of Bunny PDF
Bunny PDF offers Mona Awad’s novel, exploring themes of loneliness, belonging, and imagination․ The story captivates readers with its emotional depth, making it a compelling read for literary enthusiasts and casual readers alike․
Bunny: A Novel by Mona Awad
Bunny by Mona Awad is a captivating novel that delves into themes of loneliness, belonging, and the power of imagination․ The story follows Samantha, a graduate student, as she becomes entangled with a clique of wealthy, enigmatic girls who call each other “Bunny․” This darkly humorous and surreal tale explores the complexities of friendship, desire, and identity․ Awad’s vivid prose and unique storytelling style have garnered critical acclaim, making Bunny a standout in contemporary literature․ The novel has been compared to works like The Vegetarian and Heathers, blending psychological depth with a touch of the surreal․ For readers interested in exploring this thought-provoking book, PDF versions of Bunny are widely available for download, offering easy access to this mesmerizing story․ The novel’s exploration of human emotions and relationships continues to resonate with readers worldwide․
Downloading Bunny PDF for Free
Downloading Bunny PDF for free is a straightforward process, with numerous online platforms offering this option․ Websites like GitHub and various eBook repositories provide direct links to download Mona Awad’s novel in PDF format․ Users can also explore platforms offering free accounts to access a wide selection of eBooks and PDFs․ The novel, known for its dark humor and exploration of themes like loneliness and belonging, has gained significant popularity․ Many readers appreciate the convenience of downloading Bunny PDF for free, allowing them to enjoy the story on their preferred devices․ Additionally, some sites offer Bunny in other formats, such as EPUB or MOBI, catering to different reader preferences․ With just a few clicks, fans of contemporary literature can easily access and read this captivating novel․ For those interested, the download process typically involves creating a free account and selecting the desired version of the book․

Popular Bunny-Themed PDFs
Popular bunny-themed PDFs include “The Runaway Bunny and Other Stories” and bunny coloring pages․ These resources are ideal for Easter crafts, DIY projects, and educational activities, making them widely sought after․
The Runaway Bunny and Other Stories
The Runaway Bunny and Other Stories is a beloved collection of tales that explore themes of love, family, and adventure․ Written by Margaret Wise Brown and illustrated by Clement Hurd, this timeless classic has captivated readers for generations․ The stories feature endearing characters and imaginative scenarios, making them perfect for children and parents alike․ The PDF version of this book is widely available for free download, allowing readers to access these cherished stories digitally․ It is often used in educational settings and home libraries, as its themes resonate with audiences of all ages․ The illustrations and heartfelt narratives make it a popular choice for bedtime reading and storytelling sessions․ This collection is a must-have for anyone looking to share enduring tales of love and growth with their little ones․
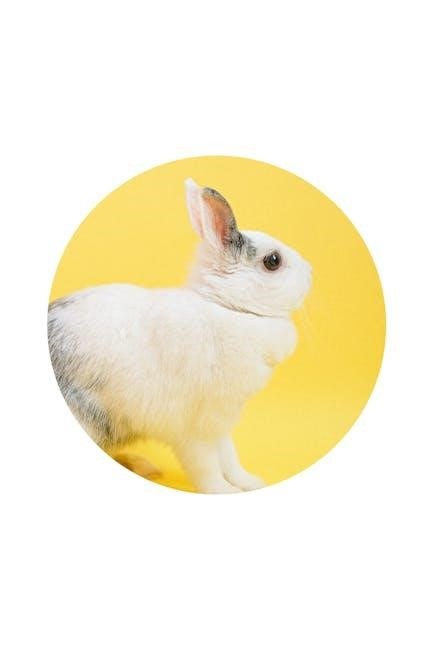
Bunny Coloring Pages and Activity Sheets

Bunny coloring pages and activity sheets are delightful resources for creative fun, especially during Easter and spring celebrations․ These free downloadable PDFs feature adorable bunny designs, from cute cartoon faces to intricate patterns․ Perfect for kids and adults alike, they offer a relaxing way to unwind and express creativity․ Many sheets include accessories like eggs, baskets, and flowers, adding festive flair․ The activity sheets often come with puzzles, mazes, and word games, making them educational and entertaining․ Parents and educators can use these to keep children engaged while improving motor skills and focus․ The variety of styles ensures there’s something for everyone, whether you prefer simple outlines or detailed scenes․ These bunny-themed PDFs are a great way to celebrate the season or enjoy a fun, crafty afternoon with family and friends․ Their accessibility and versatility make them a popular choice for both personal and classroom use․
Bunny PDFs have proven to be a versatile and engaging resource for various purposes, from creative Easter crafts to exploring literary works like Mona Awad’s Bunny․ These downloadable files offer a wide range of activities, including coloring pages, templates, and educational content, catering to both children and adults․ The availability of free PDFs makes them accessible to everyone, fostering creativity and learning․ Whether for DIY projects, classroom activities, or personal enjoyment, Bunny PDFs provide endless opportunities for fun and growth․ Their popularity is evident in their diverse designs and themes, ensuring there’s something for every interest․ As a convenient and imaginative tool, Bunny PDFs continue to delight users, making them a valuable resource for celebrating holidays, exploring literature, and engaging in creative pursuits․