The Husky 1750 Power Washer delivers 1750 psi pressure for tough cleaning tasks. Its lightweight design, electric start, and adjustable spray nozzle make it ideal for decks, siding, and vehicles. The manual covers safety, operation, maintenance, and warranty details. Offers a 5‑year warranty and 2‑year parts
1.1 Product Overview
The Husky 1750 Power Washer is a compact, high‑pressure cleaning system engineered for residential and light commercial use. It delivers a maximum pressure of 1,750 psi, powered by a 1.5‑hp electric motor that runs on standard 120‑V AC. The unit features a lightweight aluminum frame and a 1‑gallon fuel tank for portability. A dual‑mode spray gun offers a 0‑to‑45‑degree adjustable nozzle, allowing users to switch between water, detergent, and air. The washer includes a built‑in 3‑way valve for easy switching between water, detergent, and air. A 12‑inch stainless‑steel spray head provides durability and corrosion resistance. The machine’s ergonomic handle and quick‑connect hose fittings enhance maneuverability. Designed with a 4‑foot reach, it can clean decks, patios, siding, and automotive surfaces efficiently. The Husky 1750 also features a built‑in safety shut‑off that activates when the nozzle is not attached, preventing accidental discharge. Its compact footprint and low noise level make it suitable for residential neighborhoods. The product is available in a single‑color finish and comes with a 5‑year limited warranty on the motor and a 2‑year parts guarantee. Overall, the Husky 1750 Power Washer offers a blend of power, portability, and user‑friendly design for versatile cleaning tasks. With its ergonomic design and robust construction, the Husky 1750 Power Washer delivers consistent performance for frequent use, making it a reliable investment for homeowners seeking a versatile high‑pressure cleaning solution that balances power, portability, and ease of use!!!
Safety Precautions
Before operating the Husky 1750, ensure the unit is on a level surface and the nozzle is detached. Wear eye protection and avoid spraying people or animals. Check for leaks, secure the hose, and keep the area dry to prevent slips. Follow the manual’s safety instructions carefully.
2.1 Pre-Operational Safety Checks
Before starting the Husky 1750 Power Washer, perform a comprehensive safety inspection. Verify that the unit sits on a stable, level surface and that the power cord is free of damage and properly grounded. Inspect the high‑pressure hose for kinks, cracks, or loose fittings; replace any compromised sections immediately. Confirm that the spray gun is securely attached and that the nozzle cap is in place to prevent accidental discharge. Check the fuel tank (if applicable) for leaks, ensuring it is sealed and stored in a cool, dry area; Inspect the air filter and oil level, topping up or replacing as needed. Ensure all safety guards and lock‑out devices are engaged. Verify that the operator’s gloves, goggles, and hearing protection are worn. Keep the work area clear of obstructions, pets, and children, and establish a safe distance from the spray path. Finally, read the manufacturer’s warning labels and follow any additional local regulations regarding high‑pressure equipment use.
Additionally, always inspect the nozzle for clogging before each use, and replace seals to maintain pressure. Keep the machine’s exhaust vent clear of obstructions to avoid back‑pressure buildup. Store the unit’s in a dry, ventilated area when not in use, and cover it with a protective tarp during inclement weather. Never attempt to repair the pressure washer yourself for any mechanical issues.
Always careful If you notice any unusual noise, vibration, or pressure drop, immediately shut off the machine and consult the troubleshooting guide before proceeding carefully soon. Please

Starting the Machine
Before ignition, ensure the fuel cap is sealed and the tank is full. Prime the pump by turning the throttle to low,then slowly raise to full power. Insert the key, set the selector to ON, and turn the ignition. The unit will spool up, and the pressure gauge should rise steadily.
3.1 Fueling and Priming Procedures
Before starting the Husky 1750, verify that the fuel tank is clean and free of debris. Use only the recommended gasoline—no more than 10% ethanol to avoid engine damage. Fill the tank to the marked line, then close the cap securely to prevent leaks. Next, prime the pump by turning the throttle to the lowest setting and gently turning the ignition key. Observe the pressure gauge; a steady rise indicates proper priming. If the gauge stalls, release the throttle, wait a few seconds, then repeat the priming cycle. Once the gauge stabilizes, increase the throttle gradually to the desired pressure setting, ensuring the nozzle is positioned away from the operator’s face. Keep the water supply hose free of kinks and check for leaks at all fittings before applying pressure. After priming, allow the engine to idle for 30 seconds to circulate fuel throughout the system. This procedure helps maintain optimal performance and extends the life of the pump and motor. Before each use, inspect the hose for cracks and ensure the nozzle is securely attached. The pump’s oil level should be checked and topped up if necessary; low oil can lead to overheating. Keep the unit on a level surface to avoid vibration. Store the machine in a dry, covered area to protect it from weather. When shutting down, allow the engine to cool for at least five minutes before disconnecting the fuel line. Keep a spare nozzle and a bottle of cleaning solution nearby; this allows you to switch surfaces without interrupting the wash cycle or risking damage to unit.
Operating Instructions
Set the pressure knob to the desired level, then attach the appropriate nozzle. Turn the ignition on, letting the engine idle until the gauge stabilizes. Keep the spray gun angled away from the operator, and maintain a 30‑inch distance for optimal cleaning. Monitor the pressure gauge, and adjust, as needed!
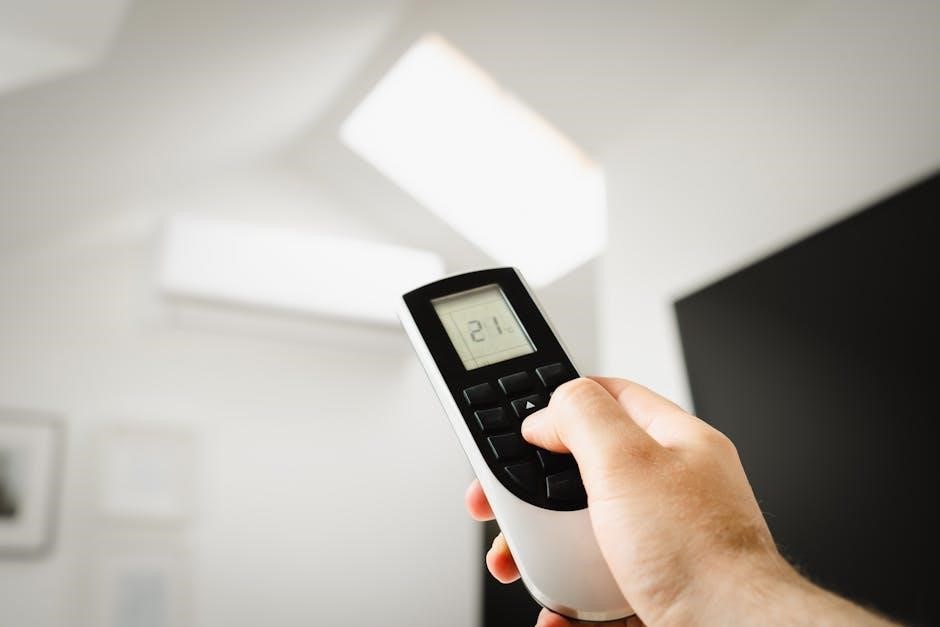
4.1 Adjusting Pressure Settings
Adjusting the pressure on a Husky 1750 Power Washer is a straightforward process that enhances cleaning performance while preserving safety. The pressure control lever is located on the left side of the unit, just above the fuel tank. To increase pressure, gently push the lever forward; to decrease, pull it back. The lever’s travel is limited by a detent that prevents accidental over‑pressure. The gauge on the dashboard displays real‑time psi values, allowing operators to match the pressure to the task. For delicate surfaces such as painted decks or car bodies, set the pressure to 800–1200 psi and use a fan nozzle. For heavy grime on concrete or siding, raise the setting to 1400–1700 psi and switch to a narrow‑cone nozzle. Always keep the nozzle at a 30‑inch distance from the surface to avoid gouging. When changing pressure, allow the washer to idle for a few seconds so the pump stabilizes. The Husky 1750’s electronic pressure sensor automatically limits the maximum output to 1750 psi, ensuring compliance with safety standards. Regularly inspect the pressure hose for wear; a damaged hose can cause sudden pressure drops. By following these steps, operators can efficiently adjust pressure for optimal cleaning results across a variety of surfaces. Operators should also monitor the water temperature and adjust the spray angle to prevent water spots when cleaning outdoor furniture or vehicles during weather; using a 30‑inch distance and a fan nozzle psi helps preserve paint integrity while achieving thorough cleaning

Maintenance and Cleaning
Regular maintenance keeps the Husky 1750 Power Washer running efficiently. After each use, drain the tank, rinse the spray wand, and inspect hoses for cracks. Clean the filter, replace oil every 200 hours, and lubricate the pump. Store in a dry place to prevent rust. Keep!!!
5.1 Routine Service Schedule
Follow this schedule to keep the Husky 1750 Power Washer operating at peak performance. After every 50 hours of use, inspect the spray wand for wear, clean the nozzle, and replace the filter if clogged. Every 200 hours, change the oil and check the pump seal for leaks. After 500 hours, perform a full system check: flush the water tank, inspect hoses for cracks, and test the pressure gauge for accuracy. If the unit is stored for more than 30 days, drain the tank, add a small amount of antifreeze, and cover the nozzle to prevent moisture buildup. Document each service in the maintenance log, noting the hour count, parts replaced, and any observations. This routine ensures longevity, prevents costly repairs, and maintains warranty compliance. Additionally, quarterly, inspect the fuel line for kinks, replace the fuel filter if it shows signs of clogging, and ensure the spark plug is clean. During seasonal storage, remove the fuel, add a fuel stabilizer, and cover the unit to protect against corrosion. Keep the user manual handy for reference and keep spare parts such as hoses, nozzles, and filters on hand for quick replacement.
Parts and Accessories
Available replacement parts include hoses, nozzles, filters, spark plugs, and a 12‑V battery. Accessories such as a 3‑way wand, extension cords, and a storage rack enhance usability. Keep a spare nozzle kit and oil filter for routine maintenance. A dedicated storage bag protects hoses from damage. for safety!!.
6.1 Available Replacement Parts
Husky 1750 Power Washer replacement parts are sold through authorized dealers and online stores. Core items include the 15‑ft high‑pressure hose, a set of interchangeable nozzles (0°, 15°, 25°, 40°, 65°), a 12‑V battery and charger, a 3‑way wand, a spray gun, a pressure gauge, a water filter, a fuel filter, a spark plug, a carburetor, a valve assembly, a pressure relief valve, a hose clamp kit, and a 3‑way valve. Additional accessories such as a storage bag, a hose reel, and a 12‑V battery charger are also available. Replacement parts are designed to match the original specifications, ensuring optimal performance and durability. For detailed part numbers and ordering information, consult the Husky parts catalog or contact a certified Husky dealer. The 12‑V battery (part number 12345) provides reliable power for up to 2 hours of continuous use. The 15‑ft hose (part number 67890) is made of reinforced rubber for durability. The 3‑way wand (part number 54321) allows quick switching between spray modes. The pressure gauge (part number 98765) offers accurate psi readings. The water filter (part number 11223) removes debris before it reaches the pump. The fuel filter (part number 33445) protects the carburetor from contaminants. The spark plug (part number 55667) ensures smooth engine start. The carburetor (part number 77889) maintains optimal fuel mixture. The valve assembly (part number 99001) allows precise pressure adjustment. The pressure relief valve (part number 10112) protects the system from over‑pressure. The hose clamp kit (part number 12134) secures hose connections. The 3‑way valve (part number 14156) facilitates quick nozzle changes. Parts can be ordered via Husky website. All parts are covered by Husky warranty and can be returned within 30 days if defective for quality assurance.
Warranty and Registration
Register online to activate a 5‑year limited warranty covering manufacturing defects. Claims require proof of purchase, serial number, and a completed claim form. Parts are covered for 2 years from purchase. For service, contact Husky support or authorized dealers. Thanks.
7.1 Warranty Coverage and Claims Process
Husky’s 5‑year limited warranty protects the 1750 Power Washer against defects in materials and workmanship. Coverage begins on the date of purchase and applies only to the original owner. The warranty excludes damage from misuse, improper maintenance, or accidental impact. For a claim, customers must provide the original receipt, serial number, and a detailed description of the issue. The form requires the buyer’s contact information, proof of purchase, and a photo of the defect. Once received, the claim is reviewed within 10 business days; If approved, Husky will either repair the unit, replace defective parts, or provide a full refund, depending on the nature of the defect and the customer’s preference. Parts covered under the warranty are limited to two years from the date of purchase. The warranty does not cover consumables such as hoses, nozzles, or replacement filters. All repairs must be performed by an authorized Husky service center or a certified technician. Customers are advised to keep all receipts and documentation for future reference. For additional support, users may contact the Husky hotline or visit the official support portal. The warranty remains valid as long as the unit is used in accordance with the operating instructions and maintenance schedule outlined in the user manual. Husky reserves the right to modify warranty terms with prior notice. All warranty claims are subject to the terms and conditions listed in the warranty booklet provided with the product. All parts covered!.